
Quick Summary
This blog explains how to create controller in Laravel and why controllers are essential for keeping code clean, organized, and scalable. It covers different controller types, handling requests and responses, setting up routes, and best practices like using middleware, validation, and resource controllers. Learn about structuring Laravel applications efficiently, improving maintainability, and keeping them flexible for future growth.
Table of Contents
If you are working with Laravel, you will often hear about controllers. They are a core component of any Laravel project. A controller helps you organize your code and keep things clean. Instead of writing all logic inside routes, you can move it into controllers. This makes your application easier to manage as it grows.
In this guide, we will go step by step through the process to create a controller in Laravel. We’ll give you the exact commands, structure, and best practices that professionals follow. So, let’s dive in!
What is Controller in Laravel?
In Laravel, a controller acts as the central system of your application’s request-response cycle. It receives incoming HTTP requests from users, analyzes their intent, and hands over tasks to other parts of your application. One of the major examples is fetching data from the database.
The controller then assembles the appropriate response. It could be a view (web page), JSON data (API), or a redirect to another part of your application. Thus, controllers direct the flow of your application by coordinating with models, views, and other components.
Types of Controllers in Laravel
Laravel provides various types of controllers, each designed to handle code in a simple and organized way. Let’s look at the most common ones you will use.
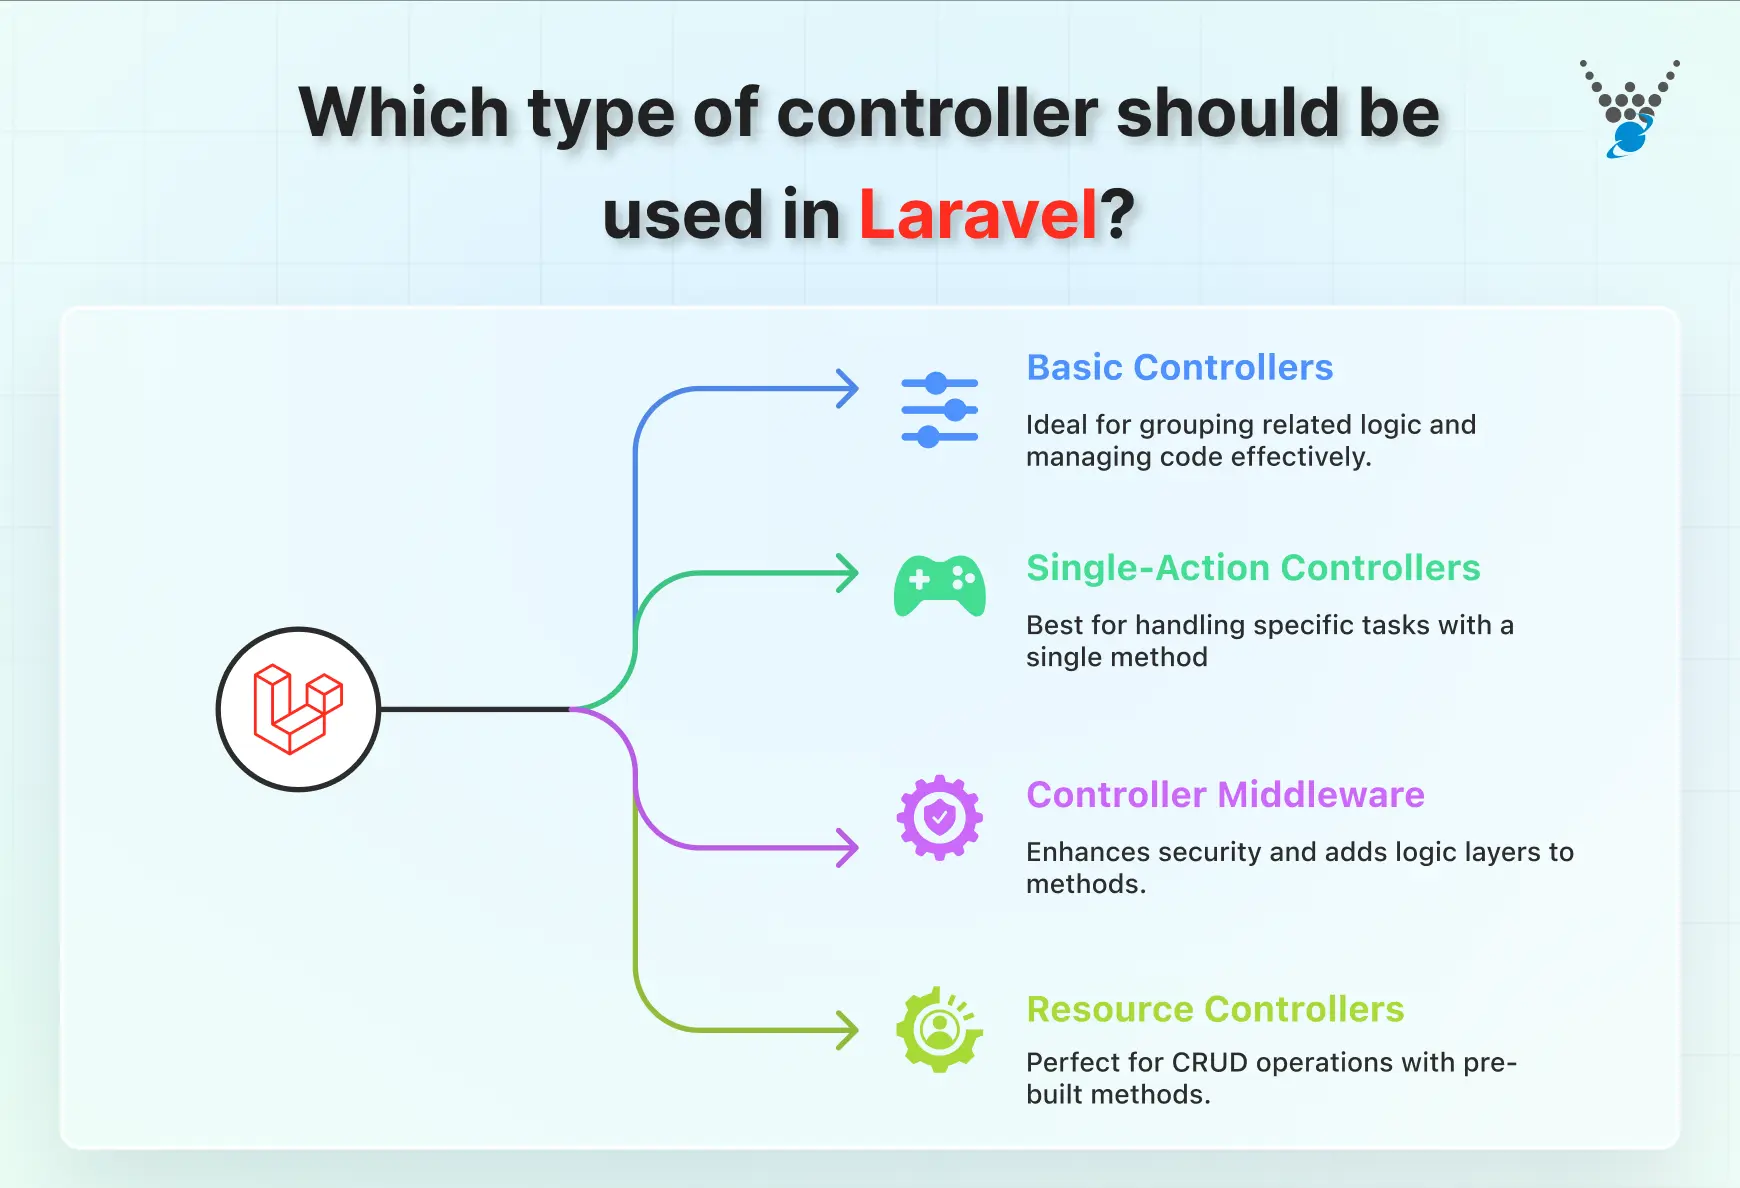
- Basic Controllers: This is the standard controller in Laravel. It allows you to group related logic inside one class. Instead of keeping all code in routes, you move it into functions inside the controller. This keeps your code neat and easier to manage.
- Single-Action Controllers: Sometimes you only need a controller to handle one specific task. In such cases, single-action controllers are a perfect fit. They use only one method, which makes them clean and focused.
- Controller Middleware: Middleware adds extra layers of logic around your controller methods. For example, you can use it to check if a user is logged in before they access a certain part of your app. This makes your application more secure and controlled.
- Resource Controllers: When you are building CRUD operations (Create, Read, Update, Delete), resource controllers in Laravel are the best choice. Laravel gives you a full set of methods out of the box. This saves time and keeps your code consistent.
How Does Laravel Controller Work?
- Receive Incoming Requests. The controller is the first point of contact for incoming HTTP requests. It identifies the specific route associated with the request. Then the controller extracts relevant data, such as parameters or form data.
- Process the Request. Based on the request type and extracted data, the controller determines the necessary actions. It may involve interacting with models to retrieve or manipulate data – often starting when you create a model in Laravel to define how data connects to your controller. This performs validation checks on user input or interactions with external services.
- Prepare the Response. Once the controller has processed the request, it constructs the appropriate response. This could involve passing data to a view template to generate an HTML response. It can also be used for formatting data as JSON for an API request or redirecting the user to a different part of the application.
Hence, the controllers act as the glue that binds various components of your Laravel application together. They ensure a smooth flow of information by receiving requests, processing them, and delivering tailored responses.
Why Use Controller in Laravel?
Controllers offer a multitude of advantages that streamline and enhance the development process in Laravel. Here’s a closer look at the key benefits they provide:
- Organization and Separation of Concerns. Controllers promote clean code by separating the logic for handling requests. It separates the logic from the presentation layer (views) and data access layer (models). This improves code maintainability and readability as each component has a focused responsibility.
- Reusability. Controllers allow you to group common request-handling logic into reusable methods. This prevents code duplication and simplifies development. It is especially beneficial for handling related operations on a particular resource (e.g., user management).
- Testability. By separating request handling logic in dedicated controller methods, you can write unit tests more effectively. These tests ensure that your controllers function as expected, promoting application stability and reliability.
- Improved Maintainability. Controllers make your application easier to maintain and understand. Developers can grasp the overall flow of the application by examining controller methods and their interactions with other components.
For complex applications or those requiring specialized expertise, consider partnering with Laravel development company. Their in-depth knowledge of Laravel’s complexities can help you use controllers to build robust, scalable, and maintainable web applications.
How to Create Controller in Laravel?
Creating controllers in Laravel is a straightforward process that includes defining classes and methods to handle incoming requests. Let’s dive into the steps involved:
Step 1: Create Controller in Laravel
The first step involves generating a controller class using Laravel’s Artisan CLI. Here’s how you can do it:
1. Open the Terminal: Navigate to your Laravel project’s root directory using your terminal or command prompt.
2. Execute the Artisan Command. Use the following command structure, replacing <ControllerName> with your desired controller name:
php artisan make:controller <ControllerName>
– Example: To create a controller named ProductController, type:
php artisan make:controller ProductController
This command generates a new controller class within the app/Http/Controllers directory. The class name will match the provided name with the addition of the Controller suffix (e.g., ProductController.php).
Step 2: Define Methods in Controller
Once you’ve created your controller class, it’s time to define methods that handle specific actions within your application. These methods will typically receive incoming requests, process them, and return appropriate responses.
1. Public Methods. Define methods within the controller class using public visibility. This ensures they can be accessed from outside the class.
2. Method Naming Conventions. Use descriptive names for your methods that reflect their purpose. For example, a method that displays a list of products might be named index().
3. Method Functionality. The specific functionality of your methods will vary depending on the application’s requirements. Common tasks include retrieving data from models, performing validation, and returning views or API responses.
public function index()
{
    // Fetch all products from the database
    $products = Product::all();
    // Return a view with the products data
    return view('products.index', compact('products'));
}
In this example, the index method retrieves all products from the database and then returns a view named products.index while passing the $products data to the view for rendering.
Step 3: Define Routes
Routes act as the bridge between incoming HTTP requests and your controller methods. They map specific URLs (e.g., /products) to the corresponding controller methods that handle those requests.
1. Route Definition File. Routes are typically defined within the routes/web.php file. This file contains various route helper methods provided by Laravel.
2. Route Structure. Each route definition typically follows a specific structure:
Route::<HTTP_METHOD>('/uri', '<ControllerClass>@<methodName>');
- <HTTP_METHOD>. This specifies the HTTP method the route handles (GET, POST, PUT, etc.).
- /uri. This defines the URI (URL path) that triggers the route.
- <ControllerClass>. This represents the name of the controller class containing the method to handle the request.
- <methodName>. This indicates the specific method within the controller class that should be executed.
Route::get('/products', 'ProductController@index');
This route defines that any GET request to the /products URI will be handled by the index method within the ProductController class. By defining routes for your controllers, you establish the communication channels between incoming requests and the relevant methods within your application.
Step 4: Return a Response
Once your controller method has processed the request, it’s time to send a response back to the user’s browser or API client. Laravel provides various methods for returning responses. Using any of them you can tailor the output to the specific request type. Here are some common ways to return responses from a controller method:
1. Return Views. For web applications, you can use Laravel Blade templating engine to generate HTML responses. Use the return view(‘viewName’, $data) method to pass data to the view for rendering.
2. Return JSON. For API requests, you can return JSON-formatted data using the return response()->json($data) method. This allows you to send structured data back to the client application.
3. Redirects. If you need to redirect the user to a different URL after processing the request, use the return redirect()->route(‘routeName’) method. This is useful for actions like form submissions or authentication flows.
4. Other Response Types. Laravel supports returning various other response types, such as file downloads, error messages, or custom HTTP status codes. Refer to the Laravel documentation for a comprehensive list of available response methods.
public function show($id)
{
    // Find a product by ID
    $product = Product::find($id);
    // Check if product exists
    if (!$product) {
        return abort(404); // Return a 404 Not Found response
    }
    // Return a view with the product data
    return view('products.show', compact('product'));
}
In this example, the show method retrieves a product based on its ID. If the product doesn’t exist, it returns a 404 error response. Otherwise, it returns a view named products.show while passing the $product data to the view.
With an in-depth understanding of how to return appropriate responses from your controller methods, you ensure your application communicates with users and clients.
What are the Additional Uses of Controller in Laravel?
Beyond handling basic request-response interactions, Laravel controllers offer a wide range of functionalities that improve your application’s structure and capabilities. Here’s a glance into some additional uses of controllers:
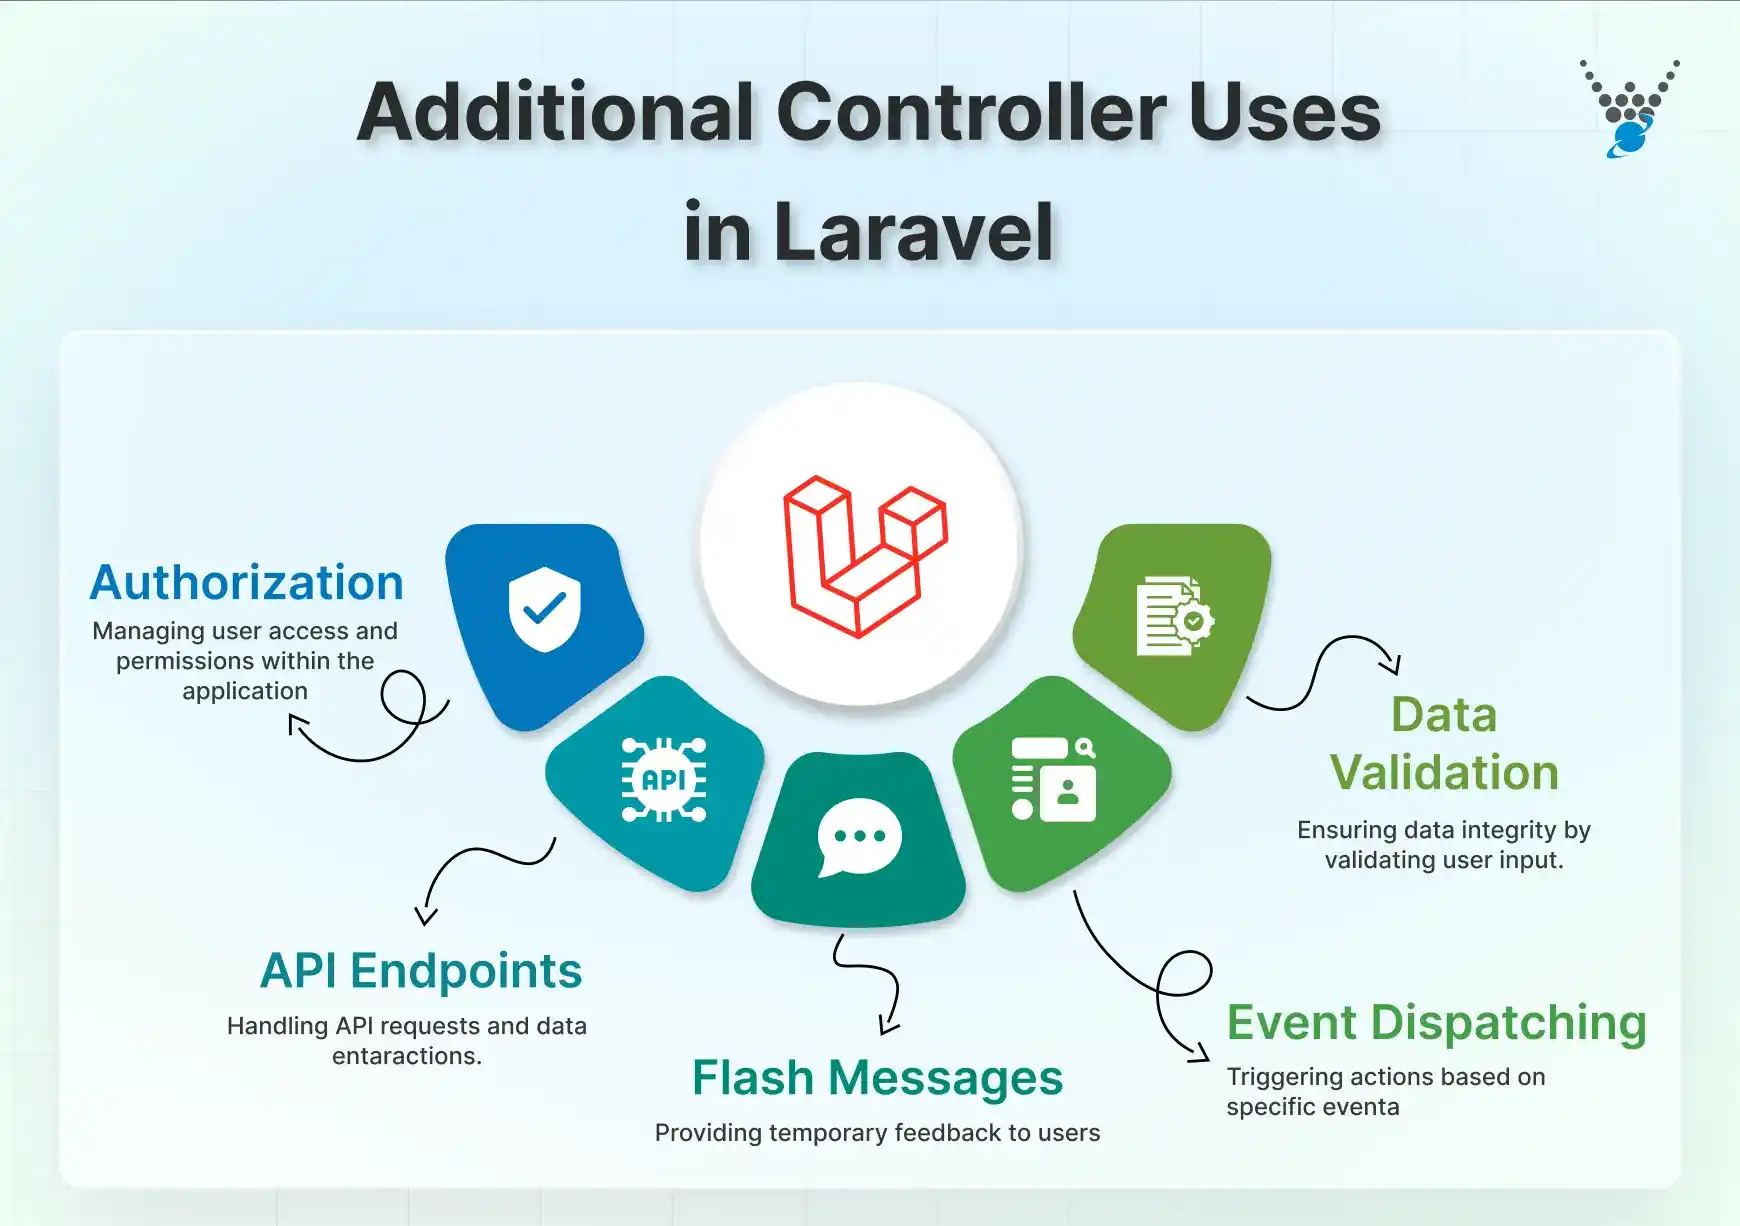
1. Authorization and Authentication
Controllers can be the central hub for managing user access within your application. You can implement authorization checks within controller methods to restrict access to specific resources based on user roles or permissions. Additionally, authentication logic for handling logins, registrations, and session management can be integrated into controllers.
2. Data Validation
Controllers can play an important role in ensuring data integrity by performing validation on user input. You can use Laravel data validation features (or custom ones) within your controller methods to validate data submitted through forms or API requests. This helps prevent invalid or malicious data from entering your application.
3. Event Dispatching
Laravel’s event system allows you to decouple tasks and trigger actions based on specific events within your application. Controllers can dispatch events in response to user actions or system activities. This promotes a more modular and maintainable codebase.
4. Flash Messages
Controllers can be used to manage flash messages, which are temporary messages displayed to the user after a specific action. These messages can be used to provide feedback on successful operations or inform users about errors.
5. API Endpoints
For building RESTful APIs, controllers act as the entry point for handling API requests. You can define controller methods that handle various HTTP verbs (GET, POST, PUT, DELETE). Each of them can be used to interact with your application’s data and resources in a structured format suitable for consumption by API clients.
With these additional functionalities, you can create robust and scalable Laravel applications that effectively manage user interactions, data integrity, and various application-wide tasks.
Proven Best Practices to Create Controllers in Laravel Efficiently
When working with controllers in Laravel, following best practices makes your code more reliable and easier to manage. Here are some tried-and-true methods every developer should follow:
- Use Artisan Command: Always create controllers using Laravel’s Artisan command (This keeps your code consistent and saves you from manual setup.):
php artisan make:controller
- Follow Naming Conventions: Use clear and descriptive method names. For example, index() for listing items, show() for displaying one record, and store() for saving data. Good names make your code easier to read.
- Organize Routes Properly: Map your routes to controller actions in a clean way. This makes your app flow easier to follow and reduces confusion later.
- Return Correct Responses: Controllers should return the right type of response. Use views for web pages, JSON for APIs, redirects after actions, and error messages when needed.
- Validate Inputs: Always validate user input before saving or using it. Laravel provides simple validation rules to keep your data clean and your app secure.
- Use Middleware: Utilize middleware for tasks such as authentication or user role verification. This keeps your controller focused only on its main job.
- Keep Controllers Lean: Avoid writing all business logic inside controllers. Instead, move heavy logic into services or models. This makes your controllers light and easy to maintain.
- Use Resource Controllers: For CRUD operations, use Laravel’s resource controllers. They come with a standard structure, saving you time and keeping your code consistent.
In short, follow Laravel’s best practices like using Artisan commands, proper naming, clean routes, and resource controllers to keep your code consistent. Keep controllers lean, validate inputs, and use middleware for security and better app structure.
Let’s Conclude
Controllers are more than just a part of Laravel. They are the central hub that keeps your application organized and efficient. By understanding the different types of controllers, how they work, and applying best practices, you can write code that is clean, secure, and easy to maintain.
Using Artisan commands, following naming conventions, validating inputs, leveraging middleware, and keeping controllers lean are small steps that make a big difference. When applied consistently, these practices help you build Laravel applications that are not only functional but also scalable and professional.
With the right approach, your applications will run smoothly, and your code will be easier to manage and expand over time. If you’re keen to take your Laravel project to the next level, then hire expert Laravel developers today!
FAQs About How to Create Controller in Laravel
How does a controller simplify application development in Laravel?
Controllers streamline development by separating concerns. They handle request logic, keeping your views clean and models focused on data access. This modularity promotes code reusability, easier testing, and improved maintainability for complex applications.
What are resource controllers and when should they be used in Laravel?
Resource controllers are pre-built controllers that handle common Laravel CRUD (Create, Read, Update, Delete) operations on a resource (e.g., users, products). Use them when you need basic functionality for managing a specific resource type. They save time by providing methods for typical actions like listing, creating, editing, and deleting resources.
Can controllers facilitate file uploads and downloads in Laravel?
Absolutely! Laravel provides helper methods and functionalities within controllers to handle file uploads and downloads. You can use features like request validation to ensure uploaded files meet size or type requirements and store them securely within your application’s storage system. Similarly, controllers can initiate file downloads and deliver them to the user’s browsers.


