Table of Contents
When designing a website, you want to ensure every image is as crisp and clear as possible, even when the visitor tries to enlarge it for a better view. That’s why the web design services use what is called SVG.
Designers use SVG to unlock the potential of versatile, scalable graphics for better website design. Often, one of the main goals of these professionals is to ensure the images can be scaled to any size without losing quality, and SVG is quite advantageous for that.
In this guide, I’ll try to shed more light on this web design tech and explain its benefits and how you can use SVG in web development. Let’s begin with what SVG is.
What is SVG?
Developed by the World Wide Web Consortium (W3C), SVG, or Scalable Vector Graphics, is a file format used on the web for two-dimensional vector graphics. It ensures crisp and sharp images that stay clear when scaled. SVG files are written in XML and can be animated and styled with CSS. This makes it ideal for creating interactive and visually appealing graphics for websites.
Web developers consider SVG to be unique because it supports Interactivity and Animation. It doesn’t lose quality when scaled because it is made up of mathematical equations. JavaScript and CSS animations can be used to bring SVG illustrations to life with smooth transitions and movements.
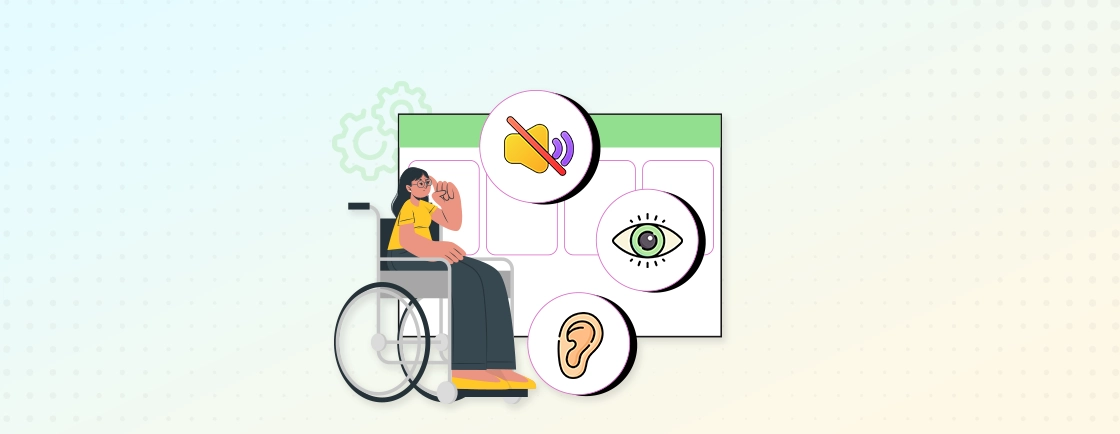
In addition, SVG is also accessible. It has features like alternative text descriptions and keyboard navigation, making it great for users with disabilities. All in all, it ensures consistent integration across platforms and browsers and seamless integration into web design.
What are the Benefits of Using SVG in Web Development?
With SVG, you can effortlessly scale graphics without losing quality, ensure web accessibility for all users, and unlock endless creative animation options to enhance user experiences. Here are a few other benefits for which you should use SVG in web development.
Scalability
As you have already seen and as it’s evident from the name, scalable vector graphics are outstanding for scalability. To that end, they offer benefits like:
- Scalability: SVG images resize without quality loss, perfect for responsive design.
- Resolution Independence: Graphics stay sharp on any display.
- Small File Size: SVG files are small for faster page loading.
- Easy Animation: Using CSS or JavaScript makes Animation a breeze.
- Accessibility: Include features like alt text for better usability.
But remember to optimize SVG files by removing unnecessary code and grouping elements together for the best performance.
Accessibility
SVG in web development enables scalable graphics that can be resized without sacrificing quality. Also, CSS can be used to stylize the visuals, making them look good and accessible. Alt text in SVG images assists screen readers in comprehending the content and providing descriptions for people with visual impairment.
Keyboard navigation and focus management can also be implemented in SVG for an effortless user experience. Plus, a proper code structure and semantic markup can improve the accessibility of complex data visualizations.
Additionally, it’s essential to consider the contrast of colors when using SVG. This ensures everyone can differentiate between the elements on a page. Furthermore, including text alternatives for non-text content within the SVG images enhances accessibility.
Here are a few things the web development services do to make the SVG content more accessible:
- Use descriptive labels and tooltips for interactive elements in SVG graphics.
- Make sure tab focus is managed within the SVG images for easy keyboard navigation.
- Implement ARIA roles and attributes in SVG elements to make them easier to use with assistive technologies like screen readers.
Adhering to these suggestions will not only enhance the accessibility of your website but also provide a great digital experience to all users, no matter their abilities or disabilities. That will help you stay forth with one of the key web design trends, i.e., inclusive design.
Animation Possibilities
The potential for Animation with SVG is endless. You can manipulate individual elements to create smooth transitions, interactive effects, and complex animations. By combining various CSS properties, like transforms and transitions, with JavaScript, developers can make attention-grabbing visuals.
| Animation | Description |
|---|---|
| Motion Path | Animating along a certain path in SVG is supported. |
| Morphing | Define stages of animation and transition between them |
| Keyframe | Define stages of animation and transition between them. |
| Filters | Apply visual effects like blurring, color manipulation, etc. |
These are only a few of the many possibilities with SVG animations. Creativity is key when mixing these techniques to bring static visuals to life.
Pro Tip: When using SVG animations, ensure good performance by controlling how many elements are animated at once.
If you want to gain an advantage on your website through these benefits of using SVG, make sure to implement it well. I have compiled the implementation process quite effectively here. But first, to get started with SVG, you need to understand its syntax and know how to create SVG elements.
Basics of SVG
When trying to use scalable vector graphics for an outstanding design on the website, you need to first understand its syntax and know how to create the SVG elements. The former will help you grasp the structure of this design tech, and the latter will help unleash your creativity to the max.
Syntax of SVG
The syntax of SVG has developed since its origins in 1999, and that has made this XML-based format quite flexible and scalable for vector graphics on the web.
Let’s first take a look at the different components of SVG.
- Shapes: SVG shapes are geometric objects that can be filled, stroked, and transformed. The most common SVG shapes are circles, rectangles, ellipses, lines, polygons, and polylines.
- Paths: SVG paths are defined by a sequence of points and curves. Paths can be used to create any shape imaginable, including complex illustrations and logos.
- Text: SVG text can be formatted using a variety of attributes, including font, size, color, and alignment. SVG also supports text effects such as gradients, shadows, and outlines.
- Fill and stroke: Fill and stroke attributes control the appearance of SVG shapes and text. Fill attributes determine the color or pattern of the interior of a shape, while stroke attributes determine the color, width, and style of the outline of a shape.
- Gradients and patterns: Gradients and patterns can be used to create complex and visually appealing fills and strokes for SVG shapes and text.
- Filters: SVG filters can be used to modify the appearance of SVG shapes and text in a variety of ways, such as blurring, sharpening, and distorting.
- Transformations: SVG transformations can be used to scale, rotate, translate, and skew SVG shapes and text.
Moreover, SVG also includes a number of other features, including Animation for creating dynamic and interactive graphics and Interactivity for creating graphics that respond to user input. There’s also Linking that allows you to create links between different parts of an SVG document or to external resources.
SVG documents are made up of elements, which are defined by start and end tags. The start tag for an element contains the element name and any attributes that are applied to the element. The end tag for an element contains the element name and a forward slash (/).
Here’s an example of an SVG code.
<circle cx="100" cy="100" r="50" fill="red" />
The circle element has three attributes: cx, cy, and r. The cx and cy attributes specify the x and y coordinates of the center of the circle, respectively. The r attribute specifies the radius of the circle. The fill attribute specifies the color of the circle.
SVG elements can be nested within other elements to create complex graphics. For example, the following SVG code defines a group of three circles:
<g>
  <circle cx="100" cy="100" r="50" fill="red" />
  <circle cx="150" cy="150" r="50" fill="green" />
  <circle cx="200" cy="200" r="50" fill="blue" />
</g>
The ‘g’ element is a grouping element that is used to group together other SVG elements. In this example, the ‘g’ element contains three circle elements.
Creating SVG Elements
If you want to craft SVG elements for your website’s design, you must understand the special tags. Here’s how a web design agency will create SVG elements for your website. There are basically two ways forward.
Using the SVG namespace: To create an SVG element using the SVG namespace, you use the createElementNS() method. This method takes two arguments: the namespace URI and the element name. The namespace URI for SVG is http://www.w3.org/2000/svg.
For example, the following code creates an SVG circle element:
const circle = document.createElementNS('http://www.w3.org/2000/svg', 'circle');
Using the ‘createElement()’ method: To create an SVG element using the ‘createElement()’ method, you simply need to specify the element name. However, you will also need to set the ‘namespaceURI’ property of the element to http://www.w3.org/2000/svg.
For example, the following code creates an SVG circle element:
const circle = document.createElement('circle');
circle.namespaceURI = 'http://www.w3.org/2000/svg';
Once you have created an SVG element, you can add it to the DOM using the ‘appendChild()’ method. For example, the following code adds the circle element to the document body:
document.body.appendChild(circle);
You can also use the setAttribute() method to set the attributes of an SVG element. For example, the following code sets the ‘cx’, ‘cy’, and ‘r’ attributes of the circle element:
circle.setAttribute('cx', 100);
circle.setAttribute('cy', 100);
circle.setAttribute('r', 50);
Once the SVG element has been added to the DOM and its attributes have been set, it will be rendered on the page.
Here is an example of a complete SVG document:
<svg xmlns="http://www.w3.org/2000/svg">
  <circle cx="100" cy="100" r="50" fill="red" />
</svg>
This SVG document will render a red circle on the page.
These steps will help you create SVG elements for your website for an outstanding design. But there is more to using SVG in web design, and we’ll cover it in the next section.
How to Add SVG to HTML?
When trying to add SVG to HTML, there are two methodologies to consider: Inline SVG and External SVG.
Inline SVG
Inline SVG is added directly to the HTML document. That is done using the <svg> element. To add inline SVG, you simply need to add the <svg> element to your HTML document. The <svg> element can contain any valid SVG code.
For example, the following HTML code adds an inline SVG circle:
<svg width="100" height="100">
  <circle cx="50" cy="50" r="40" fill="red" />
</svg>
External SVG
External SVG is referenced from the HTML document using the <img> element. To add external SVG, you use the <img> element. The <img> element’s src attribute must be set to the URL of the SVG file.
For example, the following HTML code adds an external SVG circle:
<img src="circle.svg" width="100" height="100" />
The ‘width’ and ‘height’ attributes are optional, but they are recommended because they will ensure that the SVG image is displayed correctly.
Whether you use inline SVG or external SVG depends on your specific needs. If you have a simple SVG image that you want to add to your HTML document, then you can use inline SVG. However, if you have a complex SVG image or if you need to use the same SVG image in multiple HTML documents, then you should use external SVG.
We provide website development services that ensure smooth integration of SVG graphics, making your website visually engaging and fully responsive across devices.
How to Style the SVG Graphics?
After you have added SVG to HTML, it’s time to style the SVG graphics, and there are two ways to go: CSS styling and applying filters and effects.
CSS Styling
To style an SVG graphic using CSS, you simply need to add the CSS styles to the ‘<svg>’ element or to any of its child elements.
For example, the following CSS code will style the SVG circle element to have a blue fill and a green stroke:
svg circle {
  fill: blue;
  stroke: green;
}
You can also use CSS to style SVG graphics using classes and IDs. For example, the following CSS code will style all SVG circle elements with the class ‘my-circle’ to have a red fill and a black stroke:
.my-circle {
  fill: red;
  stroke: black;
}
Applying Filters and Effects
SVG filters and effects can be used to modify the appearance of SVG graphics in a variety of ways. For example, you can use filters and effects to blur, sharpen, distort, and colorize SVG graphics.
To apply a filter or effect to an SVG graphic, you need to use the <filter> element. The <filter> element contains the definition of the filter or effect.
For example, the following SVG code applies a blur filter to the SVG circle element:
<svg>
  <filter id="blur">
    <feGaussianBlur stdDeviation= "5"/>
  </filter>
  <circle cx="100" cy="100" r="50" fill="red" filter="url(#blur)" />
</svg>
You can also use SVG filters and effects to create more complex effects. For example, the following SVG code creates a drop shadow effect for the SVG circle element:
<svg>
  <filter id="drop-shadow">
    <feOffset dx="5" dy="5" />
    <feGaussianBlur stdDeviation= "5"/>
    <feMerge>
      <feMergeNode in= "SourceGraphic"/>
      <feMergeNode in= "SourceGraphic"/>
    </feMerge>
  </filter>
  <circle cx="100" cy="100" r="50" fill="red" filter="url(#drop-shadow)" />
</svg>
Also, make sure to choose filters that fit the design concept. Consistent use of filters creates harmony. And complex filters can lead to stunning results. But be wary of performance issues on weaker devices. So, test and optimize your designs regularly.
Styling SVG graphics is a powerful way to create visually appealing and engaging designs. By using CSS and SVG filters and effects, you can create a wide range of effects for your SVG graphics.
Our team also offers WordPress website development services to implement advanced SVG animations and styling seamlessly on WordPress platforms.
Animating SVG Graphics
One of the most significant benefits of SVG is regarding the animations. SVG animations are vector-based, which means that they can be scaled to any size without losing quality. This makes them ideal for use on the web, where images need to look sharp on all devices and screen sizes.
You can use CSS animations and JavaScript animations to create dynamic and eye-catching visuals.
Using CSS Animations
CSS animations allow you to animate SVG graphics by changing their properties over time. To animate an SVG graphic using CSS, you need to use the ‘@keyframes’ rule. The ‘@keyframes’ rule defines the steps of the Animation.
For example, the following CSS code will animate the SVG circle element to move from the top of the screen to the bottom of the screen over a period of two seconds:
 @keyframes move-down {
  0% {
    transform: translateY(0);
  }
  100% {
    transform: translateY(100px);
  }
}
svg circle {
  animation: move-down 2s;
}
You can also use CSS animations to create more complex animations, such as rotating, scaling, and fading SVG graphics.
Using JavaScript animations
To animate an SVG graphic using JavaScript, you need to use the document.querySelector() method to select the SVG element that you want to animate. Once you have selected the SVG element, you can use the setAttribute() method to change its properties.
For example, the following JavaScript code will animate the SVG circle element to move from the top of the screen to the bottom of the screen over a period of two seconds:
const circle = document.querySelector('circle');
circle.setAttribute('cx', 100);
circle.setAttribute('cy', 0);
setInterval(() => {
  const cy = circle.getAttribute('cy');
  circle.setAttribute('cy', cy + 1);
}, 10);
You can also use JavaScript animations to create more complex animations, such as rotating, scaling, and fading SVG graphics.
Whether you use CSS animations or JavaScript animations to animate SVG graphics depends on your specific needs. If you are creating a simple animation, then you can use CSS animations. However, if you are creating a complex animation or if you need to interact with the Animation, JavaScript animations will be better.
If you have doubts about executing these SVG implementations for your website, consider contacting the best web development company. Their experts will help you out.
Best Optimization Techniques for SVG
When trying to optimize the SVG for your website’s design, you have to consider two techniques, i.e., minimizing file size and cleaning up SVG code. These strategies improve the performance and efficiency of your SVG images, ensuring faster load times and a better user experience.
Minimize File Size
Reducing SVG file size is key for optimizing performance by boosting the load speed and giving a great experience to users. Here’s a 3-step guide for the same:
Step 1: Erase unneeded elements. Take a look at the SVG file and identify any elements not essential for design or functionality. These could be hidden layers, excessive shapes, or unused attributes. Taking them out will shrink the file size.
Step 2: Make complex shapes simpler. Many anchor points and curves make the file size bigger. Make the shapes less complicated by minimizing anchor points without changing the design. Use vector editing tools like Adobe Illustrator or Inkscape.
Step 3: Optimize code structure. How the code is organized affects file size. Remove redundant attributes, group similar elements, and use CSS stylesheets when possible. Try compressing the SVG code with online tools or plugins.
Every byte is vital for file size optimization. Following these steps will decrease SVG files and improve loading times. For more improvement, use inline SVG code in HTML documents or external CSS stylesheets for styling. These methods will further reduce size and make the performance even better.
Clean Up SVG Code
Every top-tier web design company considers it quite significant for boosting the performance and readability of your website. That makes it simpler to manage and upgrade. Here’s how:
- Discard needless elements: Start by dumping any unused or redundant elements from your SVG code. It will reduce file size and enhance rendering velocity.
- Minimize attribute usage: Check and remove attributes that are not essential in your SVG code. That will make your code more concise and effective.
- Optimize paths: Simplify complex paths with fewer commands and fewer control points. This will make the code more compact and comprehensible.
- Group-related elements: Utilize the tag to group elements in your SVG code. This makes it easy to apply transformations or styles to multiple elements at once.
- Organize your code: Style your SVG code with indentations and line breaks to improve readability. This helps other developers understand and modify your code faster.
Utilize an SVG optimization tool or plugin to automate the cleaning process further. These tools delete hidden metadata, compress the file size, and optimize the code for better performance.
Try using CSS styles instead of inline styles whenever possible. That way, presentation, and structure are separated, which simplifies maintenance and offers more styling flexibility. Also, convert raster images into vector format when adding them to an SVG file. Vector images scale with no loss of quality, much better than raster formats like JPEG or PNG.
With these tips, you’ll have cleaner, more efficient, and easier-to-manage SVG code, optimizing user experience and performance on the web.
How to Test Cross-Browser Compatibility of SVG in Web Development?
Testing the cross-browser compatibility of SVG is an important step in developing a web application that relies on SVG graphics. By testing the compatibility of your SVG graphics across a variety of browsers and devices, you can ensure that your application will look and function as intended for all of your users.
Test SVG Support
There are a number of ways to test SVG support. One way is to use a browser testing service such as BrowserStack or CrossBrowserTesting. These services allow you to test your SVG graphics in a variety of browsers and devices.
Another way to test SVG support is to use a tool such as Modernizr. Modernizr is a JavaScript library that detects the capabilities of the user’s browser. You can use Modernizr to detect whether the user’s browser supports SVG.
Finally, you can also test SVG support by manually testing your SVG graphics in a variety of browsers. This is the most time-consuming method, but it is also the most effective way to find compatibility issues.
By testing SVG support and solving any special issues that come up, web development experts make sure their websites give a steady experience to users, no matter what browser they use.
Provide Fallback Options
Let’s say someone isn’t able to access the SVG-aided designs of your website on their preferred browser. Then, you need to provide fallback options to guarantee websites act properly on all browsers. That way, everyone can access their content and features, no matter what browser they use.
One way to give fallback options is through feature detection. Websites check if a certain browser can handle a particular feature or tech. If not, the developer can provide a suitable alternative.
Graceful degradation is another technique. Designing websites this way means essential features work on older, less capable browsers. Even if some advanced features don’t work, users can still use the website.
Progressive enhancement is a third approach. Websites are designed to be optimal on modern browsers yet still offer basic functionality for older ones. That means new browsers get an enhanced experience, and older browsers still get to access the important stuff.
Fallback options make sure everyone has equal access, no matter what browser. Without them, users may come across problems like broken layouts or non-functional features. Cross-browser compatibility is crucial to a great user experience. It’s important to provide fallback options as technology advances.
You can also hire the highly-skilled QA testers who’ll test your SVG elements to ensure your website has a captivating design and outstanding user experience.
Conclusion
SVG is an amazing tool for web development. It creates stunning visuals and animations, plus it’s scalable and responsive. You can modify shapes, gradients, patterns, and filters with SVG to make unique designs. Plus, with JavaScript and CSS, you can add Interactivity to SVG elements.
Here’s how you use SVG in web development:
- Understand the SVG syntax
- Create SVG elements
- Add SVG to HTML
- Style SVG Graphics
- Apply filters and effects
- Animate SVG graphics
- Minimize file size
- Clean up SVG code
- Test cross-browser compatibility
If you would like more information on SVG or need help implementing it on your website, contact our experts today!
FAQs on How to Use SVG in Web Development
What is SVG, and why is it used in web development?
SVG stands for Scalable Vector Graphics, which is a format used to create high-quality images and animations. It is often used in web development because SVG images can be scaled without losing quality, making them ideal for responsive designs.
Can I add Interactivity to SVG images?
Yes, you can add Interactivity to SVG images by using JavaScript. SVG supports event handlers like any other HTML element. You can attach functions to different events, such as clicks or mouseovers, to create interactive experiences with SVG graphics.
How can I optimize SVG for better performance?
To optimize SVG for better performance, you can follow a few best practices. These include using vector tools to create simpler shapes, removing unnecessary elements and attributes, compressing the SVG file, and utilizing CSS to style the graphics instead of inline styles.
Are there any tools available to create or edit SVG images?
Yes, there are several tools available for creating or editing SVG images. Some popular options include Adobe Illustrator, Inkscape, Sketch, and Figma. These tools provide a user-friendly environment for designing and manipulating SVG graphics.