Quick Summary
Discover how Laravel and Inertia.js work together to build modern, fast, and fluid web apps. This step-by-step guide walks you through installation, page rendering, and common pitfalls like class “Inertia\Inertia” not found. Learn performance tips, global data sharing, and debugging strategies, whether using Vue or React. With this guide, you’ll confidently craft single-page experiences without complex APIs or heavy front-end setups.
Table of Contents
Integrating Laravel with Inertia.js allows you to build modern, dynamic single-page applications (SPAs) while leveraging Laravel’s robust backend. Inertia.js simplifies the process by enabling smooth client-side navigation without the need for a separate API, making development faster and more efficient.
In this blog, we’ll walk you through the process of setting up Laravel with Inertia.js. You’ll learn how to integrate Vue.js, set up Vite.js, and run the application seamlessly. Additionally, we’ll dive into tips and tricks followed by the experts to optimize your development workflow. So, let’s get started!
What is Inertia.js?
Inertia.js is a JavaScript library designed to simplify the development of single-page applications (SPAs). It uses traditional server-side rendering and controllers to achieve so. It stays on top of your existing backend technologies and handles communication between the client and server.
- Server-Side Rendering (SSR). Inertia.js utilizes SSR for SEO benefits and faster initial page loads. Server-rendered HTML is streamed to the client, improving SEO and performance.
- API-less Data Exchange. Instead of a separate API, Inertia.js exchanges data between the server and the client. It uses JSON responses to manage the server-side controllers. This simplifies backend logic and avoids unnecessary API endpoints.
- Component-Based Architecture. Frontend functionality is organized into reusable components. These components receive data directly from the server, streamlining communication.
- Client-Side Routing Simulation. Inertia.js blocks standard anchor tag clicks and sends XHR requests to the server. The server returns a JSON response containing page component information and data, updating the DOM without a full page reload.
- Lazy Loading and Code Splitting. To boost performance, Inertia.js supports lazy loading components and splitting applications. This improves the page’s load speed.
Overall, Inertia.js bridges the gap between traditional server-side development and modern SPA needs. Similarly, it also offers a familiar approach to building dynamic and performant web applications.
Using Inertia.js with Laravel 12+
Working with Inertia.js in Laravel 12+ is more straightforward than it may seem. The core Laravel workflow stays the same. You still define routes, write controllers, and manage backend logic inside Laravel. The main change is how the front-end views are rendered.
How It Works
Inertia.js replaces traditional Blade templates with front-end components. These components can be written in Vue or React. Instead of returning a Blade view, you return an Inertia response that points to one of these components.
This gives you:
- The smooth feel of a single-page application
- The structure and clarity of Laravel routing
- No need to build or maintain a separate API layer
Your application remains cohesive rather than split into two distant systems.
Let’s consider a simple example. Inside a controller, instead of:
return view('dashboard');
You return:
return Inertia::render('Dashboard', [
    'user' => $request->user(),
]);
This sends the data directly into the front-end component. No JSON endpoints. No synchronization overhead. Just a clean, straightforward flow.
Why It Matters
- Faster page transitions: The browser doesn’t reload between pages.
- Stable routing: Laravel remains the source of truth for URLs.
- Less complexity: You avoid managing a separate API and state layer.
- Flexible front-end: Choose Vue or React depending on your preference.
This is why many developers search for inertia js laravel, laravel inertia install, or laravel vue inertia tutorial when building modern interfaces without complicating their stack.
Common Installation Note
If you encounter an error like:
class "Inertia\Inertia" not found
It usually indicates one of two things:
- The Inertia server-side package was not installed properly.
- The namespace is missing and needs to be imported at the top of your controller.
Both issues are quick to resolve once identified.
Using Inertia.js with Laravel 12+ lets you build fast, modern interfaces without restructuring your entire workflow. Laravel stays responsible for logic and routing. Your front-end handles the view layer with fluid transitions. It’s a balanced, clean approach that scales well as your application grows.
How to Integrate Laravel and Inertia.js?
Integrating Laravel and Inertia.js combines the power of server-side routing with the modern feel of a single-page application (SPA). Follow the steps below to set up and integrate Laravel with Inertia.js efficiently.
Step 1: Create a New Laravel Project
Begin by creating a fresh Laravel project using Composer. Open your terminal and execute the following command:
composer create-project laravel/laravel laravel11-inertia-vue
This command downloads and installs Laravel in a directory named laravel11-inertia-vue.
Step 2: Navigate to Your Project Directory
Once the Laravel project is set up, navigate to the newly created project directory by running:
cd laravel11-inertia-vue
At this stage, your Laravel framework is ready for the next configuration steps.
Step 3: Install the Server-Side Inertia.js Adapter
Inertia.js bridges the gap between Laravel and modern frontend frameworks like Vue.js. It allows you to build SPAs while leveraging Laravel’s backend capabilities. Use the following Composer command:
composer require inertiajs/inertia-laravel
This command installs the necessary components for Laravel to communicate with Inertia.js seamlessly.
Step 4: Install the Client-Side Inertia.js Adapter and Vue.js
Now, install the client-side adapter for Inertia.js and Vue 3, along with the Vue plugin for Vite.js. Run the following command:
npm install @inertiajs/inertia-vue3 vue @vitejs/plugin-vue
This command will install:
- @inertiajs/inertia-vue3: The Inertia.js adapter specifically for Vue 3.
- vue: The Vue 3 framework, which you’ll use for the frontend.
- @vitejs/plugin-vue: A Vite plugin that ensures Vue 3 compatibility.
It’s important to confirm that you’re installing a compatible version of @inertiajs/inertia-vue3 to avoid potential version conflicts.
By following the above steps, you’ll have an integration ready for building robust websites using Laravel and Inertia.js. Accelerate the development of interactive SPA components by leveraging Laravel Volt for rapid prototyping and streamlined workflows with Inertia.js.
Setting Up Vite.js in Laravel
Vite.js is a fast and modern development server and build tool designed to work seamlessly with frameworks like Vue.js. Laravel uses Vite to manage and compile frontend assets such as JavaScript, CSS, and Vue components. Follow these steps to configure Vite.js in your Laravel project effectively.
Step 1: Install Necessary Vite.js Packages
Begin by installing Vite.js and the Laravel Vite plugin. Open your terminal and run the following command:
npm install --save-dev vite laravel-vite-plugin
This command will:
- Install Vite.js, which serves as the build tool and development server.
- Add the Laravel Vite plugin, enabling Laravel to integrate Vite with its asset pipeline.
Once this step is complete, your Laravel application will have the foundational tools to use Vite.js.
Step 2: Configure Vite in vite.config.js
After installing Vite, you need to configure it for your Laravel project. Locate or create the vite.config.js file in the root of your project, then add the following configuration:
import { defineConfig } from 'vite';
import laravel from 'laravel-vite-plugin';
import vue from '@vitejs/plugin-vue';
export default defineConfig({
    plugins: [
        laravel({
            input: ['resources/css/app.css', 'resources/js/app.js'],
            refresh: true,
        }),
        vue(),
    ],
});
Explanation of the configuration:
- laravel-vite-plugin: This plugin links Vite with Laravel, specifying the entry points (app.css and app.js) to compile and refresh on changes.
- @vitejs/plugin-vue: This plugin is essential for handling Vue components with .vue file extensions.
- refresh: true: Ensures that the browser reloads automatically during development when changes are made.
This setup enables Vite.js to efficiently manage your frontend assets while ensuring compatibility with Laravel and Vue.js. For projects focused on user engagement, integrating a Laravel comment system is straightforward with Inertia.js, enabling real-time feedback and discussions.
By setting up Vite.js correctly, you unlock a powerful, fast, and efficient tool for managing your Laravel project’s frontend assets. This ensures a smooth development experience while using modern JavaScript tools like Vue.js.
Steps for Integrating Vue.js with Inertia.js
Integrating Vue.js with Inertia.js brings together the power of a modern JavaScript framework with Laravel’s backend capabilities. Follow the steps below to configure and test the integration:
Step 1: Create a Vue 3 App Entry Point
To set up Vue 3 and Inertia.js, start by creating an entry point in your project. Open the resources/js/app.js file and add the following code:
import { createApp, h } from 'vue';
import { createInertiaApp } from '@inertiajs/inertia-vue3';
createInertiaApp({
    resolve: name => import(`./Pages/${name}.vue`),
    setup({ el, App, props, plugin }) {
        createApp({ render: () => h(App, props) })
            .use(plugin)
            .mount(el);
    },
});
Code Explanation:
- createInertiaApp: Initializes the Inertia.js app.
- resolve: Dynamically resolves and imports Vue components from the Pages directory.
- setup: Configures Vue to use Inertia.js and mounts the app to the DOM.
Step 2: Create a Simple Vue Component for Testing
To test your setup, create a Vue component. Add a new file called Welcome.vue in the resources/js/Pages directory with the following code:
<template>
<div class="welcome-container">
<h1 class="title">Welcome to Laravel with Inertia.js and Vue.js</h1>
<p class="subtitle">
Enjoy the power of modern full-stack development with Laravel, Vue 3, and Inertia.js.
</p>
<div class="detail-line">
<p>Check out more Laravel tutorials at
<a href="https://wpwebinfotech.com/" class="detail-link">WpWeb Infotech</a>.
</p>
</div>
<footer class="footer">
<p class="footer-text">
© {{ currentYear }}
<a href="https://wpwebinfotech.com/" class="footer-link">WpWeb Infotech</a>. All rights reserved.
</p>
</footer>
</div>
</template>
<script>
export default {
name: 'Welcome',
data() {
return {
currentYear: new Date().getFullYear(),
};
},
};
</script>
<style scoped>
/* Add your styles here */
</style>
This simple component displays a “Welcome” message, a brief description, and a footer with a link to Laravel tutorials.
Step 3: Update resources/views/app.blade.php
Ensure the root view for your Inertia.js app is set up. If app.blade.php doesn’t already exist, create it in the resources/views directory with the following code:
<!DOCTYPE html>
<html lang="{{ str_replace('_', '-', app()->getLocale()) }}">
<head>
    <meta charset="utf-8">
    <meta name="viewport" content="width=device-width, initial-scale=1">
    <title>Laravel</title>
    @vite(['resources/js/app.js', 'resources/css/app.css'])
</head>
<body class="antialiased">
    @inertia
</body>
</html>
Code Explanation:
- @vite: Includes JavaScript and CSS files built by Vite.
- @inertia: Placeholder for Inertia.js components to be dynamically rendered.
Step 4: Update the Web Routes
Define a route to render the Welcome page. Open routes/web.php and add:
use Inertia\Inertia;
Route::get('/', function () {
    return Inertia::render('Welcome');
});
Code Explanation:
- Inertia::render: Loads the Welcome component using Inertia.js.
- Route::get: Serves the Welcome page when the root URL (/) is accessed.
Step 6: Testing Your Setup
Once the setup is completed, it’s a good practice to test it. First, start the Laravel server using:
php artisan serve
After that, run the Vite development server using the command:
npm run dev
Next, open your browser and navigate to http://127.0.0.1:8000. You should see the “Welcome” page rendered by Vue.js through Inertia.js.
This integration allows you to seamlessly build modern single-page applications using Laravel and Vue.js, powered by Inertia.js. If you are looking to build a website with well-designed frontend and robust backend technologies, get in touch with a Laravel development company.
Running the Laravel and Inertia.js Set Up
Once you’ve set up Laravel with Inertia.js and Vue.js, the next step is to get your application running. Follow the below given steps to start both the frontend and backend servers:
Step 1: Start the Vite Development Server
To compile and serve your frontend assets, such as JavaScript and CSS, start the Vite development server. Run the following command in your terminal:
npm run dev
Any changes made to your frontend files will be automatically detected and updated.
Step 2: Start the Laravel Development Server
Once the frontend server is running, start Laravel’s built-in development server to handle backend requests and routing. Use the following command:
php artisan serve
Your Laravel application with Inertia.js and Vue.js should now be running! Visit http://127.0.0.1:8000 in your browser to see the “Welcome” page rendered by Vue.js through Inertia.js. Here is the output you will see:

By following the above steps, you’ll have your Laravel application with Inertia.js and Vue.js running ready for the full-stack development.
Common Errors in Laravel + Inertia.js Projects and How to Fix Them
Even though Laravel and Inertia.js work smoothly together, a few recurring issues show up for many developers. Most of them are simple to fix once you know where to look. Below are the most common errors and their solutions, explained in clear and practical terms.
class “Inertia\Inertia” not found
This message usually appears when the Inertia server-side package isn’t installed or the namespace isn’t imported.
How to Fix
- Make sure the package is installed:
composer require inertiajs/inertia-laravel
- Then add the correct namespace at the top of your controller:
use Inertia\Inertia;
Once that is in place, Laravel will recognize the class without issues.
Blank Page or “Page Component Not Found”
This often happens when the component names or file paths do not match the names used inside Inertia::render().
How to Fix
- Confirm the component name exactly matches the string passed to Inertia.
- Check capitalization and folder structure in resources/js/Pages.
For example, if your component is stored at:
resources/js/Pages/Dashboard.vue
Then your controller should return:
return Inertia::render('Dashboard');
Even a small mismatch in spelling can break the component resolution.
Vite Assets Not Loading
Sometimes the app loads, but styles and scripts do not. This usually points to missing Vite directives in your layout file.
How to Fix
Make sure your main layout includes:
@vite('resources/js/app.js')
@inertiaHead
@inertia
This ensures Vue/React scripts and Inertia page data load correctly.
Outdated Inertia Client Package
If routes or props are not updating in the browser, the front-end Inertia client package might be out of sync with the server version.
How to Fix
Update both sides:
composer update inertiajs/inertia-laravel
npm update @inertiajs/vue @inertiajs/react
Then re-build assets:
npm run build
Keeping versions aligned avoids subtle bugs.
Navigation Works, but State Resets Unexpectedly
This happens when persistent layout components are not used, causing re-rendering on each route change.
How to Fix
Wrap your Vue or React pages in a shared layout component. This ensures headers, sidebars, and shared UI stay consistent while only the page content swaps.
Most issues come down to mismatched paths, missing imports, or outdated packages. Once those are checked, Laravel and Inertia.js run with a clean and predictable flow. When something breaks, treat the stack as one connected system rather than two separate layers. That perspective alone simplifies debugging.
Performance Tips
Building fast Laravel + Inertia.js apps isn’t hard, but small optimizations go a long way. Here are some practical tips to keep your app responsive and smooth.
Lazy Load Components
Every page does not need all components at once. Load heavier components only when necessary. In Vue, you can do:
const Dashboard = () => import('./Pages/Dashboard.vue');
This reduces initial load time and improves perceived performance.
Cache Data Strategically
Laravel makes caching easy. Store frequently accessed data to avoid repeated queries. For example:
$user = Cache::remember('user_'.$id, 60, fn() => User::find($id));
Even simple caching can make pages feel much faster for returning users.
Optimize Inertia Props
Only send the data your page actually needs. Passing large objects or unnecessary arrays slows rendering. Example:
return Inertia::render('Dashboard', [
    'user' => $request->user()->only(['id','name','email']),
]);
Trim props to essentials.
Use Persistent Layouts
Pages with the same layout can share a persistent component. This prevents headers, navbars, or sidebars from re-rendering on each page transition.
Dashboard.layout = MainLayout;
The result is smooth, snappy navigation.
Keep Dependencies Lean
Every extra library adds weight. Evaluate if each dependency is necessary. Sometimes a small utility function can replace a heavy package without slowing development.
Build Assets for Production
Before deploying, always run:
npm run build
Vite will minify and optimize scripts and styles. This reduces load times and improves performance.
Performance is about speed and feel. Optimize data, components, and layouts, and your Laravel + Inertia.js app will feel fluid and professional, even as it grows. Small tweaks make a big difference in user experience.
Tips and Tricks for Using Laravel and Inertia.js
Enhance your development experience with Laravel and Inertia.js by following these practical tips and tricks. These will help you streamline your workflow, improve performance, and maximize the potential of your application.
Optimize Development Workflow Using HMR
When using Vite, enable Hot Module Replacement (HMR) to ensure changes to your Vue components reflect immediately in the browser without a full page reload. To make the most of HMR run npm run dev and php artisan serve in separate terminal windows. This ensures seamless integration of frontend and backend updates during development.
Use Inertia.js Shared Data
Inertia.js allows you to share data globally across your pages using the share method. For example, you can share the authenticated user:
Inertia::share('auth', fn () => auth()->user());
This shared data is automatically available as props in all your Inertia.js page components, reducing redundancy in passing data.
Use Inertia Links for Seamless Navigation
Instead of traditional <a> tags, use Inertia.js’s <inertia-link> component for faster, client-side navigation.
<inertia-link href="/about">About</inertia-link>
This eliminates full page reloads, creating a smoother, single-page application (SPA) experience for users.
Leverage Vite’s Fast Refresh for Vue Components
Vite’s fast refresh feature ensures that updates to Vue.js components are reflected instantly in the browser. This avoids full reloads and is especially helpful when working on complex components, providing a smoother development process.
Utilize Vue DevTools
When working with Vue.js, using Vue DevTools is essential for debugging and inspecting the state of your application. Install Vue DevTools in your browser to track the state of your components and troubleshoot issues more effectively. It’s an invaluable tool for identifying and resolving issues quickly during development. For example, if your project requires instant communication features, build real time chat app using Laravel for a practical example with backend logic and interactive frontends.
By applying these tips and tricks, you can enhance productivity and create a more efficient development workflow with Laravel, Inertia.js, and Vue.js. These small optimizations can significantly improve the overall experience of building modern web applications.
What are the Common Use Cases of Laravel and Inertia.js?
The combination of Laravel and Inertia.js unlocks a vast array of use cases. This combination helps you build dynamic web applications. Here are some prominent scenarios where this combination shines:
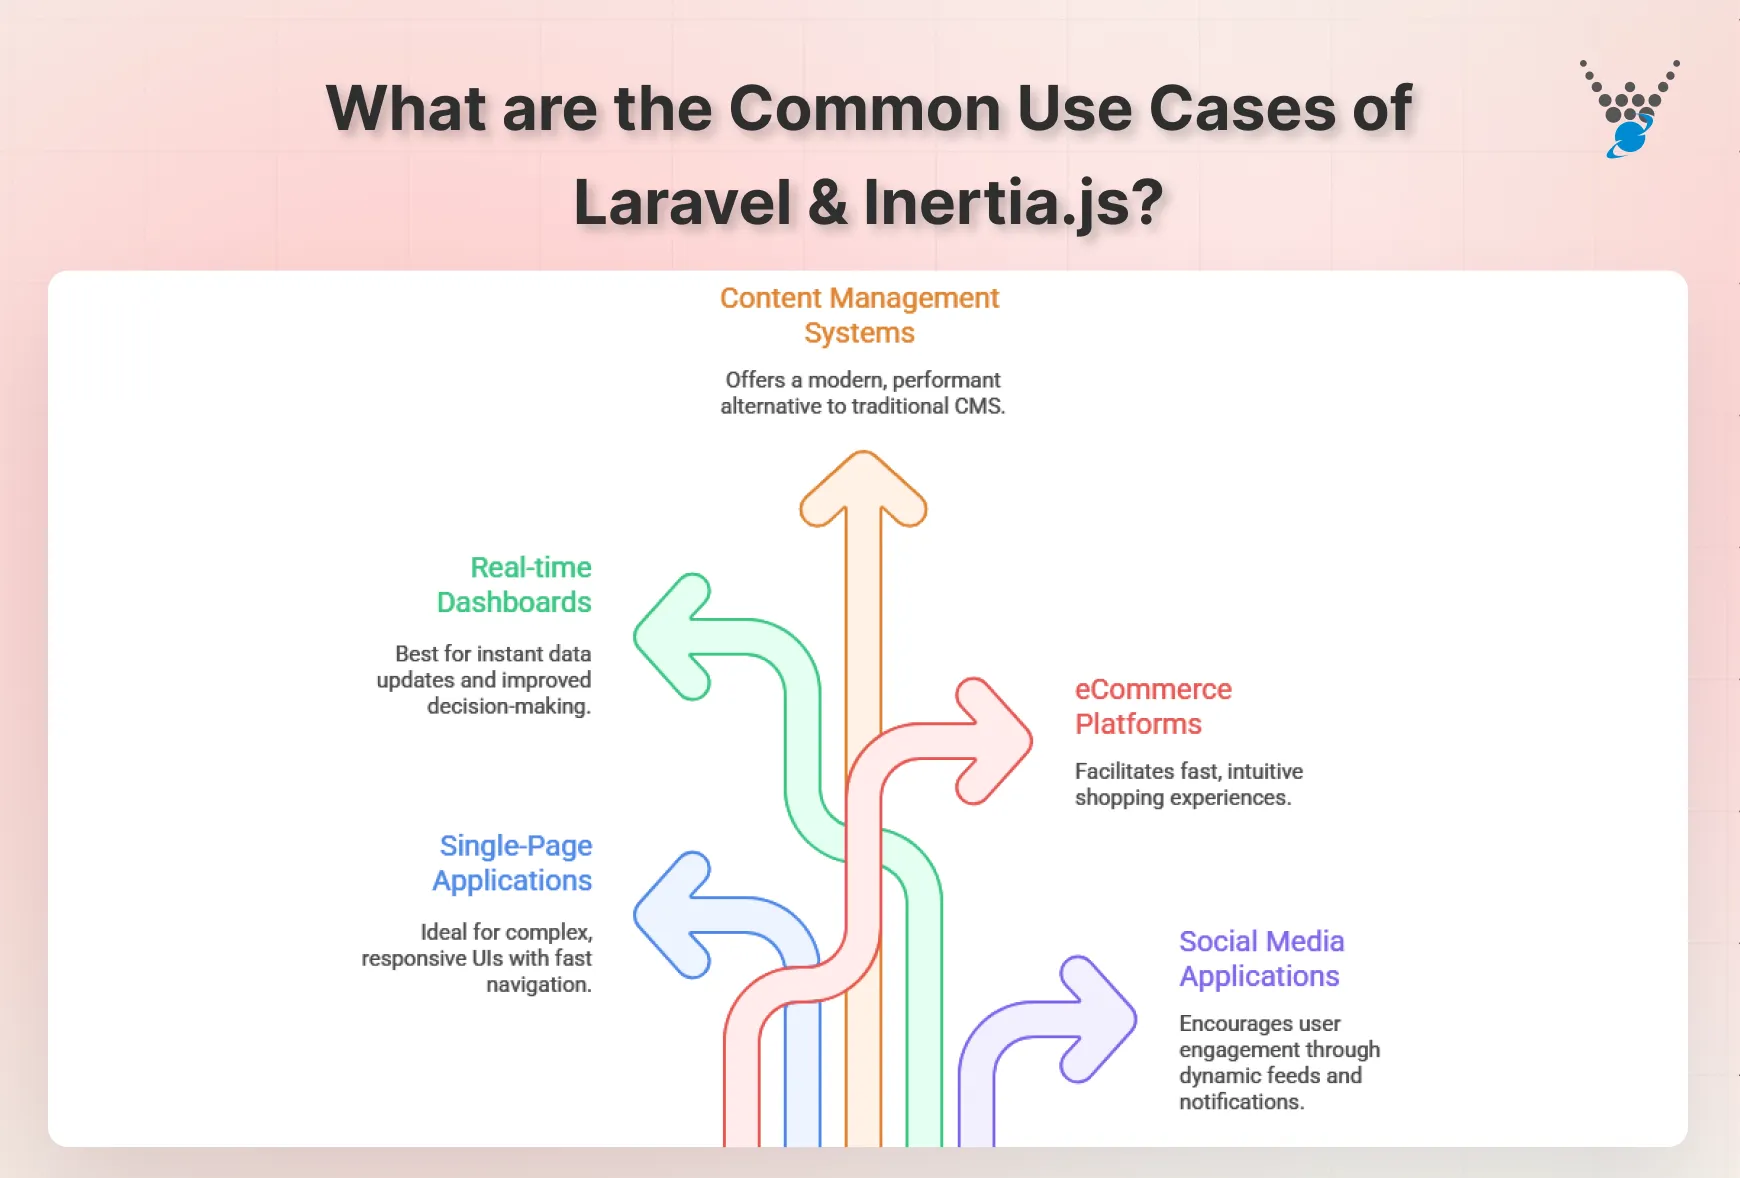
1. Single-Page Applications (SPAs)
- Create user experiences with fast navigation and minimal page reloads.
- Inertia.js handles client-side routing and component updates. On the other hand, Laravel will cover the server-side logic and data.
- Ideal for applications requiring complex interactions, UI elements, and a high level of responsiveness.
2. Real-time Dashboards
- Create dashboards that update instantly with new data. It could even offer real-time insights and improved decision-making.
- Leverage Inertia’s reactivity to push data updates to clients. This prevents the need for manual page refreshes.
- Integrate with real-time data sources like server-sent events for true real-time functionality.
3. Content Management Systems (CMS)
- Develop CMS interfaces for managing content creation and editing.
- Inertia.js provides editing experience, while Laravel handles content storage and access control.
- Offer a modern and performant alternative to traditional template-based CMS systems.
4. eCommerce Platforms
- Prepare eCommerce storefronts with dynamic product listings, shopping carts, and checkout processes.
- Inertia.js facilitates product browsing and cart interactions. Laravel handles complex e-commerce logic like payments and order management.
- Deliver a fast and intuitive shopping experience that keeps customers engaged.
5. Social Media Applications
- Foster user engagement through dynamic feeds, real-time notifications, and interactive features.
- Inertia.js enables updates to user feeds and notifications and with Laravel you can handle user management, content creation, and social interactions.
- Build engaging social experiences that encourage user interaction and participation.
This list scratches the surface. The potential applications of Laravel and Inertia.js are boundless. With their combined power, you can build innovative web experiences that cater to diverse needs and industries. As your development journey progresses, explore new use cases and push the boundaries of what’s possible.
Final Summary
Integrating Laravel with Inertia.js unlocks a smooth, modern approach to building dynamic applications. By setting up Vue.js with Inertia.js, configuring Vite.js, and utilizing features like Hot Module Replacement, shared data, and Inertia Links, you can enhance both the speed and efficiency of your development process.
These tools not only streamline frontend and backend communication but also provide a more fluid, SPA-like experience for users. With the right setup and best practices in place, you’re equipped to build robust, high-performance websites.
If you are looking to build a well-designed website with robust performance, hire Laravel developers.
FAQs About Laravel and Inertia.js
What is Inertia.js in Laravel?
Inertia.js is a modern library that connects a Laravel backend with a JavaScript-based frontend (such as Vue.js or React) without requiring a separate API. It allows you to build dynamic, single-page applications (SPAs) while keeping the simplicity of traditional server-side frameworks.
Should I use Inertia in Laravel?
Yes, if you’re looking for a simple way to build SPAs without managing complex APIs. Inertia.js is ideal for developers familiar with Laravel who want modern SPA capabilities with minimal configuration and seamless backend integration. Laravel Livewire is another option that allows you to create dynamic, reactive applications with server-driven components.
How to install Inertia.js in Laravel?
To install Inertia.js in Laravel:
– Install the Inertia.js server-side package using composer.
– Install the client-side adapter for your framework, such as Vue
– Configure routes, layouts, and pages as needed.
Can Inertia.js be used with page-based routing solutions like Laravel Folio?
Yes, Laravel Folio offers automatic Blade-to-route mapping, which you can use alongside Inertia.js for efficiently managing content-driven and SPA pages.
How do I share global data across pages?
You can share global data in Laravel using Inertia’s share method in a service provider. For example, you can pass authenticated user info, flash messages, or settings to every page. This keeps data consistent without repeating it in each controller. It’s simple, efficient, and keeps your front-end clean.
How to debug Inertia.js page transitions?
Start by checking the network tab in your browser’s dev tools. Ensure Inertia requests return the correct component and props. You can also enable Inertia.debug in development to log page visits and props. Common issues usually come from mismatched component names, missing props, or namespace problems. Debugging step by step usually reveals the root quickly.