Quick Summary
This guide details integrating Swagger with Laravel to automate API documentation. Manually maintaining docs is error-prone and inefficient. By leveraging the L5-Swagger package, you can generate an interactive OpenAPI spec directly from code annotations. This creates always-accurate documentation, streamlines developer collaboration, and provides a live testing environment for better API’s reliability and consumption.
Table of Contents
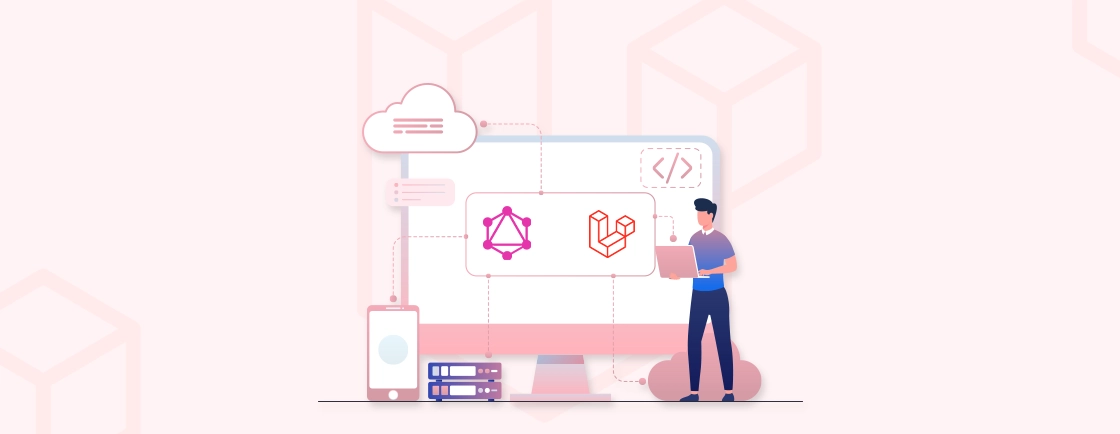
Creating a robust Laravel API is only half the job done. Without clear, accurate documentation, its adoption and utility are severely limited. However, manually maintaining the API docs can be quite tedious and error-prone. Documentation can fall out of sync with the actual codebase. That creates friction for the developers, stifling integration and collaboration.
Integrating Swagger with Laravel directly addresses this core development bottleneck. It leverages your existing codebase and annotations to automatically generate interactive, always-up-to-date API documentation. That means less maintenance overhead, consistency, and a fundamentally improved API ecosystem.
This blog sheds light on Laravel Swagger integration, its benefits, and implementation for creating and maintaining well-documented APIs. So we begin.
What is Swagger UI?
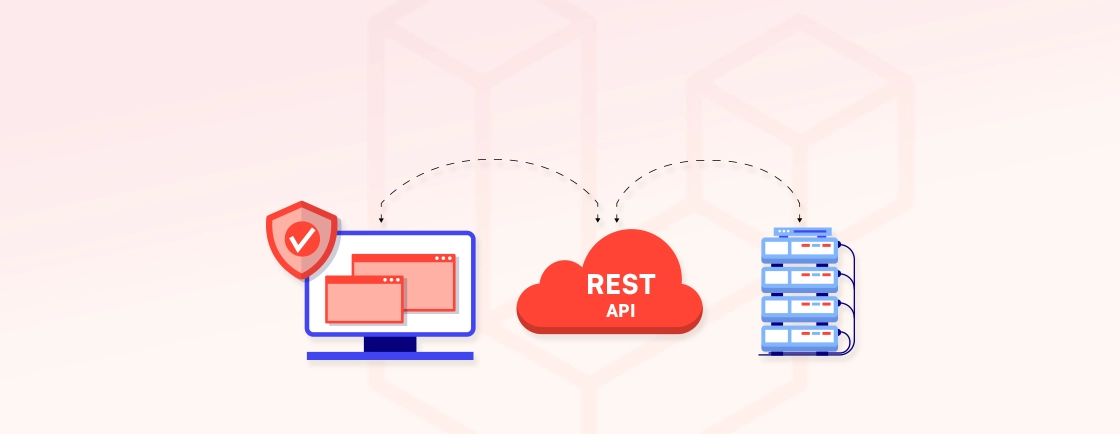
Swagger, or OpenAPI Specification (OAS), is a framework for describing, producing, consuming, and visualizing RESTful web services. With it, you can define your APIs structure within your code using a standardized format, like YAML or JSON. The API structure includes endpoints, request parameters, expected responses, and authentication methods.
This machine-readable definition, often called an OpenAPI document, then becomes the single source of information for your API. It can be used to power a suite of tools, most notably Swagger UI.
So developers can understand your API’s capabilities at a glance and even make live API calls directly from the browser. It dramatically simplifies testing and integration.
Swagger Toolset Components
Beyond the specification itself, a suite of integrated tools extends the capabilities of Swagger to streamline the entire API lifecycle.
- Swagger UI: Renders OpenAPI specs as interactive API documentation. So users can visualize and call API endpoints directly from a browser.
- Swagger Editor: A browser-based editor for writing, validating, and previewing OpenAPI definitions in real-time.
- Swagger Codegen: A template-driven engine that generates server stubs, client libraries (SDKs), and documentation from an OpenAPI file.
- Swagger Core: A suite of Java libraries for creating, consuming, and working with OpenAPI definitions.
- Swagger Parser: A standalone library for parsing OpenAPI definitions from various sources. That enables validation and programmatic access.
- Swagger APIDom: A tool for converting API descriptions between different formats like OpenAPI, AsyncAPI, and RAML.
Understanding these components enables you to fully leverage Swagger’s potential throughout your API lifecycle.
How Does Swagger Work?
At its core, Swagger operates on a simple but powerful principle: define once, run anywhere. It acts as a standardized interpreter between your code and your API’s documentation and tools.
1. Annotate the Code
You describe your API’s endpoints, parameters, responses, and authentication methods. All that is done within your Laravel controller using special PHP comments (annotations). This defines the structure of your API in a standardized, machine-readable way.
2. Generate the Documentation
The Swagger PHP library (zircote/swagger-php) scans your annotated code. Then it parses these comments to build a comprehensive OpenAPI specification file (openapi.json). This JSON file is the single source of truth for your API’s contract.
3. View the Interactive UI
The Swagger UI tool reads the generated OpenAPI file and renders it as a clean, interactive web page. This interface allows developers not only to read the documentation but also to execute live API calls directly from their browser. That tests the endpoints in real-time.
In essence, Swagger creates a living document that is intrinsically linked to your code. That eliminates the disconnect that occurs with manually maintained documentation.
Key Benefits of Integrating Laravel in Swagger
Swagger is a way to ensure your Laravel APIs are more than just a technical specification. Here are a few of its benefits.
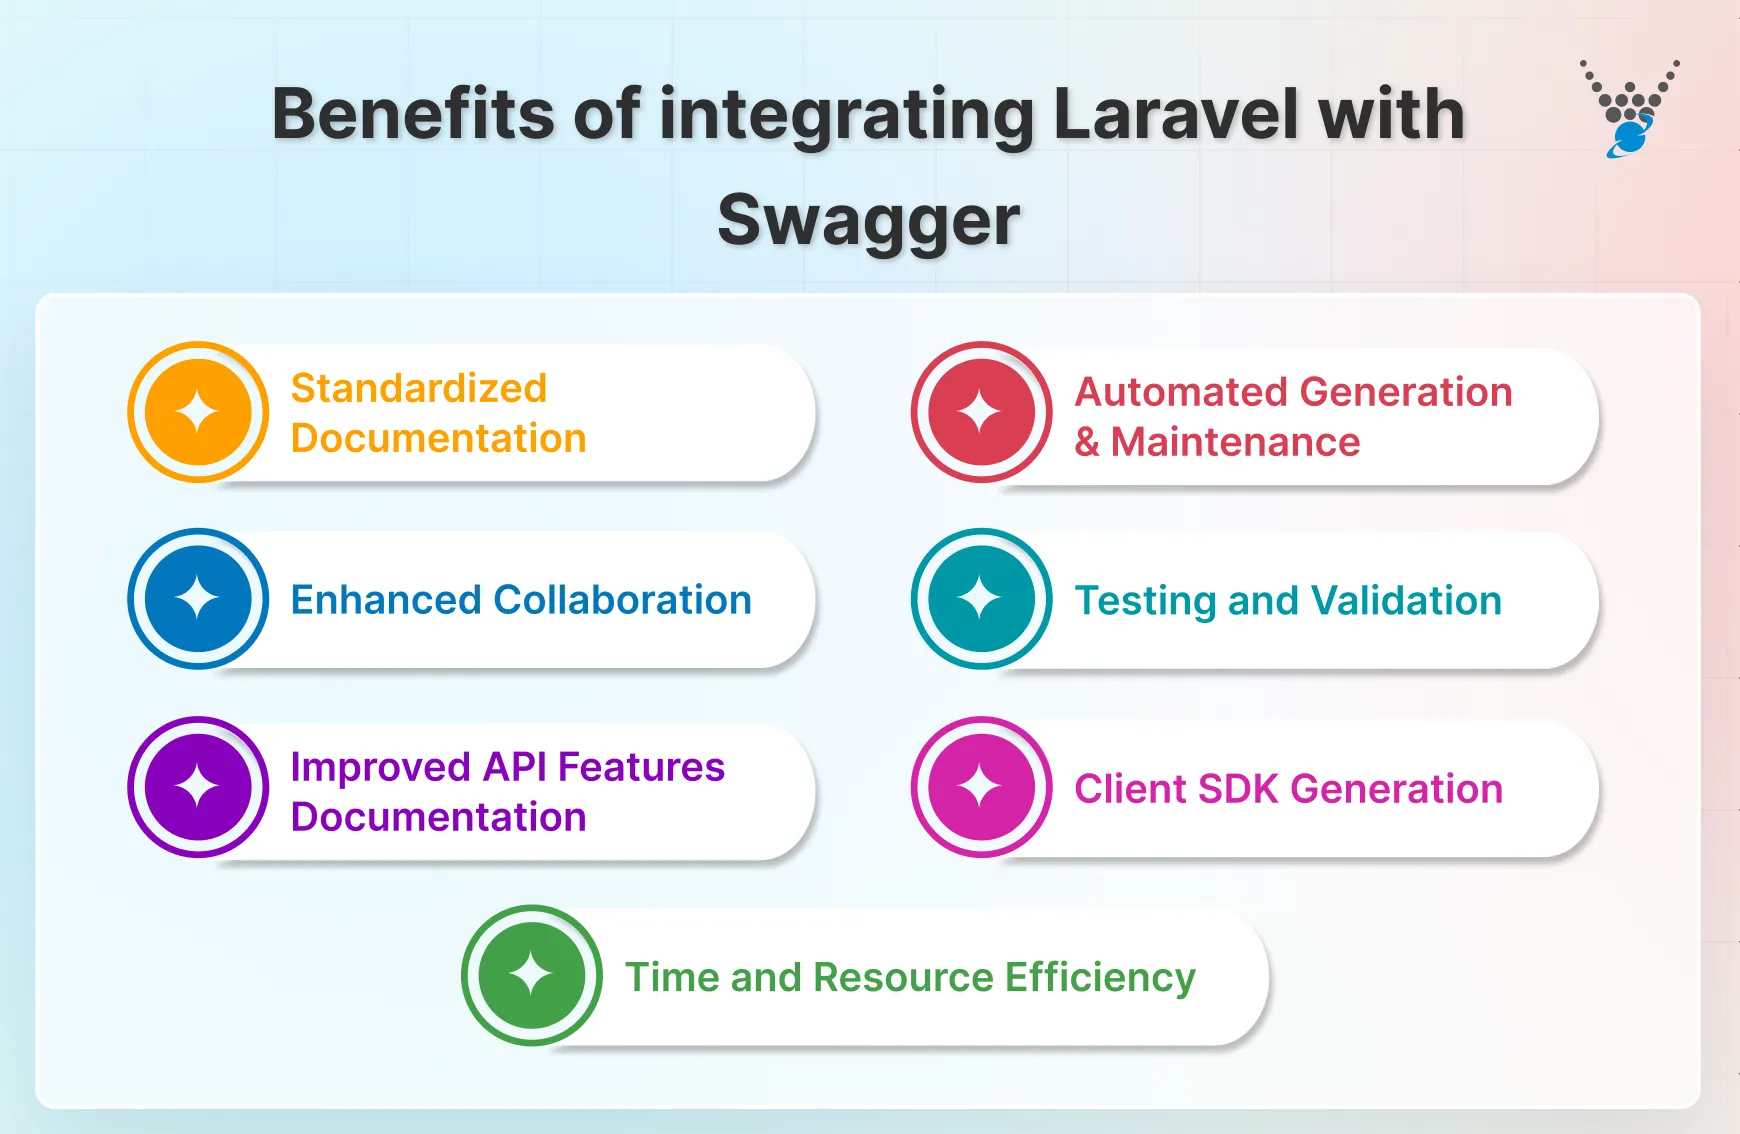
1. Standardized Documentation
Ensure every endpoint is documented with a consistent, professional structure. This universal format eliminates confusion and sets a clear contract for how your API behaves.
2. Automated Generation & Maintenance
Generate documentation directly from your codebase. Any changes to your Laravel routes, controllers, or form requests are automatically reflected, ensuring your documentation is always up to date.
3. Enhanced Collaboration
Provide frontend and third-party developers with a single, reliable source of accurate information. The interactive documentation bridges the gap between backend and consumer, speeding up integration.
4. Testing and Validation
Use the interactive Swagger UI to make live API calls. This allows you to test endpoints, debug responses, and validate request structures without external tools like Postman.
5. Improved API Features Documentation
Clearly document complex authentication flows (e.g., JWT, OAuth), pagination meta-data, and custom headers that are central to your Laravel API’s functionality.
6. Client SDK Generation
Automatically generate client SDKs in multiple languages (JavaScript, PHP, Python, etc.) from your OpenAPI spec. Customers can integrate with your API more quickly and with less code.
7. Time and Resource Efficiency
Drastically reduce the manual effort spent on writing and maintaining API docs. This automation frees up developer resources for core feature development.To get the best of these benefits for your Laravel API, you may need professional help. For that, you can consult with a professional Laravel development company.
Prerequisites for Setting Up Laravel in Swagger
Before integrating Swagger into your Laravel project, there are a few prerequisites to address.
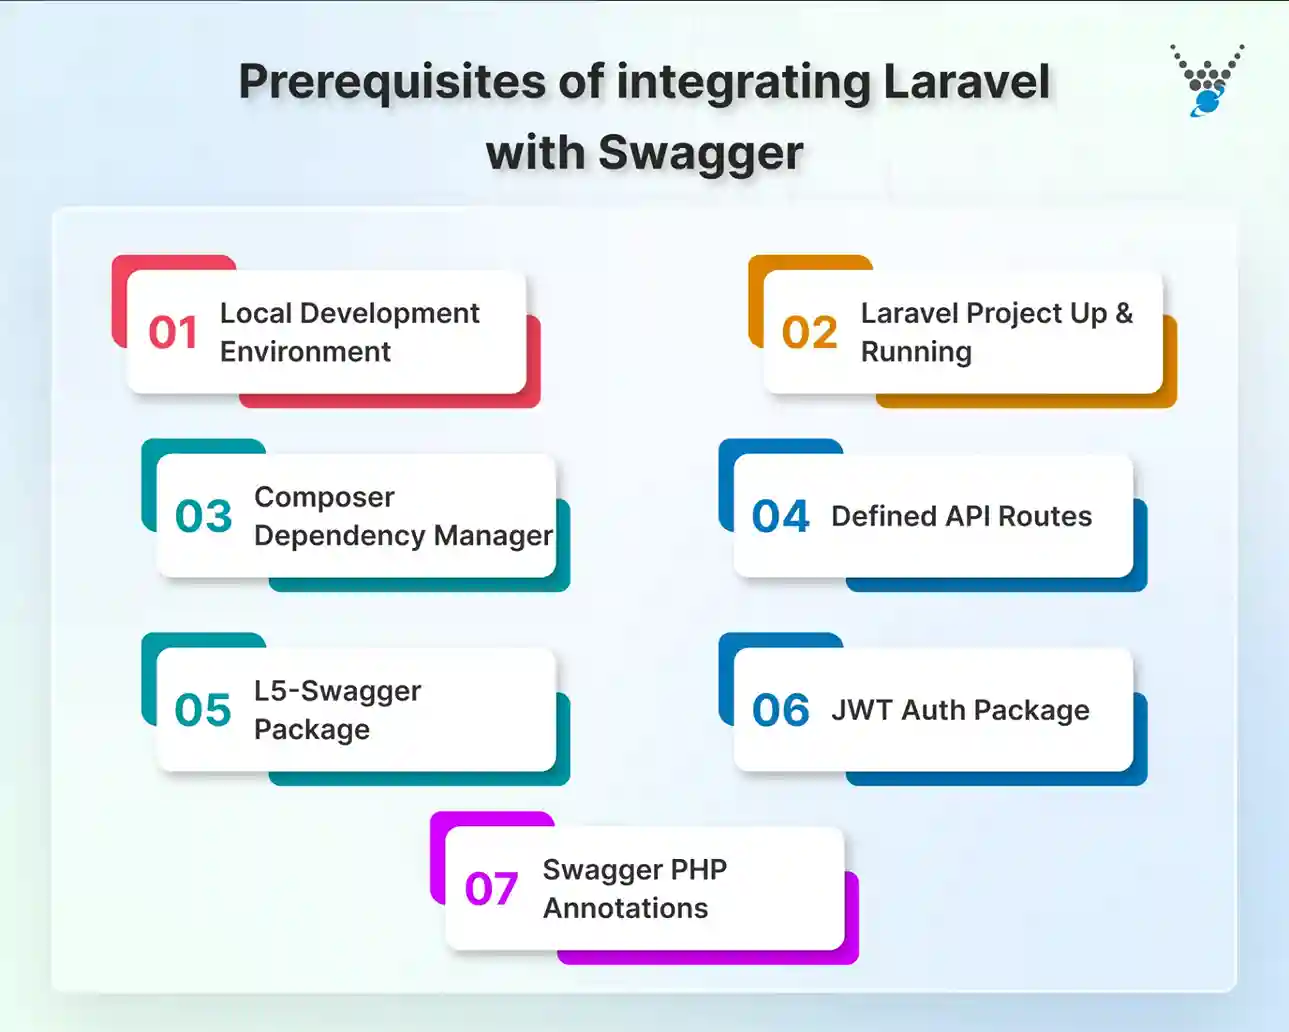
- Local Development Environment: A fully configured local server stack (like Laravel Homestead, Laravel Sail, or XAMPP/WAMP) with PHP and a database.
- Laravel Project Up & Running: A functional Laravel application (version 8.x or higher is recommended) that you can access locally. This confirms your core environment is configured correctly.
- Composer Dependency Manager: Composer must be installed globally to manage PHP packages. You will use it to install the necessary Swagger package for Laravel.
- Defined API Routes: Your Laravel application should have existing API routes defined in the routes/api.php file. Swagger needs these endpoints to scan and document.
- L5-Swagger Package: This is the primary package for integration. You will install “darkaonline/l5-swagger” via Composer to automatically generate OpenAPI specifications from your Laravel project.
- JWT Auth Package (Optional): If your API uses JSON Web Tokens for authentication, a package like tymon/jwt-auth should be installed and configured. You will need to document your auth headers.
- Swagger PHP Annotations: The zircote/swagger-php package is a dependency used to parse PHP annotations in your code. It will help generate the OpenAPI specification.
After the prerequisites are taken care of, you’ll be set to implement Laravel on Swagger.
How to Implement Laravel in Swagger?
Laravel Swagger integration is a straightforward process. You install packages, annotate your code, and generate the documentation. Follow these steps to integrate it seamlessly.
Step 1: Install the Required Packages
Begin by installing the necessary Swagger and JWT packages via Composer.
composer require "darkaonline/l5-swagger"
composer require "tymon/jwt-auth"
Step 2: Configure JWT Authentication
Publish the JWT package configuration and generate a secret key.
php artisan vendor:publish --provider="Tymon\JWTAuth\Providers\LaravelServiceProvider"

php artisan jwt:secret
This creates a config/jwt.php file and adds the JWT_SECRET to your .env file.
Step 3: Configure Swagger
Publish the L5-Swagger configuration file.
php artisan vendor:publish --provider="L5Swagger\L5SwaggerServiceProvider"
This creates a config/l5-swagger.php file where you can customize settings like API security definitions.
Step 4: Implement User Registration Logic
Create a Registration Controller and add logic to validate and create a new user.
php artisan make:controller Auth/RegisterController
// In RegisterController.php
public function register(Request $request)
{
    $validated = $request->validate([
        'name' => 'required|string|max:255',
        'email' => 'required|string|email|max:255|unique:users',
        'password' => 'required|string|min:8|confirmed',
    ]);
    $user = User::create([
        'name' => $validated['name'],
        'email' => $validated['email'],
        'password' => Hash::make($validated['password']),
    ]);
    return response()->json(['message' => 'User successfully registered'], 201);
}
Step 5: Create Login Controller
Generate a controller to handle user login.
php artisan make:controller Auth/LoginController
Step 6: Implement Login Logic
In the Login Controller, add logic to authenticate the user and return a JWT token.
// In LoginController.php
public function login(Request $request)
{
    $credentials = $request->only('email', 'password');
    if (!$token = auth()->attempt($credentials)) {
        return response()->json(['error' => 'Unauthorized'], 401);
    }
    return $this->respondWithToken($token);
}
protected function respondWithToken($token)
{
    return response()->json([
        'access_token' => $token,
        'token_type' => 'bearer',
        'expires_in' => auth()->factory()->getTTL() * 60
    ]);
}
Step 7: Implement Logged In User Details
Protect a route to fetch the authenticated user’s details.
// In LoginController.php
/**
 * @OA\Get(
 *     path="/api/user",
 *     summary="Get logged-in user details",
 *     security={{"bearerAuth":{}}},
 *     @OA\Response(response="200", description="Success"),
 *     @OA\Response(response="401", description="Unauthenticated")
 * )
 */
public function user()
{
    return response()->json(auth()->user());
}
Step 8: Create Routes
Define the API endpoints in your routes/api.php file.
use App\Http\Controllers\Auth\RegisterController;
use App\Http\Controllers\Auth\LoginController;
Route::post('register', [RegisterController::class, 'register']);
Route::post('login', [LoginController::class, 'login']);
Route::middleware('auth:api')->group(function () {
    Route::get('user', [LoginController::class, 'user']);
});
Step 9: Generate Swagger Documentation
Run the l5-swagger:generate command to parse your code annotations and create the OpenAPI file.
php artisan l5-swagger:generate
Step 10: View Swagger Documentation
Start your development server and navigate to the Swagger UI page.
php artisan serve
Visit /api/documentation in your browser (e.g., http://localhost:8000/api/documentation) to view and interact with your fully documented API.
With this Swagger Laravel integration, your codebase will be a self-documenting API. That means your documentation will always be in sync with your implementation.
Let’s Summarize
With Swagger in Laravel application, viewing API documentations won’t be just a burdensome chore. It’ll be an integral, automated component of the development lifecycle. Swagger embeds the API’s contract directly within the code. It helps create a self-documenting system that is inherently accurate and maintainable.
This practice accelerates development cycles, minimizes integration friction, and fosters clearer collaboration across teams. Ultimately, it helps build more reliable, professional, and consumable APIs with greater efficiency and less effort.So, want help with Swagger and other key integrations? Then hire Laravel developers with us today!
FAQs on Laravel Swagger Integration
What is Swagger in Laravel?
Swagger in Laravel is a tool that automatically generates interactive documentation for APIs, making it easier for developers to explore and understand API endpoints.
Is Swagger easy to use?
Yes, Swagger is user-friendly and offers interactive, auto-generated documentation, allowing developers to easily test and explore APIs.
Can Swagger generate documentation?
Yes, Swagger generates documentation automatically from your code, providing clear, up-to-date API documentation with minimal manual effort.
Do I have to write annotations for every single endpoint?
Yes, for an endpoint to appear in your documentation, it must be annotated. The depth of detail is up to you, but comprehensive annotations lead to more useful and accurate documentation for consumers.
Can Swagger handle API authentication like JWT?
Absolutely. You can document various authentication schemes. For JWT, you define a security scheme in your annotations, then specify which API endpoints are protected by it. So users can authenticate directly within the Swagger UI.
Is Swagger free to use?
Yes. The core tools of the Swagger ecosystem include the OpenAPI Specification, Swagger UI, Swagger Editor, and more. They are open-source and freely available for both personal and commercial use under the Apache 2.0 License.