
Quick Summary
Master CRUD in Laravel 12 with this step-by-step guide! From setting up your project and database to creating models, controllers, routes, and Blade templates, learn how to implement Create, Read, Update, and Delete operations efficiently. Explore best practices like Form Requests, Eager Loading, and Transactions to build clean, secure, and scalable web applications. Perfect for those who want to build powerful, maintainable Laravel projects.
Table of Contents
Every web application, from a simple contact list to a complex enterprise system, relies on some fundamental operations. These include the CRUD operations, i.e. Create, Read, Update, and Delete data, which form the backbone of most interactive software.
For developers working with PHP, the Laravel framework offers an exceptionally elegant and powerful toolkit for implementing these essential features efficiently. If you’re using the latest version, implementing Laravel 12 CRUD operations can make your development process even smoother and more structured.
This guide will walk you through building robust CRUD in Laravel 12 operations. You’ll also get the best practices for clean, maintainable code that forms the core of your next dynamic application. Let’s begin.
What are CRUD Operations?
CRUD is the cornerstone acronym for the four fundamental functions of persistent data storage. It stands for Create, Read, Update, and Delete. These operations map directly to core user interactions and are the building blocks for nearly every application you use.
In practical terms, CRUD represents a complete cycle of data management:
- Create: Adding new records (e.g., posting a new article).
- Read: Retrieving and displaying existing records (e.g., loading a blog post or a user profile).
- Update: Modifying existing records (e.g., editing a product description).
- Delete: Removing records permanently from the system.
These operations form the basis for interacting with any database. And in web development, they are most commonly executed through HTTP protocols like POST, GET, PUT/PATCH, and DELETE.
How Does CRUD Work?
CRUD operations function as the essential bridge between a user’s actions in an application and the database where information is permanently stored. The process is a coordinated sequence involving the user interface, application logic, and the database itself.
Here’s a breakdown of the workflow for each operation:
Create
A user submits a form (e.g., “Add New Product”). The application logic receives this data, validates it, and constructs an INSERT SQL command. This command is sent to the database, which creates a new record.
Read
When a page loads (e.g., a product catalog), the application sends a SELECT query to the database. The database returns the requested dataset, which the application logic formats and displays to the user.
Update
A user edits existing information. The application sends an UPDATE SQL command, specifying the unique record ID and the new values. The database locates that record and modifies its fields.
Delete
A user triggers a deletion. The application sends a DELETE command with the specific record’s ID. The database locates and permanently removes that record.
This entire cycle is seamlessly managed by the application’s backend code, ensuring data integrity and a responsive user experience.
Why Use CRUD in Laravel 12?
Laravel is a powerful and popular PHP framework. It is known for its streamlined development process and powerful built-in features. When it comes to Laravel 12 CRUD operations, the framework offers several compelling advantages:
- Simplified Approach. Laravel offers built-in features like Eloquent ORM (Object-Relational Mapper). It streamlines the process of interacting with your database. This translates to cleaner code, improved maintainability, and consistent data access patterns throughout your application.
- Reduced Development Time. Laravel’s features like resource controllers, migrations, and blade templates. Each of them has structures and functionalities that can save you development time.
- Improved Security. Laravel prioritizes security. It offers features like form request validation, authorization checks, and protection against common vulnerabilities, This benefits in reducing the risk of security breaches and data manipulation.
Using Laravel 12 for CRUD operations, you can benefit from its smooth development process, organized code structure, and security features. Hence, this contributes to the development of well-rounded and secure web applications.
System Requirements for Laravel CRUD Operations
Before building CRUD functionality in Laravel, ensure your development environment meets these core server and software prerequisites. A properly configured system is fundamental for seamless development and deployment.
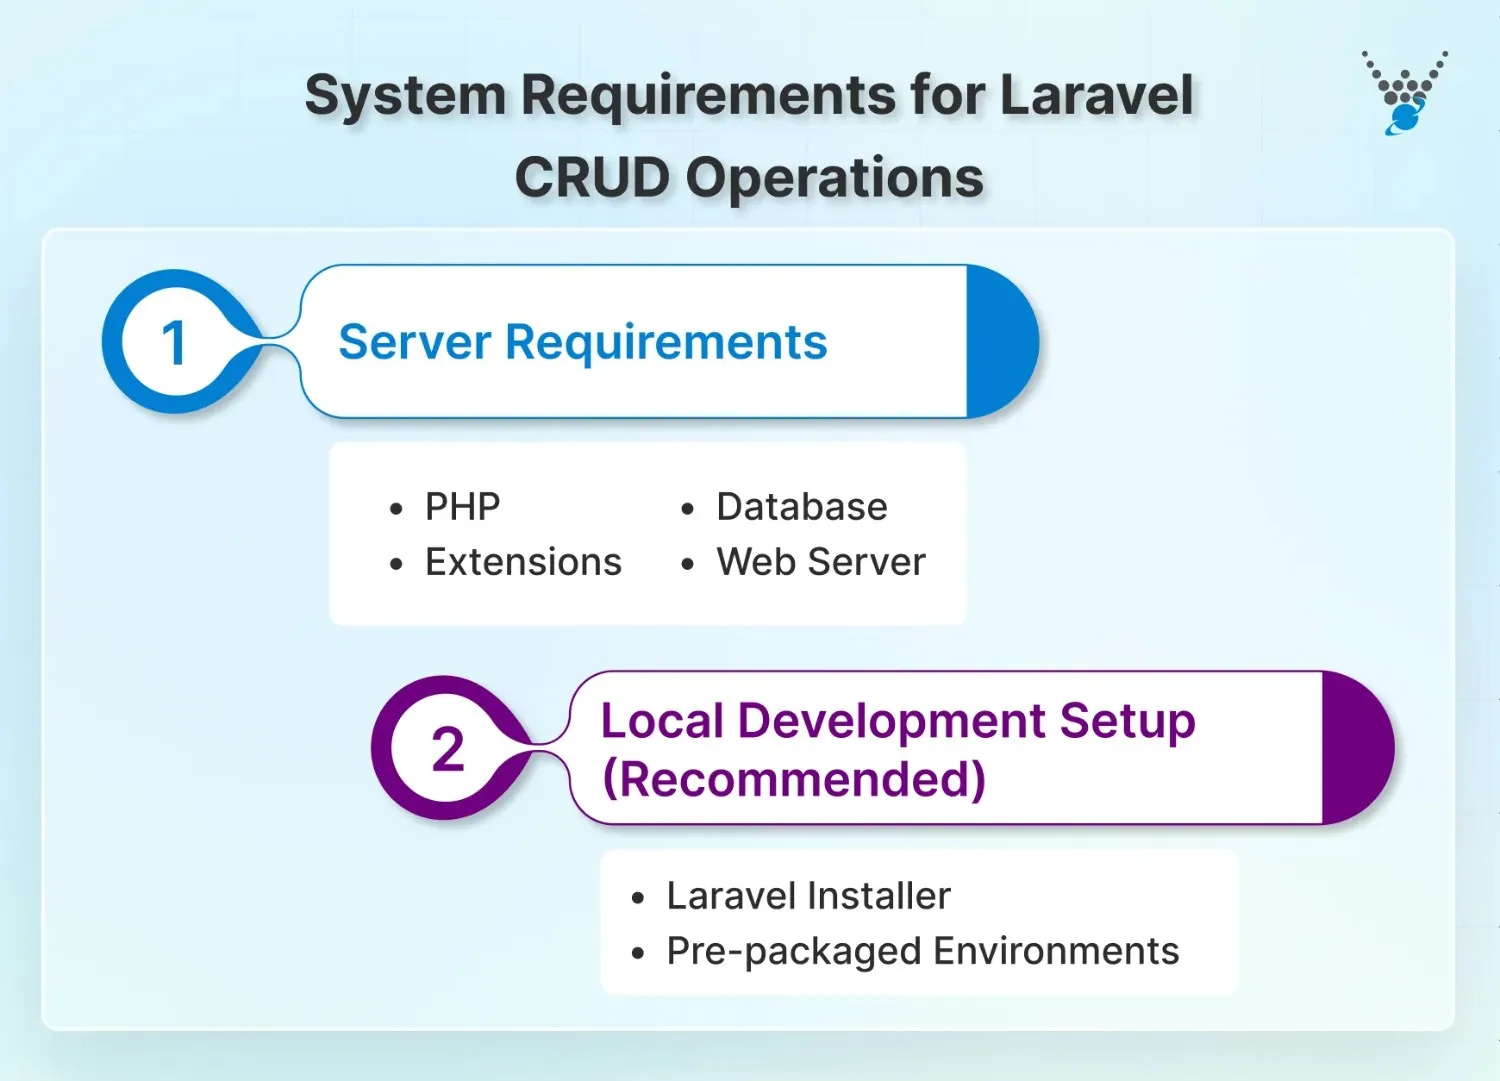
Server Requirements
- PHP: Version 8.1 or higher is mandatory, as earlier versions are no longer supported by Laravel.
- Extensions: Essential PHP extensions include OpenSSL, PDO, Mbstring, Tokenizer, XML, and Ctype.
- Database: Laravel supports MySQL (5.7+), PostgreSQL, SQLite, and SQL Server. You only need one installed.
- Web Server: Apache, Nginx, or a local development server like Laragon or Valet.
Local Development Setup (Recommended)
For a streamlined workflow, use a local server stack:
- Laravel Installer: Requires Composer, a dependency manager for PHP.
- Pre-packaged Environments: Tools like Laragon (Windows), Valet (Mac), or XAMPP/WAMP simplify setup by bundling PHP, a web server, and a database together.
Meeting these requirements provides the stable foundation needed to efficiently develop, test, and manage your application’s data interactions.
How to Perform Laravel CRUD Operations?
Implementing CRUD in Laravel 12 involves a step-by-step process that uses the framework’s built-in features and functionalities. Here’s a breakdown of the essential steps:
Step 1: Project Setup
Before diving into CRUD operations, we need to set the stage by establishing a new Laravel project. Here’s a breakdown of the steps involved:
- Use the Installer or Composer: Open your terminal and navigate to your desired project directory. Then, execute the command to create a new Laravel project using the Laravel installer:
laravel new your-project-name.
If you don’t have the Laravel installer, use Composer instead:
composer create-project laravel/laravel your-project-name
- Composer Installation. If you haven’t already, ensure you have Composer installed on your system. Composer is a dependency management tool crucial for managing Laravel project dependencies.
- Navigate to the Project Directory. Once the project is created, use the cd command to get into the newly created project directory: cd your-project-name. This is where all the project files will reside.
With these steps, you’ll have a fresh Laravel project ready to begin implementing your CRUD functionalities. You must have Composer installed and accessible on the system before proceeding.
Step 2: Database Configuration
Now that your project is set up, it’s important to configure the connection to the database. This will allow Laravel to interact with your database and perform CRUD operations effectively. Here’s how to achieve this:
- Locate Configuration File. Open the config/database.php file within your project directory. This file holds the configuration details for connecting to the database.
- Specify Database Credentials. Within the connections array, locate the appropriate database driver you’ll be using. Some of the popular examples include MySQL and PostgreSQL. Update the configuration with your specific database credentials, including:
- host. The hostname or IP address of the database server.
- database. The name of the database you want to connect to.
- username. The username for accessing the database.
- password. The password for the specified username.
- Save the Changes. Once you’ve updated the configuration details with the specific credentials, save the config/database.php file.
By completing these steps, you’ve successfully established a connection between your Laravel application and your chosen database. This enables you to proceed with the next steps in the CRUD implementation.
Step 3: Generate Model and Migration
Here, we’ll be using Laravel artisan commands to generate the fundamental building blocks for interacting with the database. This involves creating a model and a corresponding migration file.
- Use Artisan Commands. Laravel provides artisan commands to streamline the process of generating models and migrations. Open the terminal within the project directory and execute the following command:
php artisan make:model Post -m
- Replace “Post” with Desired Model Name. This command will create two files:
- app/Models/Post.php. This file represents the model class. It summarizes data structure and provides methods for interacting with related database records.
- database/migrations/YYYY_MM_DD_HHIIss_create_posts_table.php. This file defines the database schema for your table, specifying the columns and their data types.
- Customize the Migration (Optional). The generated migration file provides a basic structure. Yet, you might need to modify it further. Open the migration file (database/migrations/YYYY_MM_DD_HHIIss_create_posts_table.php) and add or modify the columns within the $table closure. This will help you to match the specific table schema requirements.
With the completion, you have the base for CRUD operations. You can do so by creating a model that represents the data and a migration file that defines the corresponding database table structure.
Step 4: Define Database Schema
Moving further, define the structure of the database table using the migration file you generated in the previous step. This involves specifying the columns and their data types within the table.
- Open the Migration File. Navigate to the database/migrations directory and open the latest migration file. It usually gets identified by the timestamp in its name.
- Define the Table Schema. Within the up method of the migration class, use Laravel’s fluent syntax to define the structure of your table. This involves using methods like:
- $table->string(‘name’);. Defines a string column named “name”.
- $table->integer(‘age’);. Defines an integer column named “age”.
- $table->timestamps();. Adds timestamp columns for “created_at” and “updated_at”. You can further customize the columns by specifying additional options like column length, unique constraints, and foreign keys.
Here’s an example of defining a schema for a “posts” table:
public function up()
{
    Schema::create('posts', function (Blueprint $table) {
        $table->id();
        $table->string('title');
        $table->text('content');
        $table->timestamps();
    });
}
- Save the Migration File. Once you’ve defined the desired table structure, save the migration file.
With a defined database schema for your table, it will store the data and format each column.
Step 5: Run the Migration
After defining the database schema in the migration file, let’s apply it to your actual database. This step involves running the migration commands to create the corresponding table.
- Execute the Artisan Command. Use the following artisan command to execute all pending migrations: php artisan migrate. This command will read all the migration files in the database/migrations directory (in their chronological order based on timestamps) and execute the up method within each file.
- Verify the Table Creation. Once the migrations run successfully, you can verify if the table was created in your database. You can do so by using a database management tool or by querying the database directly.
With a successful deployment of the migration command, you’ve translated the schema defined in the migration file into a real table within your database. This is what sets the core for storing your data.
Step 6: Create a Controller
This will handle the logic for our CRUD operations. It serves as the mediator between our application’s user interface and the database. The controller coordinates the various actions involved in creating, reading, updating, and deleting data.
- Utilize the Artisan Command. Open your terminal and navigate to your Laravel project directory. Then, use the following command to generate a controller:
php artisan make:controller YourControllerName
Replace YourControllerName with the name you want to give to your controller. The name should be descriptive and reflect the functionality it will handle (e.g., PostController, UserController). This command will create a new file within the app/Http/Controllers directory.
- Observe the Generated Code. The generated controller file will contain some basic boilerplate code. You’ll need to customize this code to implement the specific logic for each CRUD operation.
A controller manages the business logic for performing CRUD operations on your chosen model and database table. For a more dynamic and interactive experience, implement CRUD operations using Laravel Livewire, which streamlines frontend interactions without relying heavily on JavaScript.
Step 7: Define Routes
Routes are the pathways that map incoming HTTP requests from your user interface to the appropriate controller methods. In this step, we’ll define the routes for each CRUD operation in the routes/web.php file.
- Open the Routes File. Navigate to the routes/web.php file within your Laravel project directory. This file is where you’ll define routes for your web application.
- Define Routes for Each CRUD Operation. Use Laravel’s routing methods to define routes for each CRUD operation:
- Create. Use the POST method to define a route for creating new data records. This points to a method within your controller responsible for handling form submissions for creating new entries.
- Read. Use the GET method to define routes for retrieving and displaying existing data records. This can involve routes for listing all records, fetching a specific record, or searching for data based on criteria.
- Update. Use the PUT or PATCH methods to define routes for updating existing data records. This involves routes for handling form submissions for editing existing entries.
- Delete. Use the DELETE method to define a route for deleting existing data records. This should be implemented with caution and appropriate confirmation mechanisms.
Here’s an example of defining basic routes for a PostController handling posts:
Route::post('/posts', 'PostController@store'); // Create
Route::get('/posts', 'PostController@index'); // Read (all)
Route::get('/posts/{post}', 'PostController@show'); // Read (specific)
Route::put('/posts/{post}', 'PostController@update'); // Update
Route::delete('/posts/{post}', 'PostController@destroy'); // Delete
- Replace Placeholders. Ensure you replace placeholders like {post} with appropriate route parameters. It will help you to identify specific records within your controller methods.
These routes let you map between user requests and the corresponding controller methods. Also, it enables the application to handle various user interactions related to CRUD operations.
Step 8: Generate Blade Templates
Blade templates are the core of Laravel’s user interface layer. They allow you to create dynamic HTML pages by combining HTML with Laravel features. In this step, we’ll generate Blade templates to display data, handle user input forms, and present the results of CRUD operations.
- Create Blade Templates Manually: Laravel doesn’t provide a make:view command by default. You can manually create the necessary Blade templates under the resources/views directory. For example:
resources/views/posts/index.blade.php
resources/views/posts/create.blade.php
resources/views/posts/edit.blade.php
resources/views/posts/show.blade.php
Simply create these files and structure them according to the functionality you want to implement for each CRUD action.
- Structure and Content. Each Blade template will serve a specific purpose and should be structured accordingly:
- index.blade.php. This view should display a list of all posts, typically using a table or another appropriate layout. Use loops to repeat through the data and display relevant information for each post.
- create.blade.php. This view should display a form for creating a new post. Include form elements like text inputs, text areas, and select dropdowns to capture user input for various post attributes.
- edit.blade.php. Similar to the create view, this template presents a form pre-populated with the existing data of the post being edited.
- show.blade.php. This view displays detailed information about a specific post. It includes its title, content, and any other relevant attributes.
- Blade Syntax. Leverage Blade’s notes and expressions to render content and interact with your controller methods for data retrieval and manipulation. For instance, use @foreach loops to iterate through data and @if statements for conditional rendering. It also offers helpers like @csrf and @method to ensure security and proper HTTP methods for form submissions.
By generating and customizing Blade templates, you add a visual layer to your CRUD application. This allows your users to interact with the data and perform CRUD operations through forms and informative displays.
Step 9: Implement CRUD Logic in Controller
The controller methods play a central role in coordinating the various functionalities of your CRUD operations. Here are essential logics you’ll implement within each controller method:
- index method (Read)
- Use Laravel’s Eloquent ORM (Object-Relational Mapper) to retrieve data from the database. This involves querying the relevant model class (e.g., Post::all() to get all posts).
- Pass the retrieved data to the appropriate Blade template using the return statement.
- create method (Create)
- This method doesn’t require complex logic and returns the create.blade.php view to display the form for creating a new entry.
- store method (Create)
- This method handles form submissions for creating new entries.
- Validate the submitted data using Laravel’s built-in validation features or custom validation rules.
- If validation passes, use Eloquent to create a new record in the database using the model class (e.g., $post = Post::create($request->all());).
- Redirect the user to an appropriate route (e.g., back to the index page) with a success message.
- show method (Read)
- Use Eloquent to fetch a specific record based on the provided ID (e.g., $post = Post::find($id);).
- Pass the retrieved data to the show.blade.php view for displaying details.
- edit method (Update)
- Similar to the show method, retrieve the specific record based on the ID.
- Pass the retrieved data to the edit.blade.php view, pre-populating the form fields with the existing data.
- update method (Update)
- Handle form submissions for updating existing entries.
- Validate the submitted data.
- Use Eloquent to update the existing record using the model class (e.g., $post->update($request->all());).
- Redirect the user to an appropriate route with a success message.
- destroy method (Delete)
- Use Eloquent to delete the specific record based on the ID (e.g., $post->delete();).
- Redirect the user to an appropriate route (e.g., back to the index page) with a confirmation message.
Remember to handle errors and exceptions throughout your controller methods to ensure a user friendly experience. These steps will help your application perform the desired CRUD operations, managing data within the database.
Step 10: Test Application
Thorough testing helps to ensure CRUD application functions as expected and delivers a smooth user experience. Here are the steps for testing your Laravel application:
- Run Your Application. Start your Laravel application using the php artisan serve command. This will launch a development server, making your application accessible in your browser, typically at http://localhost:8000.
- Test CRUD Operations. Navigate through the various routes defined for your CRUD operations. Analyze user interactions by creating new records, editing existing ones, viewing details, and performing deletions.
- Verify Functionality. Observe the application’s behavior for each CRUD operation. Ensure data is displayed correctly, forms function as intended, and database interactions are performed successfully.
- Test Edge Cases. Go beyond basic functionality and test for potential edge cases, such as:
- Invalid form data submissions.
- Attempting to access non-existent resources.
- Testing user authorization and permissions (if applicable).
- Utilize Testing Tools. Consider using Laravel’s built-in testing framework; PHPUnit. You can also use any other testing tools to write automated tests for your application. This helps catch regressions and ensures your application remains stable as you make changes and add features.
Testing is an ongoing process. As you make changes and add features, continue to test thoroughly to maintain its functionality. For a tailored CRUD implementation, collaborate with a reputable Laravel development company. Their expertise can help you navigate complex scenarios and ensure your CRUD operations are scalable as per the specific needs.
Best Practices for Laravel CRUD
Indeed, previous steps provide a foundation for implementing CRUD operations in Laravel. Still, adhering to best practices can improve the quality, maintainability, and security of your application. Here are some key practices to follow:
Use Resource Controllers
What is it?
Laravel’s built-in way to organize all CRUD logic for a model (e.g., Post) into a single, standard controller.
Why do it?
It provides a clean, conventional structure. One line in your routes/web.php file (Route::resource(‘posts’, PostController::class)) automatically generates all seven routes (index, create, store, show, edit, update, destroy) you need.
Eager Loading
What is it?
Using with() to load related models upfront to solve the “N+1 query problem.”
Why do it?
It drastically reduces database calls. Instead of making one query to get all posts and then another query for each post’s author (N queries), Eager Loading gets all the data in just two queries.
Example: $posts = Post::with(‘author’)->get();
Form Requests
What is it?
Dedicated request classes that handle authorization and validation separately from your controller logic.
Why do it?
It keeps your controllers thin and clean. You move complex validation rules and authorization checks into a reusable class, making your code more organized and testable.
Database Indexing
What is it?
Adding indexes to columns you frequently search or order by (like id, email, created_at).
Why do it?
It’s the single biggest boost for read performance (SELECT … WHERE). It helps the database find data instantly without scanning the entire table.
Authorization
What is it?
Laravel’s system for defining rules about what a user can do (e.g., “can this user update this post?”).
Why do it?
It centralizes access control logic, making it secure and consistent. A Policy ensures a user can only update or delete their own records, preventing security breaches.
Database Transactions
What is it?
Wrapping multiple database operations into a single, atomic unit.
Why do it?
It guarantees data integrity. If any operation within the transaction fails, the entire transaction is rolled back. That prevents partial updates or corrupted data.
Pagination and Filtering
What is it?
Using Laravel’s built-in ->paginate(10) method to break large result sets into pages, and using query scopes for filtering (e.g., by category or date).
Why do it?
It dramatically improves load times and user experience by not sending thousands of records to the browser at once.
Database Optimization
What is it?
A broad practice including choosing correct data types (e.g., VARCHAR vs TEXT), avoiding unnecessary columns in SELECT *, and using database-specific features.
Why do it?
It ensures your database schema is efficient and scalable from the start, preventing performance bottlenecks as your data grows.
Caching
What is it?
Storing the results of expensive operations (like complex queries or API calls) in a fast storage system (like Redis or Memcached) for quick retrieval.
Why do it?
It removes repetitive load from the database. Data that doesn’t change often (like a list of categories) can be cached for minutes or hours, making your application incredibly fast.
Leveraging these best practices, you can build secure and maintainable CRUD functionalities within your Laravel applications. Remember, these practices are general, and the specific approaches you take may vary depending on the complexity and requirements of the project.
Let’s Conclude
Laravel CRUD operations are all about building a solid foundation for any application. You need to implement the fundamental Create, Read, Update, and Delete functions effectively. That will help establish a reliable backbone for your project.
Remember, moving from a basic working CRUD to an optimized one is what separates a functional application from a robust, secure, and scalable one. For that, using practices like Form Requests, Eager Loading, and Transactions is crucial. This disciplined approach ensures your code remains clean, maintainable, and efficient as your project grows.
So, want assistance with your Laravel CRUD operations and more? Then get our expert Laravel developers for hire today!
FAQs About Using CRUD in Laravel
Is CRUD implementation in Laravel suitable for large scale applications?
Laravel’s CRUD functionality is excellent for building the core functionalities of an application. But, it might not be sufficient for complex requirements of large-scale applications on its own. Other frameworks or libraries might be necessary alongside Laravel’s core functionalities.
How can I optimize the performance of CRUD operations in Laravel?
Optimizing performance involves various techniques like:
– Caching. Frequently accessed data can improve read operation speed.
– Database Indexing. Relevant columns in the database tables can accelerate searches and filtering.
– Eager Loading. Related data with the primary record retrieval can minimize database queries.
What role does middleware play in Laravel CRUD operations?
In Laravel CRUD operations, middleware acts as a filter for HTTP requests. It helps control access by handling authentication, authorization, and other checks before allowing users to create, read, update, or delete data.
Can I use Laravel CRUD with Vue.js/React frontend?
Yes, you can. Laravel works well with modern frontend frameworks like Vue.js and React. You can build your CRUD logic in Laravel and use APIs to connect it with your frontend. This makes your app faster, more dynamic, and easier to maintain.
Is Laravel CRUD only for MySQL?
No, Laravel CRUD is not limited to MySQL. Laravel supports several databases like PostgreSQL, SQLite, and SQL Server. You can choose the one that best fits your project. Just update your .env file with the correct database connection details.


