
Quick Summary
WebSockets in Laravel let your applications respond instantly, making data flow seamlessly between server and client. Messages, notifications, and dashboards update in real time, creating an interactive experience users notice. This guide walks you through setting up WebSockets, broadcasting events, and connecting your frontend, helping you build Laravel applications that are fast, smooth, and highly responsive without unnecessary complexity.
Table of Contents
Real-time updates are critical in web applications. Users expect to see new messages, notifications, or data changes as soon as they happen. Traditional request-and-response methods are too slow for this, which is why WebSockets are so valuable. They maintain a live connection between the browser and server, allowing updates to flow instantly without requiring a refresh.
With WebSockets in Laravel, you can build features like live chat, instant alerts, and auto-refreshing dashboards. Instead of waiting for users to request new data, the server pushes it as soon as it’s ready. In this blog, we’ll discuss WebSockets in Laravel, how they work, how to set them up, and how to use them in real projects. So, let’s dive in!
What are WebSockets?
WebSockets are a communication protocol that facilitates real-time, two-way data exchange between a web server and a client. It establishes a constant connection, allowing for continuous data flow in both directions. This enables applications to send and receive updates, fostering a more interactive and dynamic user experience.
How do WebSockets Work?
- Connection Establishment. The server acknowledges the request and drives a continuous connection using TCP (Transmission Control Protocol). This ensures reliable and ordered data delivery.
- Data Exchange. Once connected, both the client and server can send and receive data messages at any time. These messages are typically encoded in a format like JSON (JavaScript Object Notation) for transmission.
- Connection Termination. The connection can be closed by either the client or server by sending a closing message. This terminates the data exchange and releases resources.
By using this persistent and two-way communication channel, WebSockets enable real-time data exchange.
Concept of WebSocket in Laravel
Real-time updates in Laravel are built around channels, events, and subscriptions. Together, they enable your app to send data instantly to users without requiring them to refresh the page. This is ideal for features like chat apps, live notifications, dashboards, and more.
- Channels: Channels are communication pathways that connect the server to clients. You define them in the routes/channels.php file. Each channel serves as a dedicated space for exchanging specific types of data.
- Broadcasting Events: Events are actions that occur in your application, such as a new message being sent. Laravel can broadcast these events on specific channels. Once an event is triggered, all clients subscribed to that channel receive the data instantly.
- Subscribing to Channels: Clients, typically browsers, subscribe to channels to receive updates. This approach eliminates the need for repeated polling, ensuring a smooth, real-time data flow.
By combining these three elements, Laravel WebSockets make it possible to build highly interactive applications that deliver real-time updates efficiently, keeping users engaged and the app responsive. To automate background processes and handle repetitive operations seamlessly, use task scheduling in Laravel for better workflow management and efficiency.
Why Use WebSocket in Laravel?
When it comes to building web applications, Laravel shines as an efficient framework. However, incorporating real-time features often requires going beyond traditional HTTP requests – something that can be seamlessly managed when paired with concepts like Laravel middleware. When such a need arises, WebSockets come into play. It offers several benefits for Laravel applications:
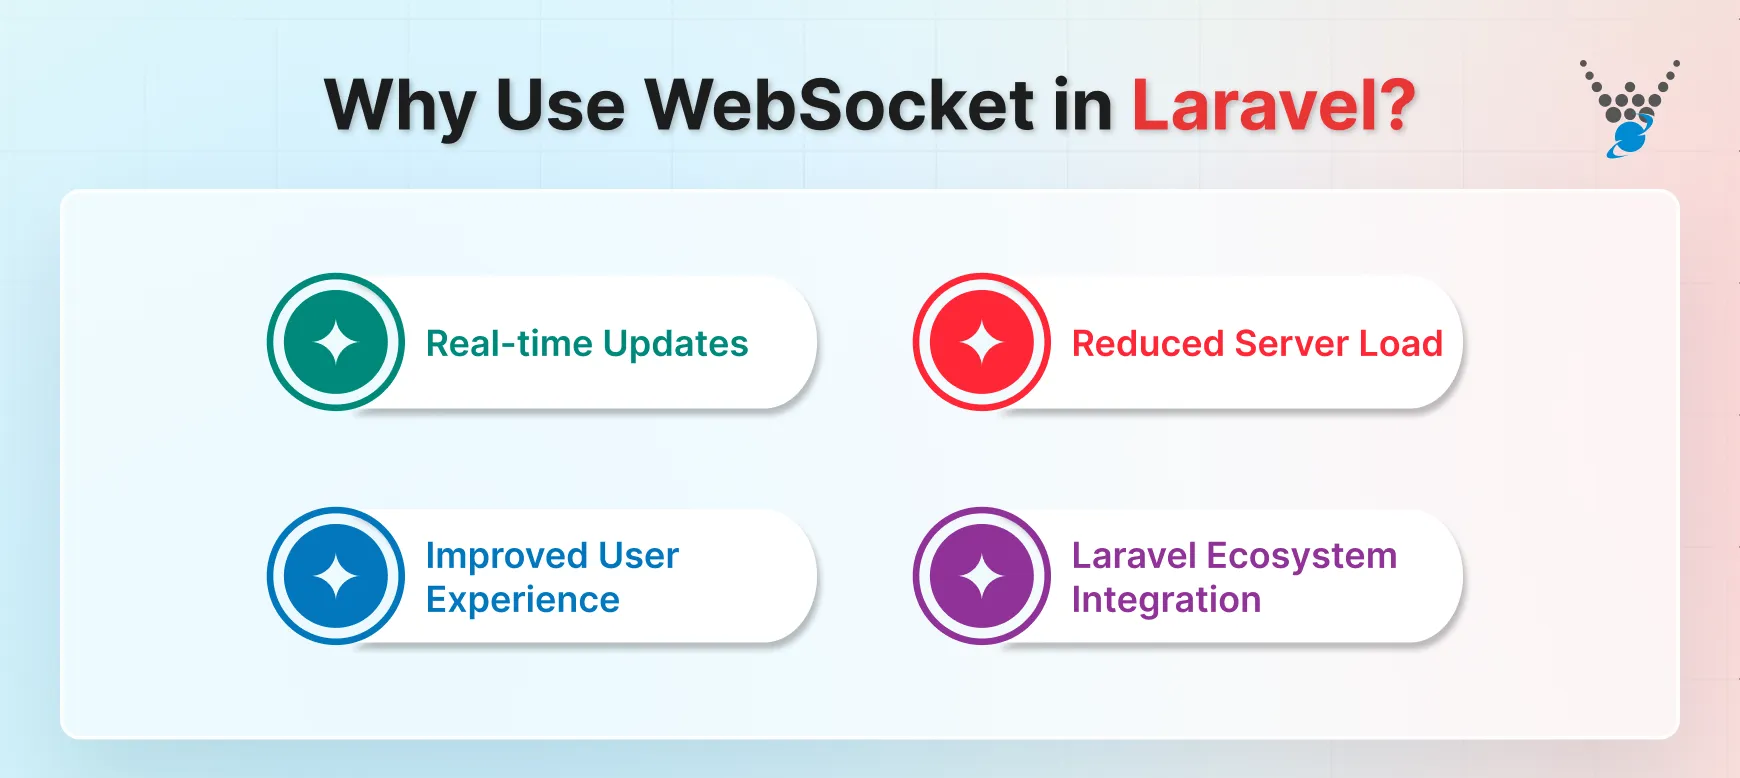
- Real-time Updates. WebSockets enable instant data exchange, preventing the need for constant page refreshes. This translates to a more responsive experience, keeping users engaged and informed in real-time.
- Reduced Server Load. By preventing the need for frequent HTTP requests, WebSockets minimize server load. This improves application performance and scalability. This is important for applications handling concurrent connections and real-time data updates. In many cases, using the Laravel Queue System alongside WebSockets ensures smoother background processing and message handling.
- Improved User Experience. The ability to send and receive data offers a more interactive and engaging user experience. This is beneficial for applications like chat rooms, collaborative tools, and live dashboards.
- Laravel Ecosystem Integration. Laravel offers integration with WebSockets through its broadcasting system and dedicated packages. This simplifies the process and leverages the existing Laravel infrastructure for data management and event handling. You can also enhance event flow using Laravel pipelines to process data through customizable stages.
If you’re looking for real-time features in your Laravel application, WebSockets are a valuable tool. However, integrating them requires careful planning and implementation — especially when working with Laravel microservices to handle distributed system communication efficiently. Their expertise can help you through the process, address any challenges, and build efficient WebSocket implementation.
How to Use WebSockets in Laravel?
WebSockets offers a powerful tool to improve your Laravel application by enabling two-way communication between the server and client. This guide has equipped you with a step-by-step approach to integrating WebSockets into your Laravel projects.
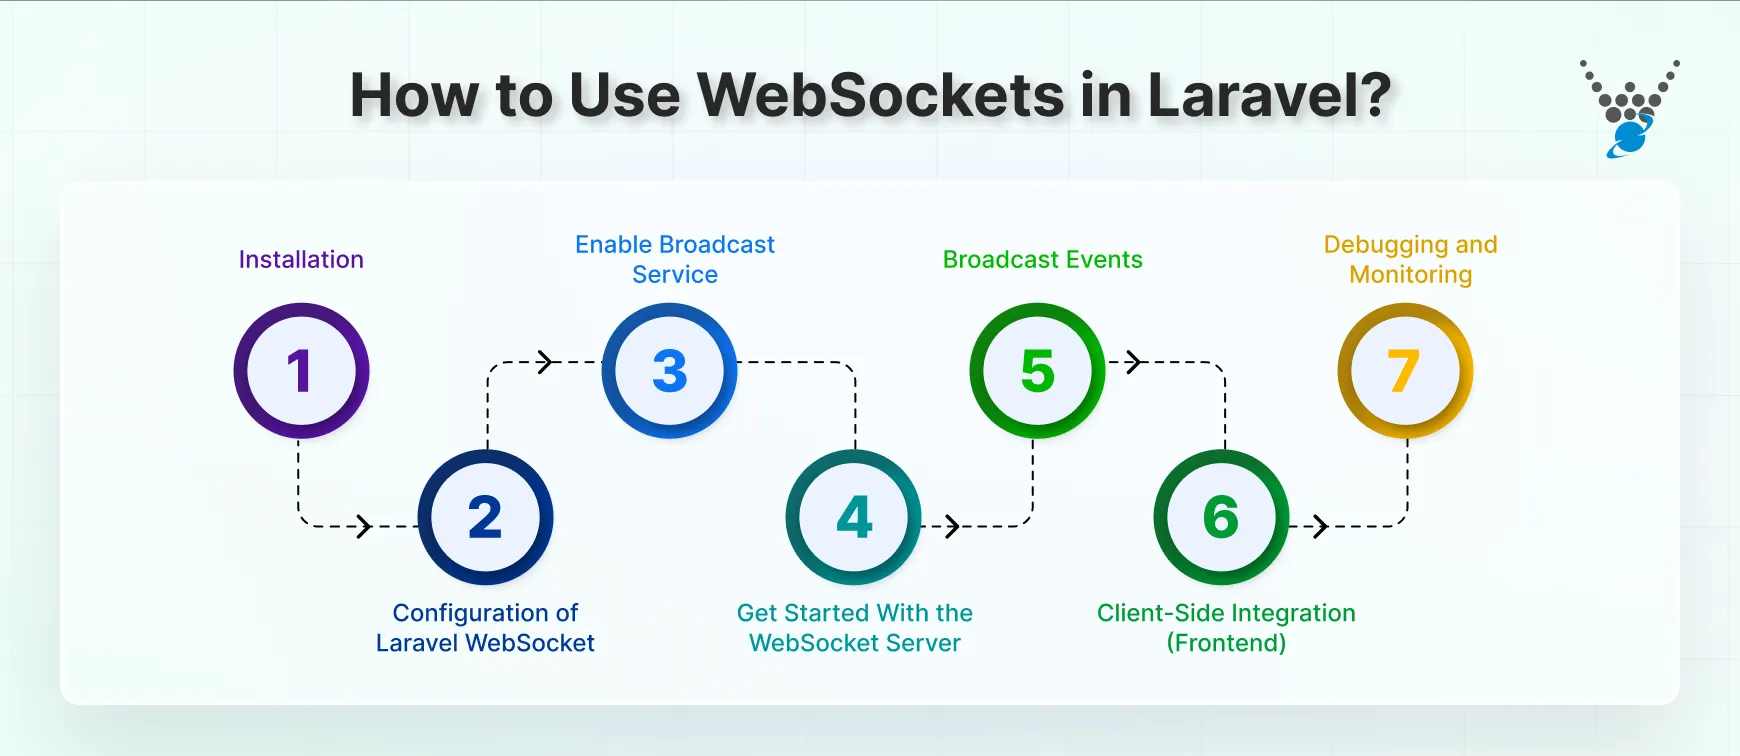
Step 1: Installation
The first step to using WebSockets in the Laravel application is installing the necessary package. We’ll use the laravel/websockets package, offering a reliable and well-supported solution for managing WebSocket connections.
1. Open Terminal. Navigate to your Laravel project’s root directory using your terminal.
2. Execute Command. Run the following command to install the laravel/websockets package through Composer:
composer requires laravel/websockets
3. Verify Installation. Once the installation finishes, check if the package is listed in your composer.json file under the “require” section. This confirms successful installation.
This command retrieves the package and its dependencies. It provides the core functionality for managing WebSocket connections in your Laravel application. It should be properly authenticated to ensure that only authorized users can send or receive real-time updates. You can implement additional authorization rules using Laravel policies and gates to control who can access specific events or channels.
Once installed, you’re ready to move on to the next step of configuration.
Step 2: Configuration of Laravel WebSocket
After installation, configuring the websockets package is important. It defines how your application interacts with WebSocket connections. This involves editing the config/websockets.php file.
1. Open File. Locate and open the config/websockets.php file within the Laravel project’s configuration directory.
2. Review and Customize. This file contains various configuration options for the websockets package. You can review and adjust settings based on your needs, such as:
- driver. This specifies the broadcasting driver you want to use (e.g., “pusher”, “ably”). Refer to the documentation for available options and configuration details.
- apps. Define the applications or channels allowed to connect to the WebSocket server. This allows you to control access and manage different configurations for each application.
- allowed_origins. Specify the allowed origins (domain names or URLs) that can connect to your WebSocket server. This restricts access and improves security.
3. Save the file: Once you’ve reviewed and adjusted the configuration options, save the config/websockets.php file.
These are just some common configurations. The specific settings you need might vary depending on your chosen broadcasting driver. Always check the official documentation or consult a Laravel development company for seamless implementation.
Step 3: Enable Broadcast Service
Laravel’s broadcast service acts as the central hub for facilitating communication between your application and connected clients. In this step, we’ll enable this service to manage WebSocket connections effectively.
1. Open Configuration File. Locate the config/broadcasting.php file within your Laravel project directory.
2. Enable “broadcast” Service. Within the file, ensure the broadcast service is enabled by setting its value to true.
3. Configure the Driver. Specify the broadcasting driver you want to utilize alongside the broadcast service. For example, if you’re using Pusher, set the driver option to Pusher.
Example:
'default' => env('BROADCAST_DRIVER', 'pusher'),
'connections' => [
    'pusher' => [
        'driver' => 'pusher',
        'key' => env('PUSHER_APP_KEY'),
        'secret' => env('PUSHER_APP_SECRET'),
        'app_id' => env('PUSHER_APP_ID'),
        'options' => [
            'cluster' => env('PUSHER_APP_CLUSTER'),
            'useTLS' => env('PUSHER_APP_TLS', true),
        ],
    ],
],
Remember to replace the placeholder values (PUSHER_APP_KEY, PUSHER_APP_SECRET, PUSHER_APP_ID, and PUSHER_APP_CLUSTER) with your actual Pusher credentials if you choose Pusher as your driver. With this step, you’ve created a foundation for broadcasting events and enabling real-time communication.
Step 4: Get Started With the WebSocket Server
Now that everything is configured, it’s time to launch the WebSocket server! This server acts as the bridge between your application and connected clients, facilitating real-time communication.
1. Execute the Command. Within your Laravel project’s root directory, run the following command to start the WebSocket server in the background:
php artisan websockets:serve
2. Verify Server Status. You can check if the server is running successfully by following the URL specified in your configuration (usually http://localhost:6001). You should see a message confirming the server is operational.
For production environments, consider running the WebSocket server as a service to ensure it stays up. Consult your operating system’s documentation for specific instructions on setting up services. By executing the command and verifying the server’s status, you’ve launched the WebSocket server.
Step 5: Broadcast Events
With the WebSocket server operational, you can now use Laravel’s event broadcasting system to trigger real-time updates and data exchange. This involves creating events and triggering their broadcast to connected clients.
1. Define Event. Create a new event class within your application using the php artisan make:event MyEventName command. This class will represent the data you want to broadcast.
2. Implement the ShouldBroadcast Interface. In your newly created event class, implement the Illuminate\Contracts\Broadcasting\ShouldBroadcast interface. This informs Laravel that this event should be broadcast.
3. Specify Broadcast Channel. Inside your event class, define the channel(s) your event should be broadcasted on using the broadcastOn method. This method should return an array of channel objects, such as new PrivateChannel(‘my-private-channel’).
class NewEvent implements ShouldBroadcast
{
    use Dispatchable, InteractsWithQueue, SerializesJobs;
    public function broadcastOn(): array
    {
        return [new PrivateChannel('user.' . auth()->id())];
    }
    // ... (rest of your event logic)
}
In this example, the event will be broadcasted on the private channel user.{user_id}, where {user_id} is the currently authenticated user’s ID.
4. Dispatch the Event. From your application code, dispatch the event using the broadcast helper function.
broadcast(new NewEvent());
This step lets you define and broadcast an event in your Laravel application. Users subscribed to the corresponding channel will receive the broadcasted event in real time. It also enables dynamic updates and interactive features within your application.
Step 6: Client-Side Integration (Frontend)
Connect your frontend application to the WebSocket server and handle broadcasted events. It will let you enable real-time functionality. Here’s how to achieve client-side integration:
1. Include JavaScript Library. Choose and include a suitable JavaScript library for managing WebSocket connections and handling broadcast events. Popular options include:
- Laravel Echo. Laravel’s official library offers a convenient way to interact with the WebSocket server and broadcast events.
- Standalone Libraries. Libraries like Socket.IO or Pusher JS provide platform-independent solutions for WebSocket interactions.
2. Establish Connection. Use the chosen library to establish a connection to the WebSocket server endpoint. This typically involves providing the server URL and relevant credentials (if necessary).
3. Listen for Events. Implement event listeners within your JavaScript code to handle incoming events. These listeners will receive the broadcasted data and allow you to update your frontend UI accordingly.
Replace placeholders like userId, MIX_PUSHER_APP_KEY, and MIX_PUSHER_APP_CLUSTER with your chosen driver and configuration values. By completing these steps, you can integrate the selected library on your frontend, enabling your application to receive and respond to real-time updates. To handle complex route structures efficiently, apply advanced routing techniques in Laravel for greater flexibility and control over your application’s routing logic.
Step 7: Debugging and Monitoring
As with any integration, ensuring the smooth operation of your WebSocket implementation is important. Here’s how to debug and monitor your WebSocket setup:
1. Use Browser Developer Tools. Leverage your browser’s developer tools to inspect WebSocket connections. You can also track network requests and any console errors that might occur during the communication process.
2. Check Server Logs. Monitor your Laravel application’s logs for errors or warnings related to the server or event broadcasting. This can provide valuable insights into issues on the backend.
3. Use Debugging Tools Provided by Driver. Many WebSocket drivers like Pusher offer dedicated debugging tools and dashboards. These tools can provide real-time data on connection health, event delivery status, and potential issues.
4. Implement Custom Logging. Consider adding custom logging within your application to track specific events and data-related interactions. This can help identify issues specific to your application’s use case.
Using these strategies, you can handle potential challenges and ensure your WebSocket in Laravel implementation works smoothly. This keeps your application real-time, responsive, and seamless for users.
Let’s Conclude
Real-time communication is essential for modern web applications. WebSockets in Laravel keep a constant connection between the server and client, allowing data to flow instantly. This makes apps more interactive, responsive, and engaging for users.
Setting up WebSocket in Laravel, from configuring channels and broadcasting events to connecting the frontend, enables smooth and efficient real-time updates. Proper implementation ensures minimal server load and a seamless experience, even for apps handling multiple concurrent users.
With WebSockets in Laravel, you can build chat systems, live dashboards, notifications, and other dynamic features that respond instantly, creating applications that feel alive and fully interactive. If you need a helping hand in boosting your Laravel project with integrated WebSockets, hire dedicated Laravel developers now!
FAQs About Using WebSockets in Laravel
How do WebSockets differ from Traditional HTTP Requests?
Traditional HTTP requests involve a single request and response. Where on the other hand, WebSockets establish a constant connection between client and server. This enables two-way communication, allowing both parties to send and receive data in real time without needing constant page refreshes.
How do I secure WebSockets in Laravel applications?
Securing your WebSocket implementation is crucial. Strategies include:
– Authentication and Authorization. Ensure only authorized users can access specific channels and data.
– Encryption. Use encryption protocols like TLS/SSL to protect data transmission between the client and server.
– Input Validation.Validate user-provided data to prevent security vulnerabilities like injection attacks.
Can WebSockets handle Real-Time broadcasting of events in Laravel?
Absolutely! Laravel’s built-in event broadcasting functionality leverages WebSockets to broadcast events to connected clients in real time. This enables features like live notifications, chat applications, and collaborative editing to update instantaneously.


