Table of Contents
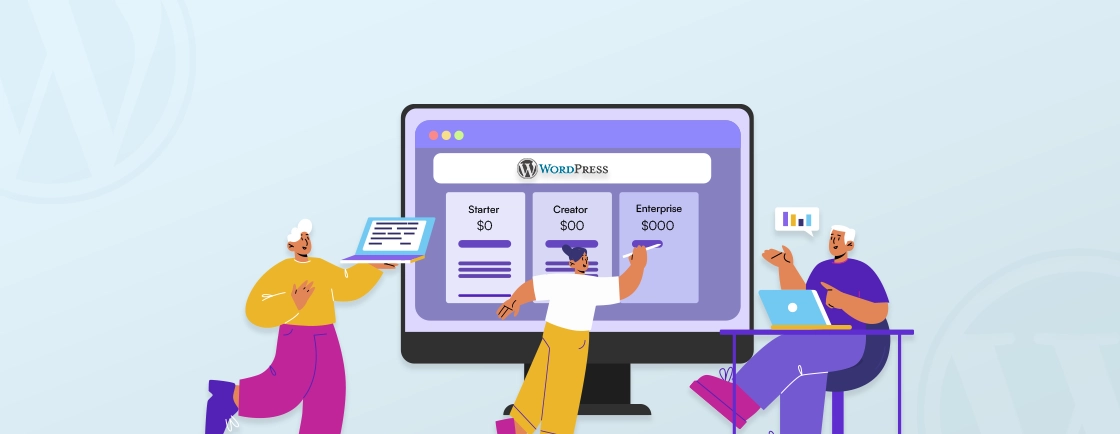
WordPress offers more than 59K plugins in its official repository. Choosing a suitable plugin can help you take care of almost every feature or functionality on your WordPress website, from enhancing SEO to adding eCommerce capabilities. But what if you need something truly unique, a feature no existing plugin offers?
Well, there are ways to create a WordPress plugin customized to your website or business requirements. While some coding skills may be required for this task, it’s not going to be as complicated as possible.
In this blog, I’ll explain how to create custom plugins, test them, and make them secure for site use. Let’s begin.
Why Create a Custom WordPress Plugin?
Creating a custom WordPress plugin can be a game-changer for your website, offering a range of benefits that off-the-shelf plugins might not provide.
Here’s why building your own plugin could be the perfect solution:
- Customization: With a custom plugin, you have full control over the features and functionality. Instead of relying on third-party plugins that might not fit your exact needs, you can tailor everything to match your specific requirements, making your website more unique and efficient.
- Performance optimization: Many plugins come loaded with features that you may never use, which can slow down your website. By creating your own plugin, you can include only the features you need, helping to keep your website lean and running smoothly.
- Compatibility: When you use multiple third-party plugins, there is a chance they might not be compatible with your website, causing conflicts or even breaking your site.
- Security: Security is a major concern with any website. Custom plugins allow you to implement the best WordPress security measures tailored to your site, which can help protect it from vulnerabilities that may exist in widely-used plugins.
- Monetization: If your custom plugin solves a common problem, there’s an opportunity to monetize it. You can offer it for sale to others or provide a freemium model with paid upgrades, turning your plugin into a potential revenue stream.
Building a custom WordPress plugin is not just about adding functionality—it’s about enhancing performance, ensuring compatibility, and even creating new business opportunities.
What You’ll Need for WordPress Plugin Development
Before you jump into creating a custom WordPress plugin, it’s essential to gather a few key tools and resources. Here’s what you’ll need to get started:
- A Text Editor: To write your plugin code, you’ll need a text editor. Some popular choices include Notepad++ and Atom. These editors provide a clean, user-friendly interface for writing and editing HTML, PHP, and other necessary coding languages.
- FTP Access to Your Hosting Account: Once your plugin is ready, you’ll need to upload it to your WordPress website. To do this, you’ll need FTP access to your hosting account. Tools like FileZilla are great for this purpose as they make uploading files easy. If you’re new to this, there are guides available to help you connect your text editor, like Notepad++, to your FTP server.
- A Working WordPress Installation: Make sure you have a working and up-to-date version of WordPress installed. It’s crucial to keep WordPress updated to avoid compatibility issues or security vulnerabilities. If you’re testing your plugin, you might want to set up WordPress locally on your computer so you can experiment without affecting a live website.
- Basic Knowledge of PHP, HTML/CSS, and JavaScript: You don’t need to be an expert, but a basic understanding of these coding languages is essential. PHP is the backbone of WordPress, and you’ll use it to write custom functions for your plugin. HTML and CSS will help you design and modify your plugin’s interface, and JavaScript is useful for adding dynamic features. Knowing these basics will make the process smoother.
- Understanding of WordPress API: The WordPress REST API allows your plugin to interact with WordPress core functions. Familiarity with this API will help you ensure your plugin is compatible with WordPress and other plugins. It also enables your plugin to perform advanced tasks like interacting with databases, creating settings, or customizing the admin area.
- Relational Databases: WordPress relies on a relational database to store its content and configurations. A good grasp of SQL and how relational databases work will be useful, especially if your plugin needs to store or retrieve data from the WordPress database.
In short, to develop a plugin, you’ll need the best WordPress tools like a text editor, FTP access, and a working WordPress installation, along with basic coding skills in PHP, HTML/CSS, JavaScript, and database knowledge. Familiarity with the WordPress API is also key for creating compatible and functional plugins. If you want a custom plugin tailored to your business needs, you can partner with a WordPress development agency.
How to Create a WordPress Plugin?
Now that you know the prerequisites of building a custom WordPress plugin, let’s take a step ahead! Here’s the process to develop your WP plugin.
Step 1: Research and Plan Your Plugin
Before diving into code, define your plugin’s purpose. Ask yourself: What problem does it solve? What specific features will it offer? Research existing plugins to ensure yours is unique or offers a significant improvement. A well-defined scope prevents feature creep and keeps development manageable.
Consider your target audience – who will use this plugin, and what are their technical skills? This will influence your design choices and documentation. Planning also includes choosing a descriptive and memorable name for your plugin.
Before you begin coding, familiarize yourself with the WordPress coding standards. Following these guidelines is an essential part of WordPress plugin development best practices, ensuring your plugin is maintainable, secure, and easy to share with others.
Step 2: Create Your Plugin Folder and Main File
All plugin files reside within a dedicated folder in the /wp-content/plugins/ in the WordPress file directory. Create a new folder with your plugin’s name (e.g., my-awesome-plugin). Inside this folder, create the main plugin file, which must have the same name as the folder (e.g., my-awesome-plugin.php). This file is the heart of your plugin and is loaded by WordPress.
Step 3: Add the Plugin Header Comment
Next, open your newly created PHP file in a text editor. The first thing you’ll need to do is write the plugin header comment. This tells WordPress that this file is a plugin and includes important meta information like the plugin’s name, description, version, and author.
Here’s an example of what the header comment should look like:
<?php
/*
Plugin Name: My First Plugin
Plugin URI: https://example.com/my-first-plugin
Description: A simple plugin to demonstrate how to create a WordPress plugin.
Version: 1.0
Author: Your Name
Author URI: https://example.com
*/
?>
Step 4: Build the Basic Structure of the Plugin File
Now that you’ve set up the plugin’s header, you’ll need to structure the rest of your file. The basic structure of a WordPress plugin includes functions, hooks, and the main body of your custom code. At this stage, you won’t need to add much, but here’s a basic template to guide you:
<?php
/*
Plugin Name: My First Plugin
Description: This is a simple plugin.
*/
function my_plugin_function() {
// Your code goes here
}
add_action('wp_footer', 'my_plugin_function');
Step 5: Writing a Custom Function for New Features
Now, let’s add some functionality to your plugin. Suppose you want to add custom text at the end of every post. You can do this by writing a simple function in your plugin file:
function my_text_addition($content) {
if (is_single()) {
$content .= '<p>Thank you for reading my blog post!</p>';
}
return $content;
}
add_filter('the_content', 'my_text_addition');
This function will take the content of a post and append your custom message to the end.
Step 6: Integrate Functions with WordPress Hooks and Filters
To make your function work, you’ll need to hook it into WordPress. WordPress uses hooks and filters to modify content and add functionality. In this case, you’ll use the add_filter function to modify the post content.
This filter modifies the content of every post by adding your custom text at the end. WordPress hooks come in two forms: actions and filters.
- Actions allow you to add or change functionality at specific points during WordPress’s execution.
- Filters modify data before it’s sent to the database or browser.
By using hooks and filters, you can integrate your custom functions into WordPress without modifying core files.
How to Test Your WordPress Plugin
After building your plugin, the next crucial step is testing it to ensure everything works perfectly across different environments. Here’s how you can effectively test your plugin:
- Start with a Staging Site: Always test your plugin on a staging site that mirrors your live environment. This way, you can observe how it behaves under real-world conditions without putting your live site at risk.
- Simulate Different Server Environments: WordPress tools like Docker or Vagrant can help you simulate various server setups, such as Apache, Nginx, or different PHP versions. This ensures your plugin runs smoothly across multiple hosting environments.
- Cross-Browser and Device Testing: Make sure your plugin works seamlessly on all major web browsers, including Chrome, Firefox, and Safari. Additionally, check its performance on different devices like desktops, tablets, and smartphones to ensure a great user experience.
- Test with Multiple WordPress Versions: It’s essential to test your plugin on both the latest and older versions of WordPress. This helps catch any compatibility issues and ensures your plugin functions well, regardless of the WordPress version being used.
- Stay Updated with WordPress Core Changes: WordPress core updates may deprecate certain functions. Regularly check for updates and make sure your plugin doesn’t rely on any deprecated functions, ensuring compatibility with future WordPress releases.
- Use WP_DEBUG: During development, enable the WP_DEBUG feature in WordPress. This will help you spot and resolve any unnoticed deprecations or errors that could affect your plugin’s performance.
- Check for Compatibility with Popular Themes and Plugins: Your plugin should play well with commonly used themes and plugins, like Divi, Astra, and Elementor. Test your plugin with these to ensure there are no compatibility issues that could affect its functionality.
- Perform Unit Testing with PHPUnit: Use PHPUnit to run unit tests, which allow you to test individual components of your plugin. This ensures that each part of your plugin is working as expected.
- Automate Testing with Continuous Integration Tools: Consider using tools like Travis CI or Jenkins to automate your testing process. These tools automatically test your plugin whenever changes are made, helping maintain ongoing functionality and compatibility.
By following these steps, you’ll ensure that your plugin works smoothly across different environments and WordPress setups. Proper testing in a reliable WordPress development environment will help you catch potential issues early, making sure your plugin is ready for a successful launch.
How to Make Your Plugin Secure
Once you have tested the functionalities of your plugin, it’s time to take security into consideration. Security is one of the most important steps to protect your site and users from potential attacks. Follow these steps:
- Clean the data to remove unwanted characters or malicious code. WordPress provides built-in functions like sanitize_text_field(), esc_url(), and esc_html() to help keep input data safe.
- Check that the data meets the expected format before processing it. For example, use is_email() to confirm a valid email address.
- Use wp_create_nonce() to create a nonce and include it in forms or URLs.
- Use check_admin_referer() or check_ajax_referer() to confirm the nonce before processing the request, ensuring it comes from a trusted source.
- Use functions like esc_html(), esc_attr(), and esc_url() when outputting data. This neutralizes any potentially harmful code and ensures the data displayed is safe.
- Use current_user_can() to ensure the user has the correct permissions.
- Restrict access to sensitive areas of your plugin based on user roles to prevent unauthorized changes to important settings or data.
- Regularly update third-party libraries or dependencies to fix potential vulnerabilities in external code.
- Always use HTTPS to encrypt data when communicating with external services.
- Use secure authentication methods like OAuth when interacting with APIs, and validate API responses to ensure they are legitimate.
- Provide clear documentation on how to configure and use your plugin securely.
- Encourage users to keep your plugin up-to-date by sending timely update notifications.
If your plugin handles sensitive data, consider choosing our WordPress security services for penetration testing.
How to Deploy Your WordPress Plugin
Now that your plugin is ready and the security considerations are also done, you might be excited to launch it, right? But let’s prepare it for the public release first.
Create a README File
Start by creating a README file for your plugin. This file should explain what the plugin does, how to install it, and how to use it. WordPress.org will extract information from this file for the plugin directory, so make sure it includes the following sections:
- Description: A brief overview of your plugin.
- Installation: Step-by-step instructions for installing the plugin.
- FAQ: Answers to common questions about your plugin.
- Screenshots: Images of your plugin in action.
- Changelog: Details of updates and changes in each version.
- Upgrade Notice: Information about upgrading the plugin.
Compress Your Plugin into a ZIP File
Before submitting, compress your plugin folder into a ZIP file. This file must include the entire plugin folder with all its contents. WordPress requires this format for installation, so ensure the structure within the zip is correct to avoid issues during installation.
Review WordPress Guidelines
Before submitting your plugin, familiarize yourself with the WordPress Plugin Directory guidelines. These guidelines help maintain plugin quality and security. Ensuring your plugin complies with them will speed up the review process.
Submit Your Plugin for Review
To submit your plugin:
- Visit the WordPress.org Plugin Submission Page and log in with your WordPress.org account (or create one).
- Upload the plugin’s ZIP file for review.

The WordPress team will review your plugin for security, functionality, and adherence to the guidelines. Be patient during this process, as it can take time. If any issues are found, you’ll receive feedback on what needs to be fixed before approval.
Manage Your Plugin via SVN
Once your plugin is approved, you’ll receive access to an SVN (Subversion) repository. This is where you will host and manage your plugin’s files. SVN is a version control system used by WordPress to handle plugin updates. Be sure to regularly update your repository with new versions as you release them.
By following these steps, you’ll successfully deploy your WordPress plugin and make it available for users through the WordPress plugin directory!
Add Banners, Icons, and Screenshots
To make your plugin visually appealing and professional, WordPress.org allows you to upload artwork and screenshots. These elements help users understand what your plugin looks like and how it works. Follow these guidelines when adding artwork.
Plugin Header Banner
This large image appears at the top of your plugin’s page. You can choose between two sizes:
- 772 x 250 pixels or 1544 x 500 pixels
- The image can be in JPEG or PNG format.
Plugin Icon
The plugin icon shows up in search results and plugin listings. It should be square and can be either:
- 128 x 128 pixels or 256 x 256 pixels
- The image should be in JPEG or PNG format.
Screenshots
You can add multiple screenshots to show how your plugin works. Name them like this:
- screenshot-1.png, screenshot-2.png, and so on.
Make sure the order of your screenshots matches the descriptions in your readme.txt file.
Once your artwork is ready, place it in the assets folder of your plugin’s local copy.
- In your Subversion (SVN) repository, click the Add button to include the new artwork files.
- Then, click the Commit button to upload them to the WordPress.org repository.
Launch Your Plugin
Now that your plugin is ready, it’s time to share it with the world. Here are two options for distributing your plugin:
A. Share Your Plugin on the WordPress Plugin Directory
By adding your plugin to the WordPress Plugin Directory, you can reach a vast audience of WordPress users. This is a great way to gain exposure and even attract new clients.
Once your plugin is approved, you’ll need to upload your files to the Subversion (SVN) directory. Once everything is set up, WordPress users will be able to find and install your plugin directly from their WordPress admin dashboard.
B. Sell Your Plugin on Your Website
Another option is to create a website to market and distribute your plugin. This allows you to:
- Showcase additional details, features, and benefits of your plugin.
- Offer documentation, tutorials, and support options.
- Promote other plugins you’ve developed.
Many developers use this method to promote premium plugins, offering a free or “lite” version in the WordPress directory while locking advanced features behind a paywall. You can also introduce different pricing tiers, offering various features depending on users’ needs and budget.
By sharing your plugin on your website, you have full control over marketing and monetization, and it offers a way to build a stronger connection with your users.
Start Developing Your WordPress Plugin Today!
Imagine your WordPress site needs a specific feature, but no existing plugin offers it. Building your own plugin is the solution. From planning your plugin’s functionality to leveraging WordPress hooks and filters, each step is crucial for building a robust and maintainable plugin.
Remember to prioritize code clarity, security best practices, and thorough testing throughout the development process. And if you need help with creating the plugin with the best results, you should hire dedicated WordPress developers today!
FAQs on How to Create a WordPress Plugin
What is the difference between a WordPress theme and a plugin?
A WordPress theme controls how your website looks, while a plugin controls what your website does by adding new features or functionality.
How to monetize a WordPress plugin?
You can monetize a WordPress plugin by offering a free version with paid upgrades, selling it on your website, or using a subscription model for premium features.
What language are WordPress plugins written in?
WordPress plugins are primarily written in PHP, but they can also include HTML, CSS, and JavaScript for front-end functionality.

Create with WordPress CMS
Build flexible and scalable websites using WordPress's powerful content management system.