Quick Summary
- A WordPress headless CMS with Angular separates content management from the frontend, improving speed and flexibility.
- Angular creates faster, smoother user experiences, while WordPress manages content via REST API or GraphQL.
- Headless WordPress works best for high-traffic, multi-platform, and application-style business websites.
- Robust API security, clean architecture, and SEO planning are essential for successful headless WordPress development.
Table of Contents
According to W3Techs, WordPress powers over 42.2% of all websites on the internet. This figure highlights the platform’s trust and reach. However, as businesses grow, the regular WordPress setup can start to feel limiting.
Modern websites require speed, flexibility, and smoother user experiences. A headless WordPress CMS combined with Angular addresses this by separating the frontend from the backend. WordPress manages content, while Angular delivers a fast, more dynamic user experience.
Developers gain more freedom, and businesses achieve better performance. Going headless also removes theme restrictions. This blog will focus on creating a headless WordPress-Angular setup step by step and exploring how WordPress with Angular works in real projects.
What is Headless WordPress?
Headless WordPress is when you use WordPress just to manage your content, while a separate framework handles how your website looks to visitors.
Normally, with WordPress, content management and website design are closely linked. WordPress stores your content, lets you choose a theme, fills in elements like the header and footer, and then sends the finished web page to visitors’ browsers.
With a headless setup, that visual part gets separated. WordPress just keeps track of your pages, blog posts, products, and media, while the frontend is built with something like React or Angular. The frontend asks WordPress for content using APIs like REST or GraphQL, and then it shows that content however it wants.
WordPress becomes the content engine, not the page builder.
A headless WordPress Angular project can work in different ways:
- Server-Side Rendering (SSR): Pages are rendered on the server before being sent to the browser.
- Static Site Generation (SSG): Pages are pre-built as static files and served very fast.
- Client-Side Rendering (CSR): Angular builds the page inside the browser after getting the content.
Project goals such as speed, SEO, and content update frequency determine which method to choose.
Simply put, in a headless setup, WordPress works as the brain, and a frontend framework like Angular works as the face.
Headless WordPress CMS: Benefits and Drawbacks
A WordPress headless CMS with Angular offers strong flexibility, but it also brings extra responsibility. Before choosing it, both the advantages and limitations should be clearly understood.
Benefits of Headless WordPress CMS
- Better Frontend Flexibility: WordPress relies heavily on themes and fixed templates. With a headless setup, developers have full freedom to create custom frontend experiences.
- Faster Performance: Pages load faster because the frontend runs independently of WordPress. Better caching, static generation, and CDN delivery improve speed and user experience.
- Stronger Security: The WordPress backend stays separated from the public-facing frontend. It reduces direct exposure and lowers the chances of common security attacks.
- Multi-Channel Content Delivery: One WordPress backend can send content to websites, mobile apps, dashboards, and smart devices. It keeps content consistent and avoids duplicate work.
- Freedom to Use Modern Technologies: Developers are not limited to WordPress themes or PHP-only development. WordPress with Angular allows the use of modern frontend tools for better results.
- Better Scalability: Frontend and backend can grow separately based on traffic and business needs. Large websites become easier to manage and improve over time.
- Cleaner Team Workflow: Content teams continue using WordPress, while developers focus on the frontend. This separation improves speed and reduces dependency between teams.
Drawbacks of Headless WordPress CMS
- Higher Development Cost: A headless WordPress setup is usually expensive. Separate frontend development, API handling, hosting, testing, and maintenance require more time and skilled developers. Small businesses may find the investment difficult to justify.
- More Technical Complexity: Managing two systems instead of one increases complexity. Teams must handle the WordPress backend, Angular frontend, APIs, deployment pipelines, and security together. The learning curve becomes much higher.
- Plugin Compatibility Issues: Many WordPress plugins are built for traditional theme-based websites. Some plugins may not work properly in a headless WordPress setup, especially visual builders, preview tools, and frontend-based plugins.
- Limited Content Preview: Content editors often expect live visual previews before publishing. In headless WordPress, preview options are usually more complex. Editors may need staging links or separate preview systems.
- More Maintenance Work: Both frontend and backend need updates, testing, and monitoring. Instead of maintaining one platform, teams manage two. The long-term responsibility and support effort increases.
- SEO Needs More Planning: WordPress handles many SEO basics automatically through themes and plugins. In a headless CMS with Angular, metadata, schema, sitemaps, and indexing often need manual setup. Without proper planning, SEO performance can suffer.
In short, headless WordPress offers speed, flexibility, and stronger frontend control, making it ideal for complex digital platforms. At the same time, it demands more cost, planning, and technical expertise, so the right choice depends on business goals and project scale.
To maximize the speed and flexibility of this architecture while minimizing technical overhead, partner with a WordPress development company to ensure a seamless and secure implementation.
What is Angular?
Angular is one of the top frontend frameworks used to build dynamic, fast, and scalable web applications. It helps developers create modern websites where users can interact smoothly without constant page reloads.
It is widely used for platforms that need speed, structure, and long-term scalability. Many businesses choose Angular WordPress architecture when they want strong frontend performance with a reliable backend like WordPress.
Angular mainly works with three core technologies:
- HTML: Creates the page structure and layout
- CSS: Handles design, styling, and visual appearance
- TypeScript: Manages logic and application behavior
TypeScript is the main programming language in Angular. It is similar to JavaScript but gives stronger control and better error handling.
Key Concepts in Angular
Understanding a few basic concepts makes Angular much easier to follow.
- Components: Components are small parts of the user interface. Examples include headers, footers, product cards, and login forms. Each part works separately, which makes development cleaner and easier to manage.
- Services: Services handle business logic, data processing, and API calls. For example, fetching blog posts from a WordPress headless CMS with Angular usually happens inside a service.
- Routing: Routing controls movement between pages. It helps users move between the home page, product page, contact page, and dashboard sections without full page reloads.
- Modules/Standalone Components: These help organize the application structure. They keep the project clean, especially as the website grows and becomes more complex. Modern Angular also supports standalone components, which reduces extra setup.
How to Set Up a WordPress Headless CMS with Angular
Building a WordPress headless CMS with Angular becomes much easier when the process is followed step by step. WordPress manages the content, and Angular handles how that content is displayed to users.
Step 1: Set Up WordPress Backend
The first step is preparing WordPress as the backend content system.
WordPress Installation
Firstly, XAMPP needs to be installed for local development.
Download it from Apache Friends and start:
- Apache
- MySQL
These services are required to run WordPress locally.
Next, download WordPress from the official website and extract it inside the htdocs folder.
Example paths:
- Windows: C:\xampp\htdocs\wp-headless
- Linux: /opt/lampp/htdocs/wp-headless
After that, create a database by opening:
http://localhost/phpmyadminCreate a new database for the project.
Then open:
http://localhost/wp-headlessComplete the WordPress setup by adding database details, admin username, password, and site information.
Once finished, it is ready to work as the backend for the headless WordPress Angular project.
Step 2: Configure WordPress REST API
The WordPress REST API acts as the bridge between WordPress and Angular.
2.1 Verify REST API is Enabled
WordPress REST API is built into WordPress 4.7 onward.
A quick test can confirm it:
curl http://localhost/wp-json/wp/v2/posts
If posts appear in JSON format, the API is working correctly.
2.2 Configure Permalinks
Go to:
- Dashboard → Settings → Permalinks
- Choose any option except Plain, then click Save Changes.
Clean permalinks are necessary for REST API endpoints to work properly.
Security Essentials
A proper headless WordPress setup must secure API access from the beginning.
1. Restrict CORS in Production
Never use * in production.
Only trusted domains should be allowed.
Example:
header('Access-Control-Allow-Origin: https://yourdomain.com');
This protects the API from unwanted external access.
2. Add Security Headers
Security headers help protect the application from common attacks.
Add them inside the .htaccess file:
<IfModule mod_headers.c>

    Header set X-Content-Type-Options "nosniff"

    Header set X-Frame-Options "SAMEORIGIN"

    Header set Strict-Transport-Security "max-age=31536000"

</IfModule>
These headers improve browser-level protection.
3. Use HTTPS in Production
Always use secure connections.
Correct:
https://yourdomain.com/wp-json/wp/v2/postsAvoid:
http://yourdomain.com/wp-json/wp/v2/postsHTTPS protects data in transit and builds trust.
4. Implement Rate Limiting
Rate limiting prevents API abuse and protects the server from too many requests.
Example:
add_filter('rest_pre_serve_request', function ($value) {
    $ip = sanitize_text_field(wp_unslash($_SERVER['REMOTE_ADDR']));
    $cache_key = 'api_requests_' . md5($ip);
    $requests = get_transient($cache_key);

    if ($requests > 100) { // 100 requests/minute
        wp_die('Too many requests', 429);
    }

    set_transient($cache_key, ($requests ?? 0) + 1, 60);
    return $value;
});
Here, the limit is 100 requests per minute.
5. Keep WordPress Updated
Regular updates reduce security risks.
Using WP-CLI:
wp core update
wp plugin update --all
wp theme update --all
Keeping WordPress updated is one of the simplest and strongest security habits.
Next Steps
Once the API is ready, the frontend can use endpoints like:
- Fetch posts: GET /wp-json/wp/v2/posts
- Get categories: GET /wp-json/wp/v2/categories
- Search: GET /wp-json/wp/v2/posts?search=query
- Filter: GET /wp-json/wp/v2/posts?categories=1
Now WordPress is ready to work as a headless CMS for Angular
Step 3: Create an Angular Application
The next step is building the frontend using Angular.
3.1 Install Node.js
Install Node.js from the official website.
Node.js is required to run Angular CLI and manage project dependencies.
Verify installation:
node -v
npm -v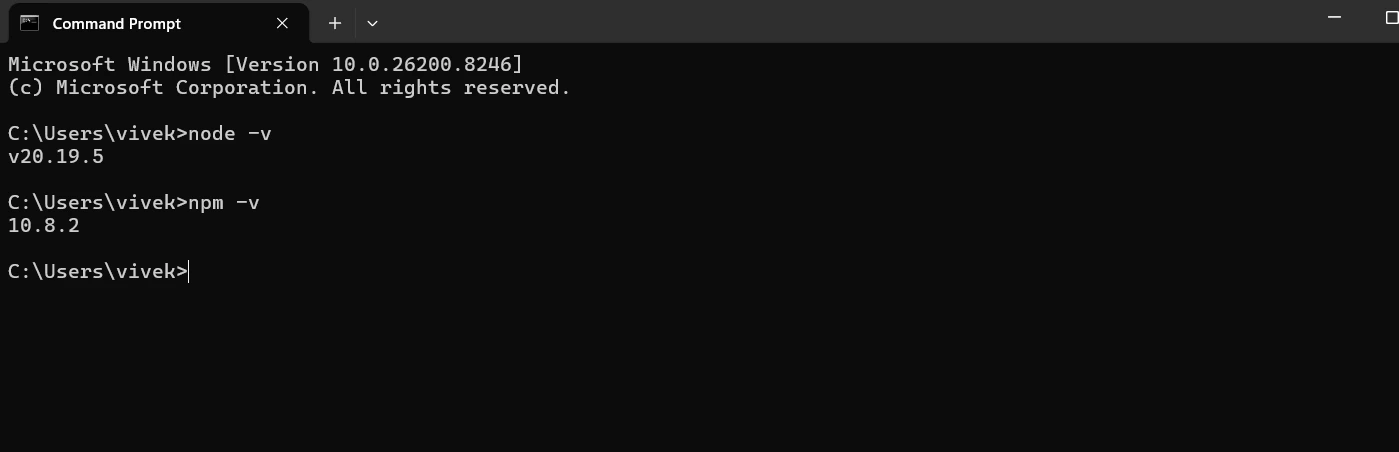
If both versions appear, installation is complete.
3.2 Optional – Use NVM
Instead of installing Node.js directly, NVM can be used.
It helps manage multiple Node.js versions.
For Windows, download from:
https://github.com/coreybutler/nvm-windows/releases
Install & Use:
nvm install 18
nvm use 18
This is useful for projects that require specific Node versions.
What is Angular CLI?
Angular CLI is a command-line tool used to create, manage, and build Angular applications.
Why is Angular CLI Needed?
Without Angular CLI, setting up Angular manually becomes complex and time-consuming.
It helps by:
- Creating a new Angular project with proper structure
- Generating components, services, and modules automatically
- Running a local development server
- Building the application for production
- Managing dependencies and configurations
Install Angular CLI :
Open Command Prompt / PowerShell / Terminal:
npm install -g @angular/cli
Verify:
ng version
It displays the installed versions of Angular CLI and Angular.
3.4 Windows Only – PowerShell Fix
Why is This Required?
On Windows, PowerShell restricts script execution by default for security reasons.
It can block Angular CLI commands and result in errors such as:
ng cannot be loaded because running scripts is disabled on this system
How to Fix
Run PowerShell as Administrator and execute:
Set-ExecutionPolicy RemoteSigned
When prompted, type: Y
What Does This Command Do?
- Allows locally created scripts to run
- Keeps downloaded scripts restricted unless signed
- Enables Angular CLI commands to work properly
Important Notes:
- Only required for Windows systems
- Administrative access is needed
- Safe and commonly used for development environments
Configure PowerShell execution policy before running Angular CLI commands to avoid script execution errors during development.
3.5 Create Angular Project
Create the project:
ng new wordpress-angular-app
It may take a few minutes.
Choose:
- Routing → Yes
- Styles → CSS or SCSS
3.6 Navigate to Project
Move inside the project folder:
cd wordpress-angular-app
3.7 Run Application
Start the development server:
ng serve
3.8 Open in Browser
Open:
http://localhost:4200
The default Angular welcome page confirms the setup is successful.
Step 4: Connect Angular to WordPress API
Now Angular must connect with WordPress using REST APIs.
Angular requests content from WordPress through REST API endpoints.
WordPress sends content in JSON format, and Angular displays it on the frontend.
4.2 WordPress API Endpoint
Example endpoint:
https://your-site.com/wp-json/wp/v2/postsThis returns posts in JSON format.
4.3 Create Model (Type Safety)
Create interfaces to represent API response data.
// src/app/models/post.ts
export interface Post {
  id: number;
  title: {
    rendered: string;
  };
  excerpt: {
    rendered: string;
  };
  content: {
    rendered: string;
  };
}
Using interfaces improves type safety and maintainability.
Avoid using any.
4.4 Configure Environment
Store API URLs inside the environment file instead of hardcoding them.
// src/environments/environment.ts
export const environment = {
  production: false,
  apiUrl: 'https://your-site.com'
};
This makes it easier to switch between:
- Development
- Production
It also keeps the project cleaner.
4.5 Implementation (NgModule – Legacy Angular)
Applicable for Angular 2–14.
Required steps:
- Import HttpClientModule in AppModule
import { HttpClientModule } from '@angular/common/http';
@NgModule({
  imports: [
    BrowserModule,
    HttpClientModule
  ],
})
export class AppModule {}
- Create a service for API calls
// src/app/services/wp.service.ts
import { Injectable } from '@angular/core';
import { HttpClient } from '@angular/common/http';
import { Observable } from 'rxjs';
import { environment } from '../../environments/environment';
import { Post } from '../models/post';
@Injectable({
  providedIn: 'root'
})
export class WpService {
  private apiUrl = `${environment.apiUrl}`;
  constructor(private http: HttpClient) {}
  getPosts(): Observable<Post[]> {
    return this.http.get<Post[]>(this.apiUrl);
  }
}
- Use Service inside Component
import { Component, OnInit } from '@angular/core';
import { WpService } from '../services/wp.service';
import { Post } from '../models/post';
@Component({
  selector: 'app-posts',
  templateUrl: './posts.component.html'
})
export class PostsComponent implements OnInit {
  posts: Post[] = [];
  constructor(private wpService: WpService) {}
  ngOnInit(): void {
    this.wpService.getPosts().subscribe({
      next: (data) => this.posts = data,
      error: (err) => console.error(err)
    });
  }
}
- Display data inside templates
<div *ngFor="let post of posts">
  <h2 [innerHTML]="post?.title.rendered"></h2>
  <p [innerHTML]="post?.excerpt.rendered"></p>
</div>
This keeps API logic separate from UI logic.
4.6 Implementation (Standalone – Modern Angular)
Applicable for Angular 16+.
Required steps:
- Enable HttpClient
import { provideHttpClient } from '@angular/common/http';
export const appConfig = {
  providers: [
    provideHttpClient()
  ]
};
- Use the same service structure.
getPosts(): Observable<Post[]> {
  return this.http.get<Post[]>(this.apiUrl);
}
- Create Components using Signals.
import { Component, OnInit, signal } from '@angular/core';
posts = signal<Post[]>([]);
loading = signal<boolean>(true);
error = signal<string | null>(null);
ngOnInit() {
  this.wpService.getPosts().subscribe({
    next: (data) => {
      this.posts.set(data);
      this.loading.set(false);
    },
    error: () => {
      this.error.set('Failed to load posts');
      this.loading.set(false);
    }
  });
}
- Use modern template syntax for rendering.
@if (loading()) {
  <p>Loading...</p>
} @else if (error()) {
  <p>{{ error() }}</p>
} @else {
  @for (post of posts(); track post.id) {
    <h3 [innerHTML]="post?.title?.rendered"></h3>
  }
}
This is the modern Angular approach for better performance and cleaner code.
4.7 Important Notes
Always follow these practices:
- Use environment files for API URLs
- Avoid using any
- Always define interfaces
- Use optional chaining (?.) to prevent runtime errors
- Ensure WordPress API is publicly accessible
These small practices prevent major issues later.
Step 5: Display Data in Angular Components
The final step is showing WordPress content inside Angular components.
The component receives data from the service, stores it, and displays it inside the UI using templates.
5.1 Overview
The component is responsible for:
- Receiving data from the service
- Storing data in variables or signals
- Rendering content inside the UI
5.2 Key Concepts
Before implementation, understand:
- Component → Handles UI logic
- Template (HTML) → Displays data
- Data Binding → Connects data to UI
- Optional Chaining (?.) → Prevents runtime errors when data is undefined
These concepts make Angular easier to manage.
5.3 Implementation (NgModule – Legacy Angular)
Applicable for Angular 2–14.
Includes:
- Component Logic
import { Component, OnInit } from '@angular/core';
import { WpService } from '../services/wp.service';
import { Post } from '../models/post';
@Component({
  selector: 'app-posts',
  templateUrl: './posts.component.html'
})
export class PostsComponent implements OnInit {
  posts: Post[] = [];
  loading: boolean = true;
  error: string | null = null;
  constructor(private wpService: WpService) {}
  ngOnInit() {
    this.wpService.getPosts().subscribe({
      next: (data) => {
        this.posts = data;
        this.loading = false;
      },
      error: () => {
        this.error = 'Failed to load posts';
        this.loading = false;
      }
    });
  }
}
- Template (HTML)
<h2>WordPress Posts</h2>
<div *ngIf="loading">Loading...</div>
<div *ngIf="error">{{ error }}</div>
<div *ngFor="let post of posts">
  <h3 [innerHTML]="post?.title?.rendered"></h3>
  <p [innerHTML]="post?.excerpt?.rendered"></p>
</div>
The component fetches data, and the template displays it.
5.4 Implementation (Standalone + Signals – Modern Angular)
Applicable for Angular 16+.
Includes:
- Component Logic using Signals
import { Component, OnInit, signal } from '@angular/core';
import { WpService } from '../services/wp.service';
import { Post } from '../models/post';
@Component({
  selector: 'app-posts',
  standalone: true,
  templateUrl: './posts.component.html'
})
export class PostsComponent implements OnInit {
  posts = signal<Post[]>([]);
  loading = signal(true);
  error = signal<string | null>(null);
  constructor(private wpService: WpService) {}
  ngOnInit() {
    this.wpService.getPosts().subscribe({
      next: (data) => {
        this.posts.set(data);
        this.loading.set(false);
      },
      error: () => {
        this.error.set('Failed to load posts');
        this.loading.set(false);
      }
    });
  }
}
- Modern Template Control Flow
<h2>WordPress Posts</h2>
@if (loading()) {
  <p>Loading...</p>
} @else if (error()) {
  <p>{{ error() }}</p>
} @else {
  @for (post of posts(); track post.id) {
    <div>
      <h3 [innerHTML]="post?.title?.rendered"></h3>
      <p [innerHTML]="post?.excerpt?.rendered"></p>
    </div>
  }
}
This improves readability and frontend performance.
5.6 Best Practices
For a clean, headless CMS Angular project:
- Always use interfaces instead of any
- Use optional chaining (?.) to avoid runtime errors
- Keep API logic inside services, not components
- Handle loading and error states for better UX
- Use trackBy id for better performance in loops
Good structure improves performance and makes future updates easier.
Following these five steps creates a complete WordPress headless CMS with Angular setup. WordPress manages the content, Angular controls the experience, and together they build a faster, more flexible, and modern website. And if you want your headless CMS to be built by experts, hire expert WordPress developers today.
When to Use Headless WordPress
Headless WordPress makes a lot of sense when the business needs more than a standard website, and the frontend needs more speed, flexibility, or control.
When the Same Content Has to Appear in Multiple Places
Many businesses publish the same content across multiple platforms, including websites, mobile apps, customer portals, smart devices, and more.
Preparing unique content for each platform creates extra work and often leads to mistakes. A headless WordPress setup solves that problem by keeping one central content source. All platforms can pull content from a single WordPress backend via APIs. Therefore, the updates are faster, and the content remains consistent everywhere.
When the Project is More Like an Application Than a Website
Member portals, learning platforms, booking systems, and SaaS dashboards are examples in which the website behaves like an application.
These platforms need dynamic actions, real-time updates, and smooth user interaction. Angular WordPress architecture works better here because Angular handles complex frontend behavior more efficiently than traditional WordPress themes.
When High Traffic and Performance are Most Important
Large websites with heavy traffic often face speed and scaling problems. Traditional WordPress can be optimized with caching, but there are still limits.
Slow loading affects SEO, sales, or user experience. A headless WordPress Angular setup can offer better performance in such cases.
When Development Teams Need More Frontend Control
Sometimes developers need design freedom that’s not there in WordPress themes, making professional web design services a better fit for complex projects. Custom animations, advanced UI, modern app-like experiences, and API-based workflows are easier to add with a headless setup.
At the same time:
- Content teams continue using the WordPress dashboard.
- Developers work with Angular and modern frontend tools.
This separation improves workflow and reduces dependency between teams.
If your project falls into any of these categories, working with specialized headless CMS development services ensures the architecture is designed correctly from day one saving time, reducing rework, and delivering a scalable solution tailored to your goals.
Best Practices for Headless WordPress
A WordPress headless CMS with Angular needs a clean structure, security, and an easy-to-manage workflow as the project grows. Following the right practices from the beginning saves time, reduces errors, and makes the system more reliable.
Keep Frontend and Backend Separate
- A headless WordPress setup should keep WordPress and Angular in separate repositories.
- WordPress handles content and backend logic. Angular manages the user experience and frontend behavior.
- Keeping them separate leads to safe updates, easier testing, and cleaner long-term maintenance.
Use Git and CI/CD for Deployment
- Manual deployment creates mistakes, especially in larger projects.
- Using Git helps track every change, while CI/CD pipelines automate testing and deployment. The downtime is reduced, and releases are smooth.
- It also helps teams work faster without breaking the live website.
Protect APIs and Sensitive Data
- In headless WordPress, content moves through APIs. Poor API security can expose private data.
- Only public content should be openly accessible. Admin routes, user details, and private fields must stay protected with proper authentication and permissions.
- Security should never be treated as an afterthought.
Prefer GraphQL for Better Data Control
- Both REST API and GraphQL can work, but GraphQL often gives better control in Angular headless CMS projects.
- It allows developers to request only the exact data needed, rather than receiving extra, unused information.
- It improves speed, reduces payload size, and makes frontend development cleaner.
Avoid Overfetching Data
- Fetching too much data slows performance and creates unnecessary server load.
- API queries should be focused and only return what the page actually needs. Smaller responses improve speed and make the frontend easier to manage.
- Clean queries are a major part of an efficient headless CMS.
Use ACF JSON Sync for Custom Fields
- Many projects use Advanced Custom Fields (ACF) for flexible content management.
- Saving ACF field groups in JSON helps with version control for those settings. It makes team collaboration easier and prevents field structure from getting lost during updates or migrations.
- It is very useful in larger WordPress and Angular projects.
Plan SEO from the Beginning
- Meta titles, descriptions, structured data, and canonical tags should be planned early.
- URLs should be clean.
- SSR or SSG also helps improve SEO performance in a headless setup.
Overall, a successful headless WordPress project depends on a clean structure, secure APIs, and sound development practices. Plan from the beginning to make it easier to scale, maintain, and improve.
Conclusion
A WordPress headless CMS with Angular gives businesses a smarter way to build websites. WordPress handles content, while Angular delivers a faster, more flexible frontend experience. The setup improves performance, supports better scalability, and removes the limitations of traditional theme-based development.
For projects that need speed, custom user journeys, and multi-platform content delivery, headless WordPress is a long-term solution. But going headless requires proper planning. API security, frontend architecture, SEO setup, and ongoing maintenance all play an important role.
It might not be the right fit for every website, but for growing businesses and complex digital platforms, it offers high value. If you want to unlock the full potential of a headless architecture, hire Angular developers and create a stronger foundation for growth.
FAQ Related to Headless WordPress Site with Angular
What is Headless WordPress?
Headless WordPress is a CMS setup where WordPress is used for managing content while a different technology is used for the front-end display to visitors1.
Why use Headless WordPress?
Benefits include greater flexibility in programming, enhanced security, multi-channel content management, improved site loading time, and deeper visual control1.
How to set up WordPress for Angular?
Enable Rest API in WordPress, adjust permalink settings, and use tools like Postman to test API endpoints1.
How to get started with Angular for a Headless WordPress site?
Install necessary dependencies like NodeJS, NPM, and Angular CLI. Create a new Angular app using CLI and develop your front-end while interacting with WordPress through REST API1.