Quick Summary
Struggling to launch your Laravel app? Our guide makes deployment simple. Learn 3 easy methods: Forge for simple server management, Vapor for automatic scaling, and CI/CD for automated workflows. We include common issue fixes and help you choose the right approach. Stop worrying about technical complexity. Transform deployment from a headache into a smooth, reliable process. Launch with confidence.
Table of Contents
So your Laravel application is finally ready. It works flawlessly on your local machine. But the thought of moving it to a live server fills you with dread. What about environment variables, database migrations, and compiling assets? One wrong move and your app could crash publicly.
This gap between local development and a live production environment is where many projects face issues. An unstable Laravel deployment is a risk to your application’s security and performance. You need a process that is repeatable, secure, and doesn’t require a system administrator’s expertise to manage.
This guide will help you with a perfect production launch. I’ll walk you through the clearest methods to deploy your Laravel project. You’ll learn how to configure your server, automate the boring parts, and implement essential Laravel deployment best practices. So, let’s begin.
Why Deploy a Laravel App?
Deploying your Laravel application is a crucial step after development, ensuring that users can access and interact with it seamlessly. A proper deployment setup enhances scalability, security, and performance to handle real-world traffic efficiently. For cloud-based hosting, deploy Laravel AWS Elastic Beanstalk to achieve an automated and highly scalable deployment environment.
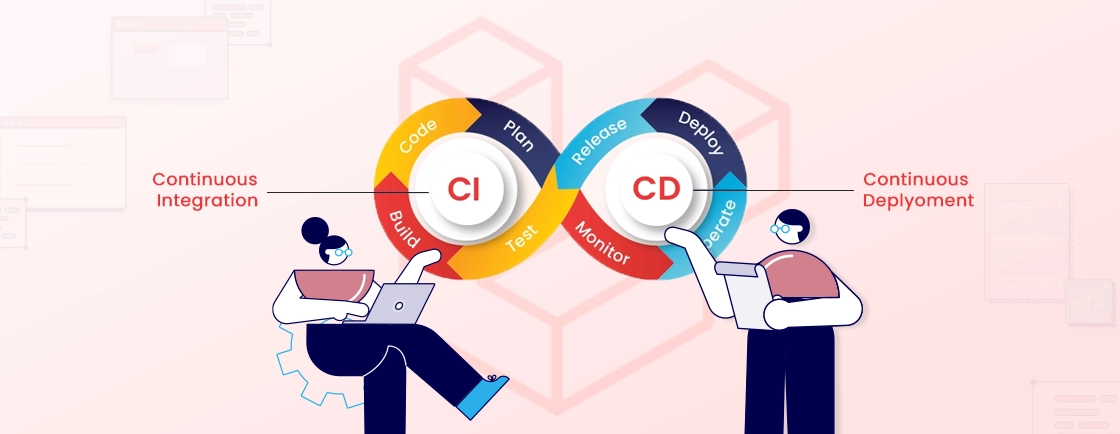
Moreover, deploying a Laravel app helps in implementing continuous integration and continuous deployment (CI/CD) practices. It ensures smoother updates and maintenance, leading to a more robust and reliable application.
Benefits of Deploying a Laravel App
Deploying a Laravel app offers several benefits that enhance both the functionality and user experience of your web application. Here are the key benefits of deploying a Laravel app:

- Security and Stability: A well-deployed Laravel app leverages the PHP framework’s security features to protect against vulnerabilities. Deployment tools can automate security updates, safeguarding your Laravel site. Additionally, Laravel’s structure promotes stable operation by separating concerns and avoiding conflicts.
- Scalability and Performance: It allows you to leverage cloud-based resources to handle fluctuating traffic. Laravel’s built-in caching mechanism and queue systems enhance performance by handling tasks efficiently. This ensures a smooth user experience even as your application grows.
- Reduced Downtime: Deployment tools like Forge or Vapor can facilitate zero-downtime deployments. This means your application remains available to users during updates, ensuring continuous service.
- Cost-Effectiveness: Cloud-based deployment offers pay-as-you-go options, offering flexibility to scale resources based on your needs. This can be more cost-effective than maintaining dedicated servers, especially for applications with fluctuating traffic.
- Easier Management: It automates tasks like code transfer, configuration updates, and server management. This frees up your development team to focus on other priorities and reduces the risk of errors during manual deployments.
- Monitoring Tools: Deployment platforms often provide built-in monitoring tools that track application health and performance. This allows you to identify and address issues quickly, ensuring a positive user experience.
Deploying a Laravel application offers a secure, scalable, and cost-effective solution for your web application. It streamlines management, minimizes downtime, and frees up time for Laravel developers. Now, let’s begin with understanding the deployment process.
How to Deploy a Laravel App?
There are several ways to deploy a Laravel application. Here, we’ll explore two default and easy tool options: Laravel Forge and Laravel Vapor. Let’s begin with the prerequisites.
Prerequisites for Deploying a Laravel App
Before diving into the deployment methods, ensure you have the following:
- A Laravel application: You’ll need a ready-to-deploy Laravel project.
- Version control system: Use Git for version control and code management.
- A domain name: This is the address users will access your app through (e.g., yourcompany.com).
Once you have the prerequisite, let’s start the deployment using Laravel Forge.
Method 1: Deploying with Laravel Forge
Laravel Forge is a platform specifically designed for deploying Laravel applications. When you are considering to deploy the application using a server, Forge comes handy as it simplifies server management and configuration. Here is how you can deploy your application with Laravel Forge:

1. Create a Forge Account: Sign up for a Forge account at the official Laravel Forge page.
2. Connect Cloud Provider: Forge integrates with various cloud providers like DigitalOcean and AWS. Choose your preferred provider and configure it using their API credentials.
3. Create a Server: Click Servers and then Create Server. Select your chosen cloud provider, server size, and Laravel version. Forge will handle server provisioning and installation of necessary software like Nginx, PHP, and MySQL.
4. Add Your Domain: In the Sites section, click Add Site. Enter your domain name and point your domain’s DNS records to Forge’s provided IP address.
5. Connect Git Repository: Click on Deploy and then Deployment Method. Choose Git and link your project’s Git repository (e.g., GitHub) using OAuth.
6. Configure Deployment Script: Forge provides a basic deployment script. You can customize it to automate tasks like running Laravel migrations or clearing cache.
7. Deploy Your Application: Click Deploy Now to initiate the deployment process. Forge will pull your code from the Git repository, install dependencies, run migrations, and configure your application.
With the above steps, we have leveraged Laravel Forge for the deployment process, which simplifies server setup, environment management, and application configuration.
Now, it will automatically handle server provisioning and configuration, making deployment easy. This method uses a server for deployment; what if you need a serverless deployment? Let’s dive into the second method for that.
Method 2: Deploying with Laravel Vapor
Laravel Vapor is a serverless deployment option for Laravel applications offered by AWS. It offers automatic scaling and eliminates the need to manage servers. Here is how you can deploy your app with Laravel vapor:
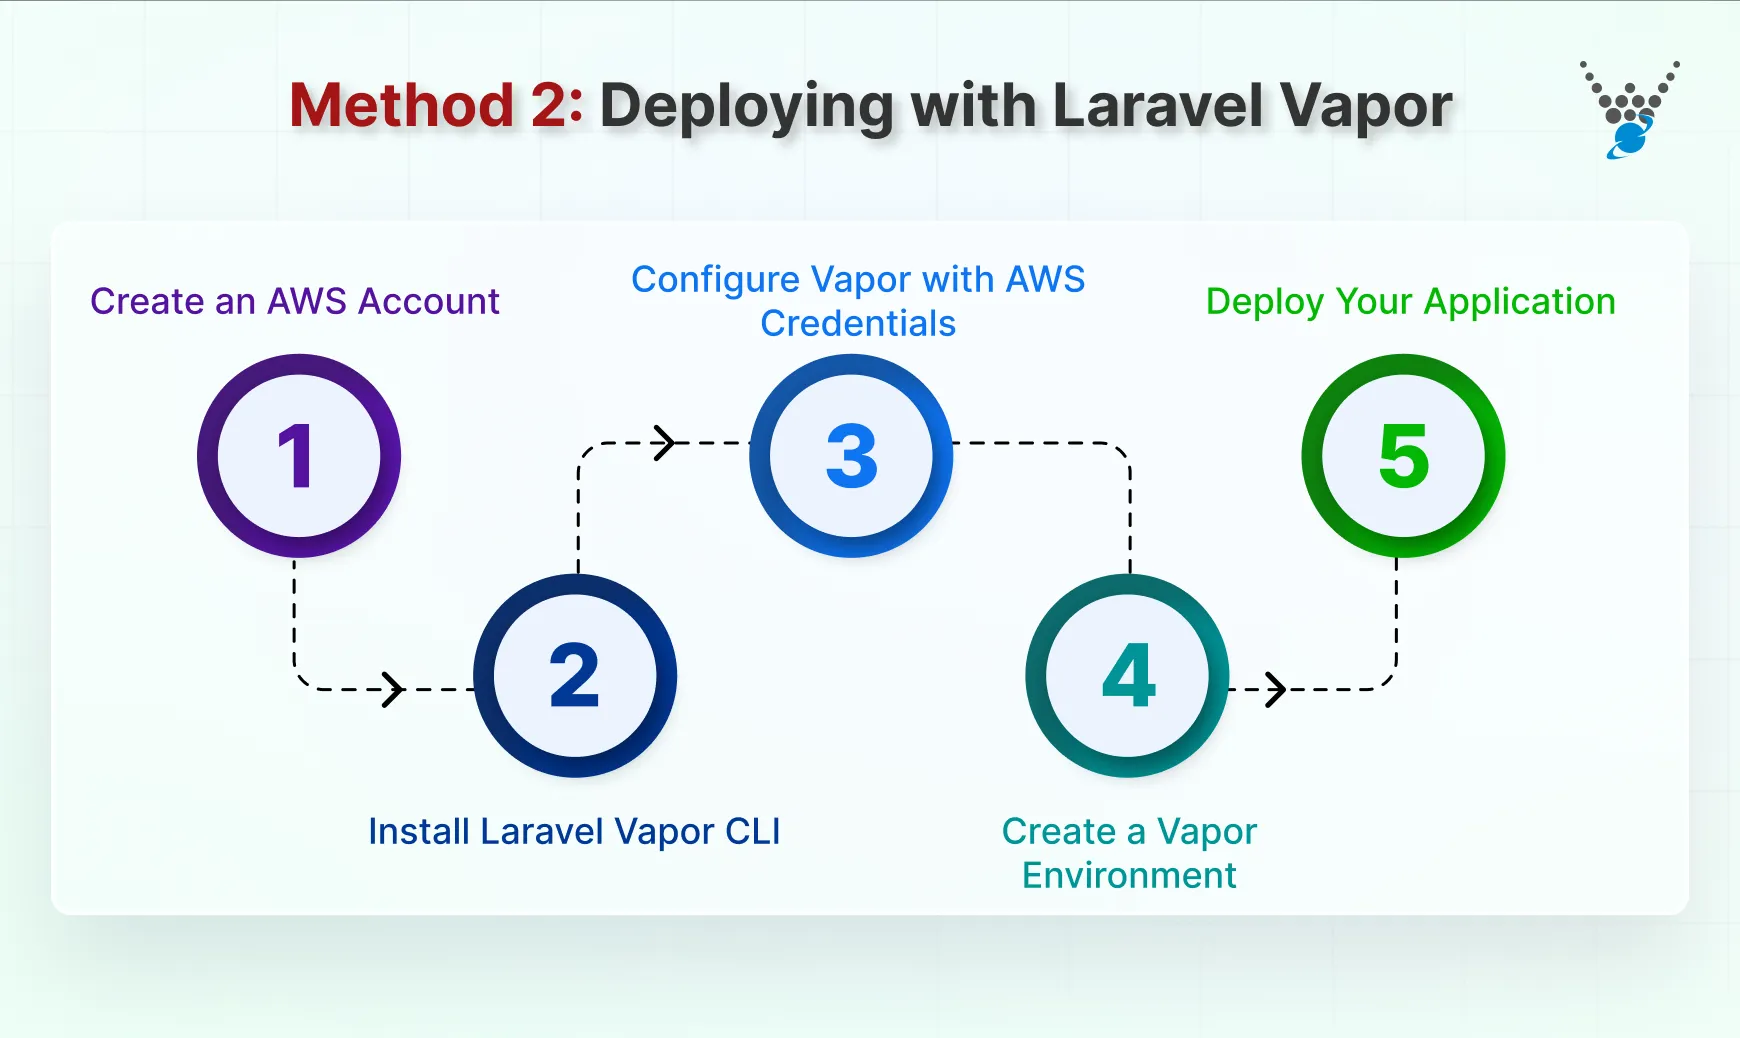
1. Create an AWS Account: If you don’t have one, sign up for a free AWS account at the official AWS website.
2. Install Laravel Vapor CLI: Use Composer to install the laravel/vapor package in your project:
composer require laravel/vapor
3. Configure Vapor with AWS Credentials: To configure Vapor with your AWS credentials, run the command:
vapor:cloud
4. Create a Vapor Environment: This defines deployment settings for your application. Run the create command for the new Vapor environment:
vapor:env create
5. Deploy Your Application: Vapor will handle infrastructure provisioning and configuration on AWS. To deploy your application to the Vapor environment, run the command:
vapor deploy
Here, we have used the Laravel Vapor CLI to deploy your application to a serverless environment on AWS. Laravel Vapor takes care of server management and scaling, allowing you to focus on development.
Method 3: Automated Deployments with CI/CD (GitHub Actions)
Manual deployment works, but automation prevents human error. A CI/CD pipeline, such as GitHub Actions, can automatically test and deploy your code whenever you push to your main branch.
Here’s a basic workflow to get started:
- Create the Workflow File: In your repo, create .github/workflows/laravel-deploy.yml.
- Define the Trigger: Set the pipeline to run on a push to your main branch.
- Add the Jobs: Create jobs to:
- Run Tests: Execute your Laravel test suite to catch bugs early.
- Deploy to Production: Use a dedicated action (like appleboy/scp-action) to securely copy files to your server or trigger a deployment on Forge/Vapor via an API.
This approach enforces Laravel continuous integration, ensuring only tested, stable code reaches production.
Choosing the Right Method to Deploy a Laravel App
The best deployment method for your Laravel application depends on your specific needs and preferences. Here’s a quick breakdown to help you decide:
Choose Laravel Forge if:
- You prefer a user-friendly interface with traditional server management concepts.
- Your application has predictable traffic patterns.
- You value control over server configuration.
Choose Laravel Vapor if:
- Your application experiences fluctuating traffic.
- You prefer a pay-per-use model that scales automatically.
- You want to avoid server management complexities.
Choose a CI/CD Pipeline (e.g., GitHub Actions) if:
- You already use a version control system like GitHub and want to automate your workflow.
- Your team needs to run tests automatically before every deployment.
- You want a customizable, script-driven process to deploy to any infrastructure.
In short, your deployment path depends on your app’s needs. Choose Forge for simple server control, Vapor for auto-scaling, or a CI/CD pipeline for full test-and-deploy automation. And if you need expert assistance with building and deploying your site, hire Laravel developers with expertise in these methods and other tools. It will make the deployment smoother, more reliable, and more secure.
Common Issues when Deploying a Laravel App & Their Fixes
Deploying a Laravel application can be smooth, but sometimes, you might encounter issues. Here are some common issues and their solutions:
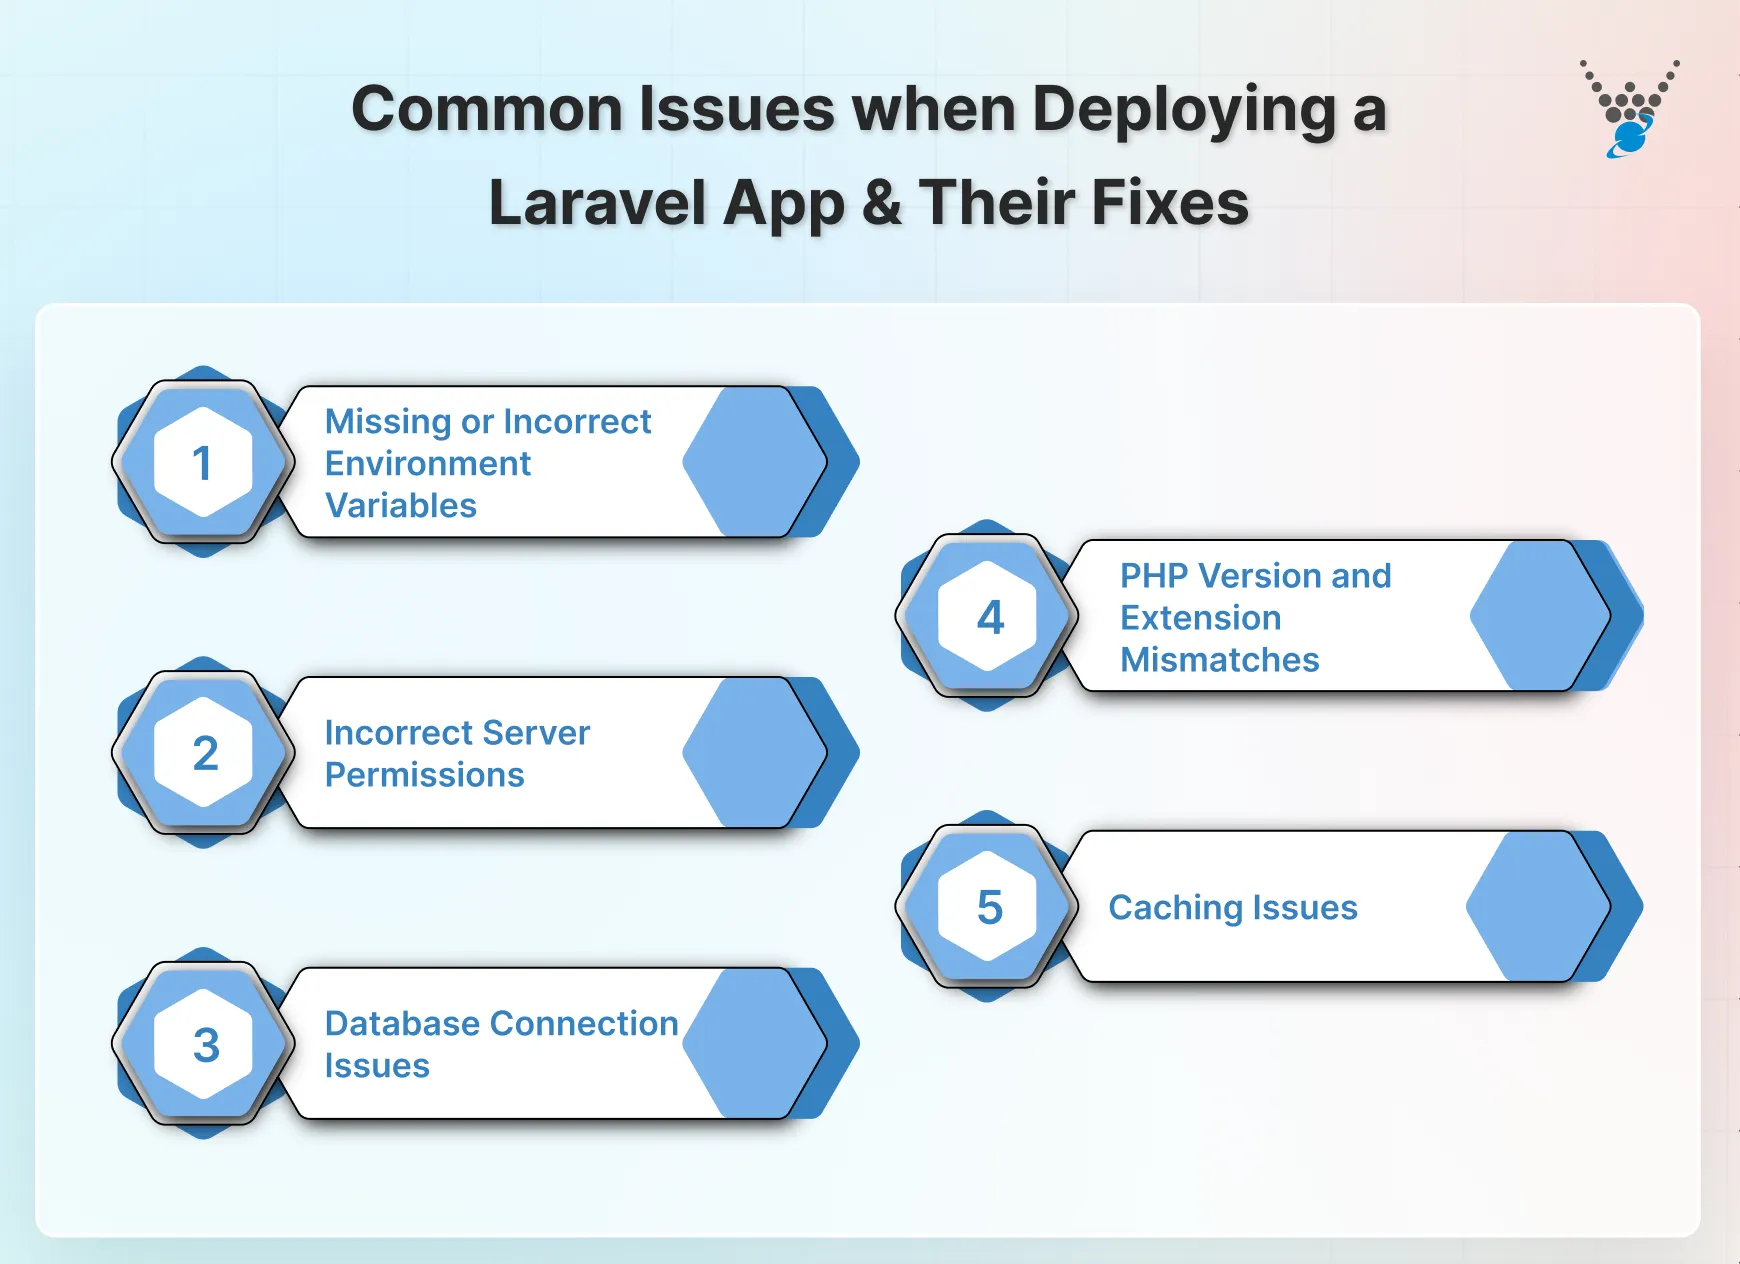
1. Missing or Incorrect Environment Variables (.env File)
The .env file stores critical configuration details like database credentials and API keys. It’s essential for your application to function properly.
- Problem: If the .env file is missing or contains incorrect values, your application won’t be able to connect to services like the database or external APIs. This will result in errors or unexpected behavior.
- Fix: Ensure you have a .env file in your project root and populate it with production-specific values. Double-check for typos and missing quotes around values containing spaces.
By configuring the .env file correctly, your application will have the necessary information to connect to external resources.
2. Incorrect Server Permissions
Laravel relies on permissions for directories like storage to write files. Incorrect permissions can prevent your application from functioning.
- Problem: If these directories have incorrect permissions, your application won’t be able to write to them. This leads to errors or incomplete functionalities. For instance, you might not be able to upload files or you might not be able to fetch data.
- Fix: Use commands like chown and chmod to grant the user view and write permissions as required.
With proper permissions set, your application will be able to write to the necessary directories and function without errors.
3. Database Connection Issues
A proper database connection is crucial for your application to function. It stores and retrieves data essential for user interaction and application logic.
- Problem: Incorrect credentials in your .env file or firewall restrictions blocking connections can all lead to connection issues. This will result in your application being unable to access or manipulate data, making it unusable.
- Fix: Verify the database credentials in your .env file match your production database. Check firewall rules to ensure they allow connections from the web server. Ensure the database server is running and accessible.
A successful database connection allows your application to interact with the data it needs, enabling it to function properly.
4. PHP Version and Extension Mismatches
Laravel has specific PHP version and extension requirements to ensure compatibility and functionality.
- Problem: If your server doesn’t meet these requirements, your application might not run at all or encounter errors. This can lead to unexpected behavior or crashes.
- Fix: Refer to the Laravel documentation for the required PHP version and extensions. Update your server’s PHP configuration or install the missing extensions to meet the requirements.
By ensuring your server meets the PHP requirements, your application will have the necessary environment to execute code.
5. Caching Issues
Caching can significantly improve the performance of your Laravel application by storing frequently accessed data. It will result in faster retrieval of data from memory.
- Problem: Improperly configured caching (e.g., Redis) can lead to performance problems or outdated data being displayed. This might result in slow loading times or users seeing cached data that are no longer correct.
- Fix: Ensure your caching configuration is set up correctly in the production environment. Clear the cache after deployment to ensure fresh data is served to users.
6. SSL/HTTPS Issues
Forcing HTTPS is a key Laravel deployment best practice.
- Problem: Mixed content warnings or redirect loops after enabling SSL.
- Fix: In your .env file, set APP_URL=https://yourdomain.com. In your AppServiceProvider, set URL::forceScheme(‘https’);.
7. Queue Workers Not Running
Cron jobs handle scheduled tasks, but queues need a persistent process.
- Problem: Emails don’t send or jobs sit in the jobs table.
- Fix: Use a process manager like Supervisor to keep your queue worker running. A simple php artisan queue:work will terminate when your SSH session ends.
8. Storage:link Not Set Up
This creates a symbolic link from public/storage to storage/app/public.
- Problem: User-uploaded images and files (e.g., avatars) return a 404 error.
- Fix: Run php artisan storage:link on your production server. It’s a small but crucial step.
9. Composer Install Issues on Server
Your server needs to install dependencies just like your local machine.
- Problem: composer install fails due to memory limits or missing extensions.
- Fix: Use composer install –no-dev –optimize-autoloader for production. This skips development packages and makes the autoloader faster.
Simply put, common issues such as missing environment files, incorrect server permissions, or database connection errors can delay deployment. Quickly fix these by ensuring your .env file is configured, that the storage folder permissions are set, and that your production server meets all PHP requirements.
Case Study: A Deployment That Delivered
We helped an online retailer whose site buckled under holiday traffic. Their platform crashed every Black Friday, costing them crucial revenue.
Our team redesigned their deployment from the ground up. We shifted their main storefront to a serverless environment for instant scaling. This let them handle massive traffic surges effortlessly.
The outcome was transformative. That holiday season, their site handled record traffic without a stutter. Sales increased while their infrastructure costs became more predictable. The right deployment strategy fixed their crashes and built a foundation for growth.
Conclusion
Deploying your Laravel app is simple by using Laravel Forge and Laravel Vapor. It ensures your application is secure, scalable, and reliable. Laravel Forge can be used when you have predictive traffic and want a user-friendly interface. On the other hand, Laravel Vapor provides a serverless deployment option for scalable, cost-effective applications.
No matter which method you choose, remember to address common issues to ensure an error-free deployment. If you need help developing and deploying your site, connect to Laravel development company. They can deploy your site errorlessly by following best practices and solving deployment issues.
FAQs About How to Deploy a Laravel App
How can I automate the deployment process?
You can automate the deployment process using CI/CD pipelines with tools like GitHub Actions, GitLab CI, or CircleCI. Laravel Forge and Laravel Vapor also offer built-in deployment automation features.
Can I use shared hosting to deploy a Laravel app?
While it’s possible to use shared hosting, it’s not recommended due to limitations in performance, scalability, and security. Using a VPS or cloud hosting provider offers more control and better resources.
How do I handle application scaling in production?
Use cloud hosting providers that offer scalable resources. Tools like Laravel Forge and Vapor provide options for scaling your app by adjusting resources to handle varying traffic loads.
What is the best hosting provider for Laravel apps?
For most developers, Laravel Forge provides the perfect balance of control and simplicity. It automates server provisioning on DigitalOcean, AWS, or Linode. For complex, scalable applications, consider Laravel Vapor for serverless deployment on AWS.
Can I deploy Laravel on cPanel/shared hosting?
Yes, but with significant limitations. You’ll need to manually upload files via FTP and configure the public folder. This approach lacks automation for commands like php artisan, making proper Laravel server configuration challenging.
Which is better: Laravel Forge vs Vapor?
Forge gives you full control over traditional cloud servers (VPS), ideal for most applications. Vapor is serverless, offering automatic scaling but requiring an AWS account. Choose Forge for simplicity, Vapor for high-traffic, event-driven applications.
Can I use Docker for Laravel deployment?
Absolutely. Docker ensures environment consistency from development to production. Using Laravel Sail simplifies local development, while the same containers can be deployed to any cloud provider, making your Laravel deployment strategies more reliable.