Quick Summary
Learn how to build a Laravel comment system step by step. This blog shows you how to let users post, view, and reply to comments in real time using Laravel, Pusher, and Vue.js. From installing tools to creating models, routes, and a live frontend, you’ll see how everything connects. Build a secure, fast, and user-friendly comment section that boosts engagement and brings conversations to life on your website.
Table of Contents
Engagement is one of the most crucial aspects that website owners focus on. Comments are the heartbeat of any interactive website. They allow visitors to share thoughts, ask questions, and spark conversations. But static comment sections can feel dull and slow. That’s where a real-time comment system comes in. When users see their words appear instantly, engagement soars, and your site feels alive.
Laravel, with its elegant syntax and powerful features, makes building such systems straightforward. By combining Laravel with tools like Vue.js and Pusher/Echo, you can create a seamless, responsive post comment system. This stack ensures comments appear instantly without page reloads, keeping users engaged and conversations flowing naturally.
In this guide, we’ll explore how to implement a PHP comment system using Laravel comments packages, integrate it into Blade templates, and bring real-time interactions to your site. Let’s dive in!
What is a Laravel Comment System?
A Laravel comment system is a feature that allows users to leave comments on blog posts, articles, or any other content on a website. It enables interaction, allowing users to share their thoughts, ask questions, and discuss the content with others. It typically includes functionalities such as:
- Comment submission: Users can submit comments through a form or other interface.
- Comment display: Comments are displayed in a structured format, often with timestamps and user information.
- Nested comments: Users can reply to existing comments, creating a threaded discussion.
- User authentication: Comments may be tied to registered users, allowing for moderation and accountability.
- Comment moderation: Administrators can manage comments, approving or deleting them as needed.
- Real-time updates: Comments can be updated in real-time using technologies like Pusher or Laravel Echo.
A Laravel Comment System can be a simple or complex feature, depending on the requirements of the project. It can include using web development technologies such as Pusher, WebSockets, and Vue.js.
Benefits of Using Laravel for Building a Comment System
Laravel is a good choice for building a comment system. Its features make development faster, safer, and more flexible. Let’s discuss why developers prefer it:
- Ease of Integration: Laravel’s ecosystem supports multiple packages, which makes adding a post comment system seamless. Packages often provide traits like HasComments to attach comments to any model, reducing boilerplate code and speeding up development.
- Customizability: You can tailor your comment system to fit your project’s needs. Laravel allows easy configuration of approval workflows, nesting options, and moderation rules. Whether you want threaded comments or simple flat lists, Laravel adapts without heavy coding.
- Built-in Admin Tools: Many Laravel comments packages, such as Commenter, come with intuitive admin panels. These interfaces let you manage, filter, and organize comments effortlessly, saving time on manual moderation.
- Security: Laravel provides robust security features like CSRF protection, input validation, and SQL injection prevention. These help keep your PHP comment system safe, protecting both your site and your users.
- Performance and Scalability: Laravel handles database queries efficiently, making comment systems fast even under heavy traffic. With caching and optimized queries, your system can scale to support thousands of concurrent users while maintaining real-time responsiveness.
- Real-time Broadcasting: With Laravel’s support for Pusher, Echo, or WebSockets, you can implement real-time updates. Users see new comments instantly without refreshing the page, creating a more interactive experience that encourages engagement.
- Vue.js Integration: For dynamic, modern interfaces, Laravel works seamlessly with Vue.js. You can create reactive comment components that update instantly, making your Laravel blade comment sections feel fluid and highly interactive.
Combining these strengths makes Laravel an excellent choice for building a robust, secure, and highly interactive comment system. In the next sections, we’ll show you how to implement a customized Laravel comment system with real-time features.
Core Building Blocks for Building a Live Commenting System
Before we dive into how to create a Laravel comment system, let’s dive into the web development technologies that will be involved. They are going to be Laravel, Pusher, and Vue.js:
Laravel
It is one of the best PHP frameworks that can handle the server-side logic of web apps, manage user authentication and store comments in the database. Laravel will interact with the database (usually through Eloquent ORM) to store and retrieve comment data. It will also serve API routes that allow Vue.js to post and fetch comments dynamically.
Pusher
Pusher is a real-time communication service that enables instant updates in your app without the need to refresh the page. In this setup, Pusher will notify all connected users when a new comment is added, updating their views in real time. Laravel integrates easily with Pusher using the Broadcasting functionality, allowing you to broadcast new comments.
Vue.js
Vue.js is a JavaScript framework that can be used to create interactive user interfaces. It offers a reactive interface that updates the UI components when a comment is submitted. Vue.js components will be responsible for rendering, displaying, and updating the comments in real time. It all happens when a new comment is broadcasted from the backend via Pusher.
If you want to blend server-side logic with client-side interactivity, Laravel Inertia can be used to deliver a robust SPA experience alongside your comment system.
How to Build a Laravel Comment System?
The process of building a Laravel comment system involves various steps, from installation of Pusher and Echo to reading components in Vue. Here is a stepwise breakdown of how you can create a comment system using Laravel:
1. Install and Setup Laravel, Pusher, and Echo
First, install Laravel and set up Pusher to broadcast real-time comments. We’ll also install Laravel Echo, which will listen to events broadcasted by Pusher and update the front end dynamically.
Step 1: If you haven’t installed Laravel, install it using Composer. Here is the command you can use:
composer create-project --prefer-dist laravel/laravel laravel-comments-system
Step 2: Once installed, we’ll start setting up the pusher. In your .env file, configure Pusher credentials:
BROADCAST_DRIVER=pusher
PUSHER_APP_ID=your-app-id
PUSHER_APP_KEY=your-app-key
PUSHER_APP_SECRET=your-app-secret
PUSHER_APP_CLUSTER=your-cluster
Step 3: After saving the changes of the .env file, install Pusher for real-time functionality:
composer require pusher/pusher-php-server
Step 4: Now, install Laravel Echo and Pusher JS client to enable real-time comment broadcasting:
npm install --save laravel-echo pusher-js
Step 5: Update config/broadcasting.php to use Pusher.
Step 6: Update resources/js/app.js for Laravel 10 + Vite:
import Echo from "laravel-echo";
window.Pusher = require('pusher-js');
window.Echo = new Echo({
    broadcaster: 'pusher',
    key: import.meta.env.VITE_PUSHER_APP_KEY,
    cluster: import.meta.env.VITE_PUSHER_APP_CLUSTER,
    forceTLS: true
});
2. Database Setup and Migration
Once we have Laravel, Pusher and Echo installed and configured, then we can start with configuring the database and creating migrations. That will let us store the comments in the table.
Step 1: Configure the .env file to set up your database connection:
DB_CONNECTION=mysql
DB_HOST=127.0.0.1
DB_PORT=3306
DB_DATABASE=laravel_comments
DB_USERNAME=root
DB_PASSWORD=
Step 2: Now, create the migration for the comments table:
php artisan make:migration create_comments_table
Step 3: Once the table is created, modify the migration file to include the required fields:
Schema::create('comments', function (Blueprint $table) {
    $table->id();
    $table->text('body');
    $table->foreignId('user_id')->constrained()->onDelete('cascade');
    $table->foreignId('post_id')->constrained()->onDelete('cascade');
    $table->timestamps();
});
This will create a table with the column fields you have added. After that, all you need to create the migration, run the command:
php artisan migrate
In this step, we had set up the database configuration and created a migration to handle the comments table structure. The migration stores comment content, user IDs, and post IDs, allowing us to track who created the comments and on which post. Speed up the development of interactive components in your comment system by incorporating Laravel Volt, which allows for rapid creation of modern interfaces.
3. Creating Models
You need to create models for comments, users, and posts to define relationships between them. Here are the steps how:
Step 1: Create the comment model by running the artisan command:
php artisan make:model Comment
Step 2: Define relationships in the Comment model (app/Models/Comment.php):
class Comment extends Model
{
    protected $fillable = ['body', 'user_id', 'post_id'];
    public function user() {
        return $this->belongsTo(User::class);
    }
    public function post() {
        return $this->belongsTo(Post::class);
    }
}
Here, we created the Comment model and established the necessary relationships with the User and Post models. Each comment belongs to a user and a post, and we will use this to link comments in our system.
4. Creating Controllers
The next thing you need is a controller to handle the logic for storing and broadcasting comments. Here is how you can create controllers in Laravel:
Step 1: To create the CommentController, run the command:
php artisan make:controller CommentController
Step 2: In CommentController, create a store method for handling comment submission and broadcasting:
public function store(Request $request, Post $post)
{
    $request->validate([
        'body' => 'required',
    ]);
    $comment = $post->comments()->create([
        'body' => $request->body,
        'user_id' => auth()->id(),
    ]);
    broadcast(new CommentPosted($comment))->toOthers();
    return response()->json(['comment' => $comment]);
}
Now, create an event for broadcasting using the command:
php artisan make:event CommentPosted
Step 3: Once the event for broadcasting is created now, you can broadcast the comment inside the CommentPosted:
class CommentPosted implements ShouldBroadcast
{
    public $comment;
    public function __construct(Comment $comment)
    {
        $this->comment = $comment;
    }
    public function broadcastOn()
    {
        return new Channel('post.' . $this->comment->post_id);
    }
}
In this step, we created a controller for handling comment storage and an event for broadcasting new comments. The store method adds comments and triggers the broadcasting event using Pusher.
5. Creating Routes
Now, we need to define routes that will trigger the comment creation process and broadcast events.
Step 1: Open routes/web.php and add the following route:
Route::post('posts/{post}/comments', [CommentController::class, 'store'])->middleware('auth');
Step 2: Ensure you have authentication routes enabled, like:
Auth::routes();
We created a route that handles posting comments. This route is protected by authentication middleware, ensuring only logged-in users can submit comments. The route will also trigger the broadcasting event.
6. Setting Up Vue (Frontend)
For real-time updates on the frontend, use Vue.js to listen to broadcasted events and display new comments dynamically.
Step 1: Install Vue if it’s not already part of your project:
npm install vue
Step 2: Update your resources/js/app.js file to include Vue and Echo:
import Echo from "laravel-echo";
window.Pusher = require('pusher-js');
window.Echo = new Echo({
    broadcaster: 'pusher',
    key: process.env.MIX_PUSHER_APP_KEY,
    cluster: process.env.MIX_PUSHER_APP_CLUSTER,
    forceTLS: true
});
Step 3: Now, create a Vue component CommentComponent.vue:
<template>
    <div>
        <ul>
            <li v-for="comment in comments" :key="comment.id">
                <strong>{{ comment.user.name }}</strong> - {{ comment.body }}
            </li>
        </ul>
        <form @submit.prevent="submitComment">
            <textarea v-model="newComment"></textarea>
            <button type="submit">Post Comment</button>
        </form>
    </div>
</template>
<script>
export default {
    props: ['postId'],
    data() {
        return {
            comments: [],
            newComment: ''
        };
    },
    mounted() {
        axios.get(`/api/posts/${this.postId}/comments`).then(response => {
            this.comments = response.data;
        });
        window.Echo.channel(`post.${this.postId}`).listen('CommentPosted', (e) => {
            this.comments.push(e.comment);
        });
    },
    methods: {
        submitComment() {
            axios.post(`/posts/${this.postId}/comments`, { body: this.newComment })
                .then(response => {
                    this.newComment = '';
                });
        }
    }
}
</script>
Here, we configured Vue.js with Laravel Echo to listen for new comment events broadcast in real time. When a new comment is posted, it is dynamically added to the comment list without refreshing the page.
7. Create Comment State
We need to create a state for storing and updating the comments on the front end. Here is the example code you can add to CommentSection.vue to set up state management for comments:
data() {
    return {
        comments: [],
        newComment: '',
    };
},
methods: {
    fetchComments() {
        axios.get(`/posts/${this.postId}/comments`).then(response => {
            this.comments = response.data;
        });
    },
    addComment() {
        axios.post('/comments', { comment: this.newComment, post_id: this.postId }).then(response => {
            this.comments.push(response.data.comment);
            this.newComment = '';
        });
    }
},
Here, we ensured the component maintains a state that dynamically updates when new comments are posted. That will keep the commenting section live and make the user experience smooth. You can streamline route creation for your commenting system by using Laravel Folio, which automatically maps your Blade templates to corresponding routes for cleaner code organization.
8. Create Components
Lastly, we need to integrate the Vue components into the Laravel application to render and display comments in real-time. Here is the implementation code where we use the Blade template to include the Vue component:
@extends('layouts.app')
@section('content')
    <div class="container">
        <h1>{{ $post->title }}</h1>
        <p>{{ $post->body }}</p>
        <comment-component :post-id="{{ $post->id }}"></comment-component>
    </div>
@endsection
9. Implementing Real-Time Updates with Echo
Vue listens to the broadcasted CommentPosted event:
window.Echo.channel(`post.${this.postId}`).listen('CommentPosted', (e) => {
    this.comments.push(e.comment);
});
This ensures new comments appear instantly without a page refresh.
10. Testing the Laravel Comment System
- Run the development servers:
npm run watch
php artisan serve
- Open your app in the browser.
- Post comments as different users and verify they appear in real-time.
- Ensure authentication and broadcasting work correctly.
At this point, your real-time Laravel comment system is live and fully functional.
With that, we have built a real-time commenting system using Laravel, Pusher, and Echo. If you are finding it hard to follow through, consider getting in touch with an expert Laravel development company. We can provide you with the right expertise to build a customizable site with features like live commenting and more.
Advanced Features You Can Add
Once your basic Laravel comment system is running smoothly, you can enhance it with features that make discussions richer and more engaging. Here are a few advanced ideas worth exploring:
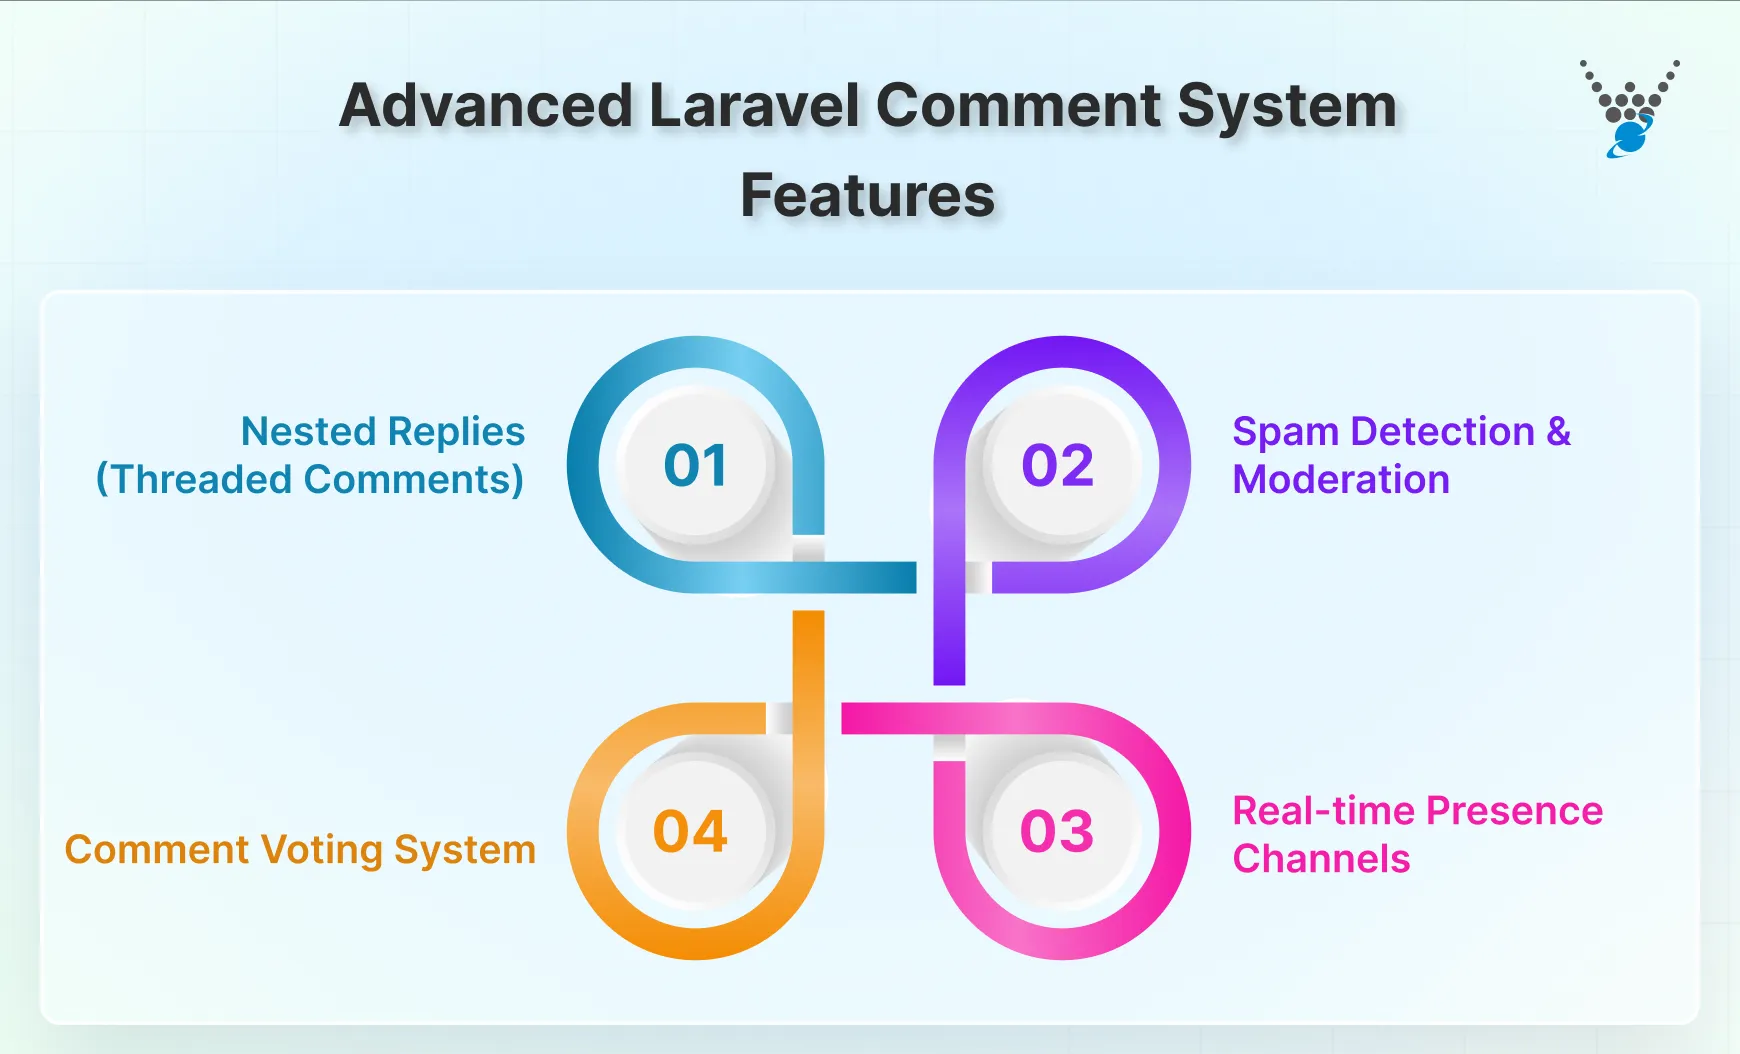
Nested Replies (Threaded Comments)
Threaded comments let users reply directly to one another. It makes conversations easier to follow and adds structure to long discussions. By adding a parent_id column to your comments table, you can connect replies to specific comments.
In the frontend, you can display these in a simple nested layout. This small change transforms a flat list of comments into a clear, interactive discussion flow.
Comment Voting System (Upvote/Downvote)
A voting system helps highlight valuable insights. Users can upvote comments they find useful and downvote irrelevant ones. You can store votes in a separate table and display a score next to each comment. It brings a social touch to your site, rewarding meaningful engagement and keeping low-quality comments in check.
Spam Detection and Moderation
As your site grows, spam becomes inevitable. Laravel makes it easy to integrate spam filters using packages or APIs like Akismet or reCAPTCHA. You can also add a moderation queue where flagged comments await admin approval. This keeps your comments in Laravel clean, relevant, and safe for users.
Showing Online Users with Presence Channels
Real-time presence channels let you display which users are currently viewing or commenting on a post. With Laravel Echo and Pusher, you can track active participants and even show live indicators like “John is typing…” or “2 users are reading this post.” It makes your platform feel alive and interactive, encouraging real-time participation.
Simply put, you can enrich your Laravel comment system with advanced features like threaded replies, voting, spam detection, and real-time presence indicators. These upgrades make discussions more structured, engaging, and interactive for every user.
Winding it Up
We built a strong comment system using Laravel for the backend, Pusher for real-time updates, and Vue.js for the front end. Laravel handles all the server-side logic, Pusher makes updates appear instantly, and Vue.js manages the user interface.
To start, install the required tools and create the necessary models and controllers. Next, set up routes and build the front end, creating the site’s different states. Once everything is in place, test the system to make sure it works smoothly.If you are looking to build custom features that are also essential for user engagement, hire Laravel developers.
FAQs About Building a Laravel Comment System
Can I integrate notifications with the Laravel comment system?
Yes, you can use Laravel’s notification system to send alerts when new comments are posted. Notifications can be delivered via email, SMS, or in-app messages and can be triggered by comment-related events.
How can I implement real-time comments in Laravel?
To enable real-time comments, you can use Pusher and Laravel Echo. This combination allows your application to broadcast new comments instantly, ensuring users see updates without refreshing the page.
Can I use Laravel’s built-in authentication for the comment system?
Yes, Laravel provides built-in authentication features that you can easily integrate into your comment system. This ensures that only registered users can post comments, enhancing security and accountability.
Can I build an interactive comment system using Laravel Livewire?
Yes! Laravel Livewire lets you create dynamic, reactive comment interfaces with real-time updates, all while working seamlessly with Laravel’s backend.
How to scale a Laravel comment system for high traffic?
To handle heavy traffic, focus on optimizing database queries and use caching for frequently loaded comments. Implement pagination to load comments in chunks instead of all at once. Using queues for broadcasting events also helps balance server load. For larger setups, consider a CDN and database indexing to keep performance smooth.
Can I use alternatives to Pusher (like Laravel WebSockets)?
Yes, Laravel WebSockets is a great alternative to Pusher. It’s fully compatible with Laravel Echo and lets you host your own WebSocket server without extra costs. It offers real-time broadcasting, presence channels, and full control over your infrastructure — ideal for developers who prefer self-hosted, scalable solutions.