Table of Contents
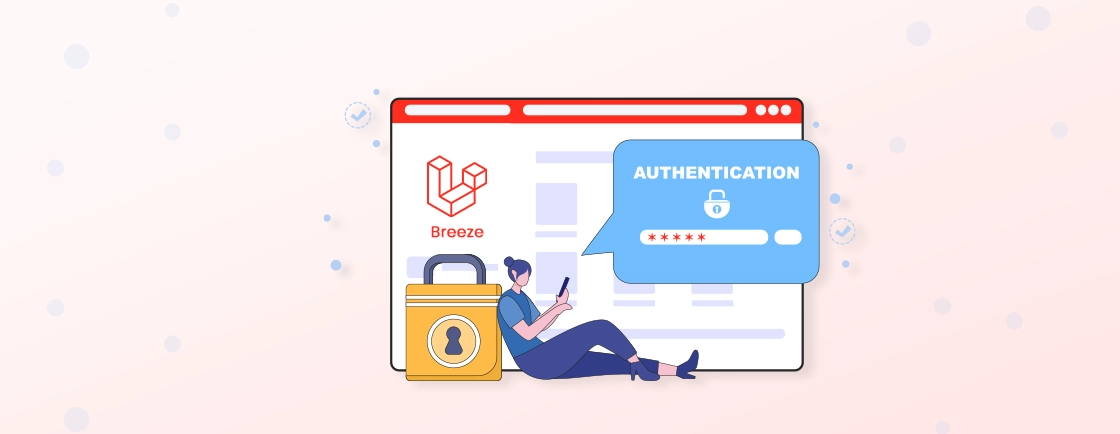
Building a secure and user-friendly authentication system is important for any web application. Laravel, the popular PHP framework, offers robust tools to streamline this process. Among them, Laravel Fortify stands out as a powerful backend solution for user authentication.
But what exactly is Fortify, and why should you consider it for your next project? This comprehensive guide dives deep into the world of Laravel Fortify. We’ll explore its core functionalities, the benefits it offers, and how it compares to other Laravel authentication solutions.
We’ll also walk you through a step-by-step installation process, equipping you with the knowledge to implement Fortify in your Laravel application. This guide is packed with in-depth information, directly sourced from the experts themselves. Thus, ensures you have the most reliable and up-to-date knowledge at your fingertips. So, let’s dive in.
What is Laravel Fortify?
Laravel Fortify is a frontend-agnostic authentication backend package for Laravel. In simpler terms, it provides a robust set of features to handle user registration, along with login, password reset, email verification, and more. That too without dictating a specific user interface. This allows you to leverage Fortify’s functionalities in the background while designing your custom front end that perfectly matches your application’s aesthetics.
Features and Functionalities of Laravel Fortify
- Registration & Login. Laravel Fortify streamlines user onboarding with secure registration complete with email verification. It also provides pre-built login functionalities to ensure a smooth user experience.
- Password Reset. In case users forget their passwords, Laravel Fortify offers a built-in password reset functionality that allows them to regain access securely.
- Two-Factor Authentication (2FA). Laravel Fortify improves security by enabling you to implement two-factor authentication. This adds an extra layer of protection for user accounts.
Laravel Fortify provides a robust authentication backend for Laravel applications, managing essential features like registration, login, and password resets. For projects that require a simpler starter kit with ready-to-use Blade templates, Laravel Breeze offers a lightweight and efficient solution to kickstart authentication and frontend development.
Why Use Laravel Fortify?
Creating a secure and feature-rich authentication system from scratch can be a significant hurdle in the development process. Here’s where Laravel Fortify shines. This pre-built authentication for Laravel applications streamlines development by handling essential user functionalities. This frees you, the developer, to dedicate your efforts toward core application logic and crafting a captivating user experience.
Benefits of Using Laravel Fortify
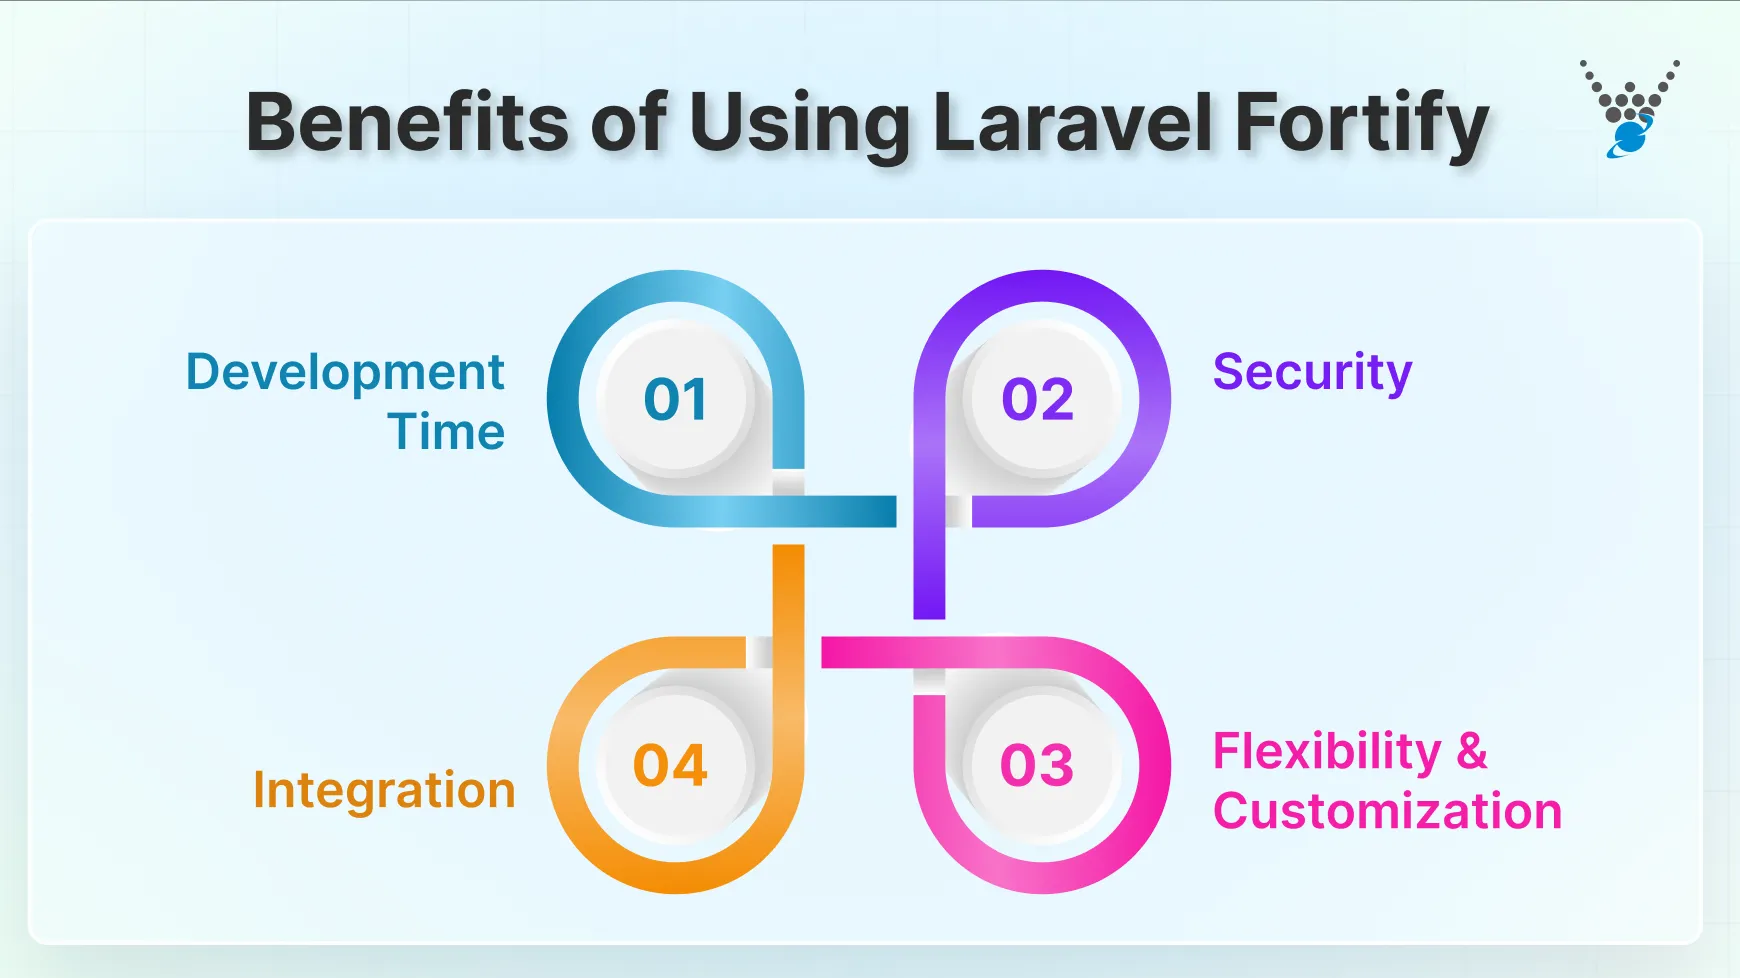
- Development Time. Laravel Fortify prevents the need to build core authentication features from scratch. Its pre-built functionalities for registration, login, password reset, and email verification reduce development time.
- Security. It uses secure password hashing and email verification mechanisms. This benefits in ensuring a strong foundation for your application’s authentication system.
- Flexibility & Customization. While Laravel Fortify provides pre-built functionalities, it also offers extensive customization options. You can create functionalities like registration fields, email templates, and validation rules to match your application’s specific requirements.
- Integration. Fortify integrates easily with your existing Laravel project. Its controllers and routes interact with Laravel’s authentication system, minimizing configuration hassles.
Laravel Fortify streamlines the development process by providing a secure and customizable authentication backend. Using this on your application you can focus on building secure applications without reinventing the wheel.
What is the Difference Between Laravel Scantum vs Fortify?
Laravel’s ecosystem offers multiple packages to address authentication needs. While using Laravel Sanctum and Fortify might seem to overlap at first glance, they serve distinct purposes and often complement each other.
Understanding the interplay between these packages is important for creating a secure and well-structured authentication flow in your Laravel application. So let’s dig in:
| Factor | Laravel Sanctum | Laravel Fortify |
|---|---|---|
| Purpose | API token-based authentication | Session-based authentication (traditional login/logout) |
| Functionalities | User registration, login, password reset, email verification | User registration, login, password reset, email verification |
| Customization | Limited | Extensive customization options for functionalities |
| Use Case | Perfect for (Single Page Applications) SPA and APIs | Ideal for traditional web applications with login/logout |
| UI Integration | Requires additional UI development | Do require additional UI development. Yet, Laravel Fortify provides a foundation for custom UI |
For applications that primarily rely on API interactions and require token-based authentication, Laravel Sanctum is the way to go. If you’re building a traditional web application with login functionalities and user management, Laravel Fortify is the better choice.
In some cases, you might even leverage both packages together. Consulting the project complexity and the specific authentication needs, with a Laravel development agency can be highly beneficial. They can help you determine the most suitable approach and ensure a secure authentication system for your application.
How to Use Laravel Fortify?
Empowering your Laravel application with robust user authentication is a breeze with Laravel Fortify. This guide dives into the step-by-step integration process, from installation to customization. Follow along to streamline user registration, login, and other essential functionalities.
Step 1: Installation
The foundation for a secure authentication system begins with installing Laravel Fortify. Here’s how to get it set up in your Laravel project:
1. Composer Command. Open your terminal and navigate to your Laravel project’s root directory. Run the following Composer command to install the Fortify package:
composer require laravel/fortify
2. Package Update. After running the command, Composer will download and install the Fortify package along with any dependencies. This might take a few moments depending on your internet connection speed.
3. Verification. Once the installation is complete, you can verify it by checking your project’s composer.json file. The laravel/fortify package should be listed under the require section.
This initial step lays the core for integrating Fortify’s functionalities into your Laravel application. Now you can proceed with publishing the necessary resources.
Step 2: Publish Resources
Laravel Fortify provides pre-built views and configuration files that streamline the user experience for registration, login, and other functionalities. To leverage these resources in your project, you’ll need to publish them. Here’s how:
1. Artisan Command. Use the Laravel Artisan command to publish Fortify’s resources. Open your terminal and navigate to your project’s root directory. Execute the following command:
php artisan vendor:publish --provider="Laravel\Fortify\FortifyServiceProvider"
2. Published Location. This command will copy Fortify’s views and configuration files to your project’s designated locations. By default, views are published to the resources/views/vendor/fortify directory, and configuration files are placed in the config directory.
3. Customization Potential. The published resources serve as a starting point. You can customize them further to perfectly match your application’s design and user experience. We’ll explore customization options in a later step.
Publishing these resources provides the foundation for integrating Fortify’s functionalities into your Laravel application. The next step involves running database migrations to create the necessary tables
Step 3: Database Migrations
Laravel Fortify uses database tables to store user information securely. These tables need to be created in your database before you can leverage Fortify’s functionalities. Here’s how to perform the migrations:
1. Artisan Command. Run the Laravel Artisan command to execute the migrations for Fortify. Open your terminal and navigate to your project’s root directory. Execute the following command:
php artisan migrate
2. Migration Process. This command will execute all pending migrations, including those introduced by Fortify. It will create the necessary tables in your database schema to store user data.
3. Verification. Once the migrations are complete, you can verify the newly created tables in your database. You can do so by using a PHP development tool like phpMyAdmin for database management or your preferred interface.
This step ensures a proper foundation for storing user data within your Laravel application when using Fortify for authentication. With the database tables in place, you can move on to optional configuration steps.
Step 4: Configuration (Optional)
While Laravel Fortify offers suitable defaults for various functionalities. Using any of them you can fine-tune certain aspects to perfectly match your application in an easy way. This step explores optional configuration options:
- Email Verification. By default, Laravel Fortify enables email verification during user registration. You can disable this behavior or customize the email content and verification process by editing the config/fortify.php file.
- Password Reset. Laravel Fortify provides built-in password reset functionality. You can adjust the throttle settings or customize the email templates used for password reset communication within the config/fortify.php file.
- Two-Factor Authentication (2FA). Laravel Fortify doesn’t include built-in 2FA functionality by default. However, the configuration allows you to integrate third-party 2FA packages seamlessly for enhanced security.
Remember, these configuration options are entirely optional. The default settings should work well for most projects. Yet, this step helps you to fine-tune Fortify’s behavior to align with the application’s specific requirements.
Step 5: Register Views
Fortify provides pre-built Blade views for functionalities like registration and login. To use these views within your application, you need to register them with your Blade layout. Here’s how:
1. Blade Layout Edit. Open your main Blade layout file, typically resources/views/layouts/app.blade.php. Locate the section where you define your application’s navigation or header.
2. View Registration Code. Within the navigation or header section, add the following code snippet to register the Fortify views:
<ul class="nav navbar-nav ms-auto">
  @if (Route::has('login'))
    <li class="nav-item">
      <a href="{{ route('login') }}" class="nav-link">Login</a>
    </li>
  @endif
  @if (Route::has('register'))
    <li class="nav-item">
      <a href="{{ route('register') }}" class="nav-link">Register</a>
    </li>
  @endif
</ul>
- Explanation. This code snippet checks if the login and register routes defined by Fortify exist. If they do, it creates navigation links for them using the route helper function.
These are just the basic registration links. You can further customize their appearance and behavior using Laravel Blade components and your preferred styling approach. By registering these views, you provide access points for users to interact with Fortify’s functionalities within your application’s interface. For full OAuth2 support and advanced API token options, use Laravel Passport together with Fortify as needed.
Step 6: Create Views
While Fortify provides pre-built views, it operates as a headless system, meaning it is a Laravel authentication system that doesn’t dictate the user interface. You have the freedom to create custom views that perfectly match your application’s design and user experience. Here’s an overview of the process:
1. Blade Templates. Leverage Laravel Blade templating engine to create custom views for functionalities like registration, login, and password reset. You can publish the default Fortify views as a starting point using Artisan (php artisan vendor:publish –tag=fortify-views) and customize them further.
2. UI Framework Integration. If you’re using a UI framework like Bootstrap, Tailwind CSS, or Vue.js, integrate its components and styling into the custom views to achieve a custom user experience.
3. Code Example (Basic). Here’s a basic example of a custom login view using Blade:
@extends('layouts.app')
@section('content')
<div class="container mt-5">
  <div class="row justify-content-center">
    <div class="col-md-8">
      <div class="card">
        <div class="card-header">Login</div>
        <div class="card-body">
          <form method="POST" action="{{ route('login') }}">
            @csrf
            <div class="form-group row">
              <label for="email" class="col-md-4 col-form-label text-md-right">Email Address</label>
              <div class="col-md-6">
                <input id="email" type="email" class="form-control @error('email') is-invalid @enderror" name="email" value="{{ old('email') }}" required autocomplete="email" autofocus>
                @error('email')
                  <span class="invalid-feedback" role="alert">
                    <strong>{{ $message }}</strong>
                  </span>
                @enderror
              </div>
            </div>
            <div class="form-group row">
              <label for="password" class="col-md-4 col-form-label text-md-right">Password</label>
              <div class="col-md-6">
                <input id="password" type="password" class="form-control @error('password') is-invalid @enderror" name="password" required autocomplete="current-password">
                @error('password')
                  <span class="invalid-feedback" role="alert">
                    <strong>{{ $message }}</strong>
                  </span>
                @enderror
              </div>
            </div>
            <div class="form-group row">
              <div class="col-md-6 offset-md-4">
                <div class="form-check">
                  <input class="form-check-input" type="checkbox" name="remember" id="remember" {{ old('remember') ? 'checked' : '' }}>
                  <label class="form-check-label" for="remember">
                    {{ __('Remember Me') }}
                  </label>
                </div>
              </div>
            </div>
            <div class="form-group row mb-0">
              <div class="col-md-8 offset-md-4">
                <button type="submit" class="btn btn-primary">
                  {{ __('Login') }}
                </button>
                @if (Route::has('password.request'))
                  <a class="btn btn-link" href="{{ route('password.request') }}">
                    {{ __('Forgot Your Password?') }}
                  </a>
                @endif
              </div>
            </div>
          </form>
        </div>
      </div>
    </div>
  </div>
</div>
@endsection
This is a simplified example. You can customize it further with additional functionalities, error handling, and styling based on your specific requirements. Creating custom views offers complete control over the user interface for your authentication flow.
Step 7: Customization (Optional)
Fortify offers a high degree of flexibility for tailoring its functionalities to your application’s specific needs. Here’s a glance at some key customization options:
- Registration Fields. By default, Fortify expects email and password during registration. You can modify the registration form using the Laravel\Fortify\Contracts\RegisterRequest contract. This allows you to add custom fields like name, phone number, or any other information relevant to your application.
- Email Templates. Fortify provides email templates for functionalities like registration confirmation and password reset. You can customize these templates within the resources/views/vendor/fortify directory to match your application’s branding and messaging.
- Validation Rules. Laravel Fortify enforces basic validation rules for user input. You can extend or modify these validation rules using Laravel’s validation features within the RegisterRequest and UpdateUserProfileRequest classes. This ensures stricter validation or custom validation logic specific to your application.
Yet, customization is entirely optional. The default settings should work well for most projects. Regardless, this step helps you to refine Fortify’s functionalities to perfectly integrate with the application’s unique requirements.
Additional Use Cases of Laravel Fortify
While Laravel Fortify excels at core functionalities like registration, login, and password reset, its capabilities extend beyond these essentials. Here’s a look at some powerful use cases that demonstrate Fortify’s versatility:
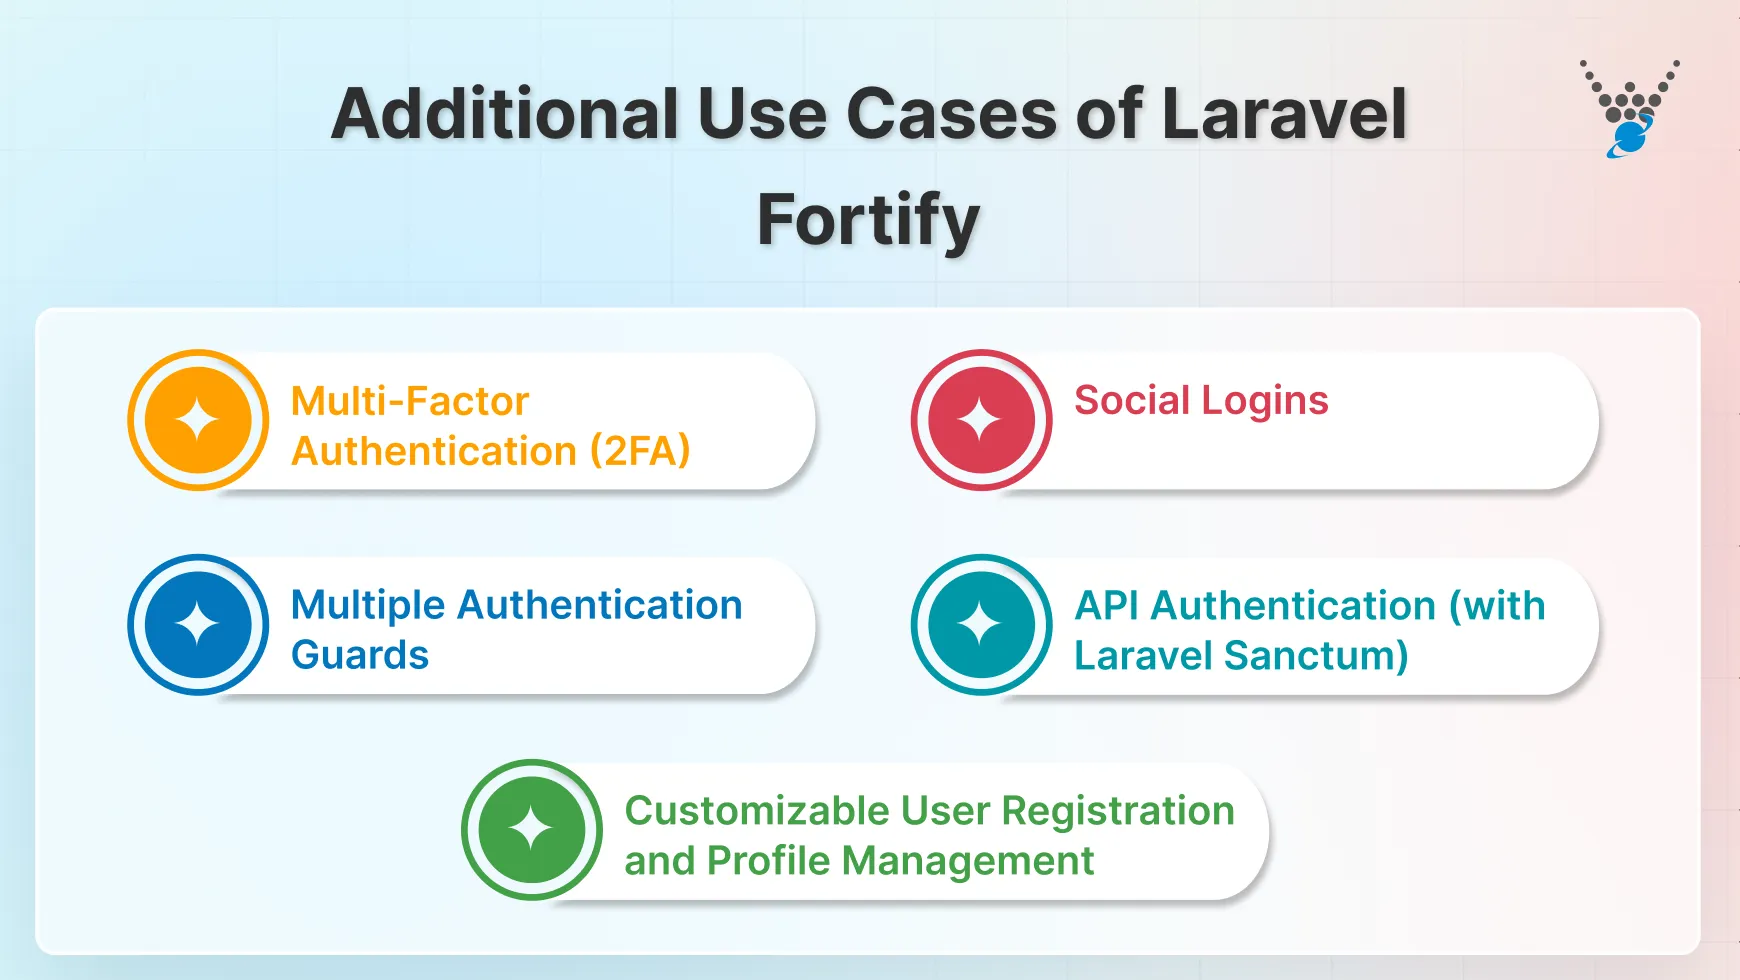
1. Multi-Factor Authentication (2FA)
While not built in, Fortify allows seamless integration with third-party 2FA packages like Laravel MFA or Google Authenticator. This enhances security by adding an extra layer of verification during the login process. You can master permissions, assign multi-role setups, and secure user hierarchies with advanced user management in Laravel.
2. Social Logins
Integrate social login providers like Facebook, Google, or Twitter using packages like Laravel Socialite. Fortify’s flexibility allows you to leverage these providers alongside traditional email/password authentication, offering users convenient login options.
3. Multiple Authentication Guards
Laravel supports multiple authentication guards. This enables you to create separate authentication systems for different user types within your application. For example, you could have a guard for regular users and another for administrators. Each with distinct login functionalities and authorization rules.
4. Customizable User Registration and Profile Management
Fortify provides a solid foundation for user registration. However, you can extend it further by adding custom registration fields, profile management functionalities, and validation rules as per your application’s specific needs.
5. API Authentication (with Laravel Sanctum)
While Fortify focuses on session-based authentication, it can work alongside Laravel Sanctum for API authentication. Sanctum offers token-based authentication, ideal for securing communication between your Laravel application and external APIs.
These additional use cases demonstrate the versatility of Laravel Fortify. By understanding these and exploring their potential for customization and integration with other packages, you can create a user friendly authentication system.
Conclusion
By now, you’ve gained a comprehensive understanding of Laravel Fortify and its potential to streamline user authentication in your Laravel applications. From core functionalities like registration and login to extensive customization options and integrations with other packages, Fortify offers a robust and flexible solution.
Whether you’re building a small-scale project or a large-scale application, Fortify’s modular design and focus on security make it a compelling choice. Its ease of integration with existing Laravel projects further enhances its value proposition.
Need help with implementing Laravel Fortify in your project? Let our experienced Laravel developers for hire help you with tailored solutions.
FAQs About Laravel Fortify
How is Fortify different from Laravel Breeze or Jetstream?
Fortify handles only backend authentication logic. Breeze includes basic Blade views, and Jetstream offers advanced features like teams and Livewire/Inertia.js integration.
Do I need to use Fortify with Laravel UI?
No, Fortify is a standalone package designed for modern Laravel apps. Laravel UI is an older alternative for Bootstrap/Vue scaffolding.
What’s the difference between Laravel Fortify and Laravel Jetstream for authentication?
Laravel Jetstream includes UI scaffolding, team features, and frontend options (Livewire/Inertia), while Laravel Fortify provides only backend authentication logic so you can build any custom frontend as needed.
Can I customize Fortify’s authentication logic?
Yes, Fortify allows customization through callbacks in the Fortify class (e.g., modifying login/registration behavior in AppServiceProvider).
How do I disable certain Fortify features?
Modify the config/fortify.php file and comment out unwanted features in the 'features' array (e.g., registration, password reset).
Can I use Laravel Fortify with API authentication methods like token-based login?
Laravel Sanctum is designed for API token authentication; you can use it alongside Fortify for projects needing both secure web login and API token access for SPAs or mobile backends.