
Quick Answer: WooCommerce adds products, checkout, and order management to WordPress. Set up payments, tax, and shipping before adding products and adjusting your storefront. Test checkout, emails, and refunds before making the store live.
If you already run a WordPress site, you’re one plugin away from selling online. That plugin is WooCommerce, and you can handle nearly all of the setup without coding expertise. So you can run an online store while leveraging all the perks of WordPress for eCommerce.
This WooCommerce tutorial shows you how to use WooCommerce in WordPress, from the first install to a live store you can manage day-to-day. Most eCommerce projects can follow it from start to finish on their own.
Bigger projects, like a custom checkout, an ERP integration, or a large catalog migration, are where a WooCommerce development company can do the heavy lifting without putting your live store at risk.
What Is WooCommerce and Why Choose It?
WooCommerce is a free, open-source plugin that turns WordPress into a store. WooThemes built it in 2011, and Automattic bought it in 2015. It adds a product catalog, cart, checkout, and order management, while WordPress keeps running your pages.
If you’re new to WordPress itself, our guide on how WordPress works covers the basics.
Here’s why store owners keep choosing WooCommerce:
- The plugin is free. You pay for hosting, a domain, and any premium extensions you add.
- Orders and customer data stay in your own database.
- WooCommerce takes no share of your sales, and the only transaction fee comes from your payment processor.
- Physical goods, downloads, and services work out of the box. Subscriptions and memberships need paid extensions.
- Official docs and a large community support offering WooCommerce tutorials for almost every problem you might face.
Interesting Read: Top 9 Benefits of Using WooCommerce for a Stronger Online Presence
There is a trade-off. Updates, backups, and security are now your responsibility. We’ve seen stores get hacked just because nobody updated a plugin for a few months, and our WordPress security guide explains how to avoid that.
Next, this WooCommerce tutorial covers how to set up WooCommerce, starting with your site’s requirements.
How to Install WooCommerce and Set Up Your Store?
This part of the WooCommerce tutorial covers how to use the WooCommerce plugin in WordPress step by step, and it’s where most of the real setup happens.
What Your WordPress Site Needs First
Since WooCommerce runs on WordPress, get the site ready first:
- Your hosting should meet the WordPress server requirements. That means PHP 8.3 or newer and HTTPS.
- You’ll need an SSL certificate for a secure checkout. If your host didn’t set one up, here’s how to add an SSL certificate to WordPress.
Installing the Plugin and Running the Setup Wizard
This part usually takes under two minutes. Search for WooCommerce under Plugins > Add New Plugin, and you’ll get a pile of add-ons with WooCommerce in their names.

Automattic publishes the one you actually want. Install it, then activate it. Some managed hosts hide that button entirely. If yours does, download WooCommerce from WordPress.org as a .zip and upload it instead.
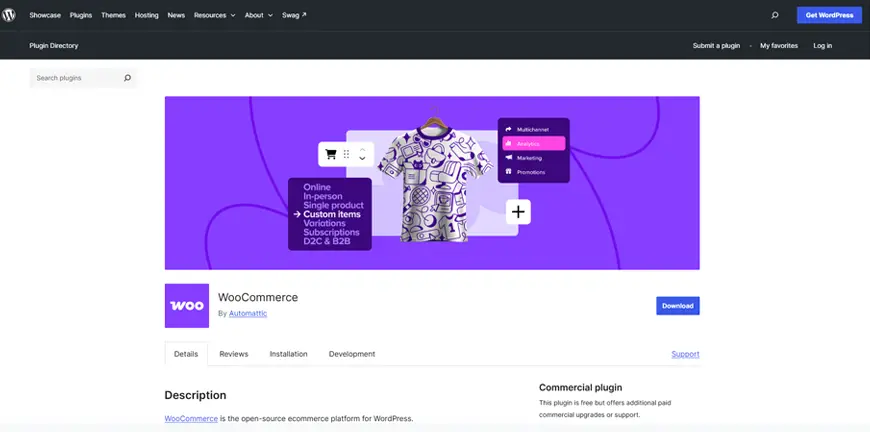
Activation also adds four pages to your site, named Shop, Cart, Checkout, and My Account. A setup wizard pops up right after with a few questions, and the only one worth slowing down for is location. It quietly sets your currency, and every tax and shipping rate leans on it later. The wizard also offers a few free extensions. We usually uncheck all of them, because every plugin adds code and you can install the useful ones later.

New stores start in Coming soon mode, which shows visitors a placeholder page. You’ll switch it to Live under WooCommerce > Settings > Site visibility.
Payment Gateway Setup
Hosted gateways send card numbers straight to the processor, which keeps most of your setup out of scope for the PCI Data Security Standard, the rulebook every business that accepts cards has to follow. That’s a big reason we steer US stores toward WooPayments, which you’ll find under WooCommerce > Settings > Payments.
The WooCommerce team builds it; it takes cards and wallet payments, and payout reports land right in your dashboard. Outside its supported countries, the built-in bank transfer, check, and cash on delivery options will do the job until another gateway is live.

Sales Tax Settings for US Stores
Tax is the setting new store owners most often get wrong, mostly because every state plays by its own rules. People also go hunting for a Tax tab that isn’t there yet. It only appears after you tick “Enable tax rates and calculations” on the General settings tab and save.
Inside it, two settings drive everything else: whether your prices already include tax and which address tax is based on. American shoppers expect tax at checkout, and that’s why most US stores leave it out of the sticker price. Rates go in by state or zip code, or from a CSV.
Once you ship to a second state, it gets messy fast. An hour with a tax professional before launch costs far less than refunding overcharged customers.
Shipping Zones, Methods, and Classes
Most shipping mix-ups we untangle start with zones. A zone is just a list of places that share one set of rates, and you build them in WooCommerce > Settings > Shipping. The catch is order. WooCommerce reads zones from the top and stops at the first match, and a nationwide zone placed above your Oregon zone will swallow every Oregon order.
Each zone needs a shipping method. A Portland coffee roaster could give its “Oregon” zone local pickup and a $6 flat rate, and a “Rest of US” zone a $9 rate with free shipping over $50. Bulky products can get a shipping class with a higher cost.

Why Product Permalinks Come Before Launch
We lock product URLs in early, a lesson many stores learn the hard way. After search engines index a product, changing its URL means a redirect, or shoppers land on a 404. Our usual choice in Settings > Permalinks is Post name with the default /product/ base. Category-based URLs work too, but then a product’s address changes every time it moves.
For most stores, that’s the whole WooCommerce store setup. Now that payments, tax, and shipping are ready, you can add your first product.
How to Add Products to Your WooCommerce Store?
If you’ve written a WordPress post, adding a product will feel familiar, with extra fields for price, stock, and shipping. We’ll use a men’s T-shirt as the example.
Creating the Listing: Name and Description
Big catalogs shouldn’t be typed in by hand. If you’re moving from another platform, export everything to a CSV and run it through the Import button on the Products list. With a few hundred items, that’s easily a day saved. For a single product, open Products > Add New Product.

For a single product, start with the name, and write it the way a shopper would type it into search. “Men’s Organic Cotton Crew Neck T-Shirt” gives search engine crawlers important context, while “Classic Tee” gives them almost nothing. The name also becomes the product’s URL. The big editor below it holds the long description, and for our T-shirt, that’s fabric, fit, sizing, and washing tips.
Adding the Product’s General Information
In the Product data box, pick the product type first, because the tabs change with it:
- Simple product: A single item with no options
- Variable product: One item in several sizes or colors
- Grouped product: Related products shown together on one page
- External/Affiliate product: Listed on your site but sold somewhere else

Check Virtual for services, which removes the shipping fields, or Downloadable for digital files.
Next come the tabs. General takes your regular price and a sale price if one is planned. Inventory is where the SKU goes, basically your own ID for the item, plus your stock count. Fill in weight and size under Shipping even for small items, because calculated rates can’t work without them.
Then scroll down to the short description. Most themes put it beside the price and Add to Cart button, making it the last thing people read before buying, and two or three lines on the main benefit is enough.
Adding Categories to Your WooCommerce Store
Most shoppers find things through your menus and filters, and both are built from categories. You can tick one in the Product categories box or add a new one on the spot, giving it a parent for subcategories like Men’s > T-Shirts. With hundreds of products, it’s easier to map out the whole tree first under Products > Categories. Tags are looser. Think “organic cotton,” a label that ties together items from different categories.
Photos, Preview, and Publishing
Photos make or break the shop grid. The problem we fix most often on new stores is a grid where every picture has a different shape. Crop them to one ratio before uploading, and the grid lines up by itself.

The main image goes in through Set product image, extra angles go in the gallery under it, and both need alt text. When Preview looks right, hit Publish. Products land on the Shop page, which you can reassign under WooCommerce > Settings > Products.

Setting Up a Variable Product
Now say the T-shirt comes in three colors and three sizes:
- Change the product type to Variable product.
- In Attributes, add Color with the values Red | Blue | Green, then add Size. Check “Used for variations” for both.
- In Variations, click Generate variations to get all nine combinations.
- Price each one, and add its own image or stock count if needed.
Don’t forget the prices. A variation without one stays hidden, and that’s often why a size seems to disappear after launch.
Once your products are live, most of your time goes into orders, coupons, and settings.
How to Manage Your WooCommerce Store?
Learning how to use WooCommerce day-to-day means getting comfortable with a handful of screens.
Orders
Orders land in WooCommerce > Orders. Be careful with the Completed status, because it fires off an email telling the buyer the order is done. We only switch to it once the parcel has left.

Coupons
Coupons were moved to Marketing > Coupons a while back, which throws off people following older guides.

Each coupon lets you set the discount and amount, an end date, a minimum spend, and how many times one customer can use it.

A 15% welcome code, one use per customer, is an easy first offer. Our WooCommerce marketing guide for store owners shows how coupons fit into a bigger plan.
Customers and Analytics
WooCommerce > Customers shows each buyer’s orders, spending, and location. Analytics tracks revenue, top products, and coupons over any date range.

In the Customers section of WooCommerce, you can view your previous customers’ information, which includes:
- Name
- Username
- Last Active
- Sign-up Date
- Email Address
- How Many Orders
- Total Money Spent
- Country/Region
It also lets you download this information into a PDF file.
Settings
We covered payments, tax, and shipping earlier in this WooCommerce tutorial. The tabs under WooCommerce > Settings handle the rest of the store:
- General: Your store address and currency go here, along with the countries you sell and ship to.
- Products: This is where you pick the Shop page and decide when low-stock alerts go out.
- Tax: It only appears after you turn taxes on, and it holds your rates and how tax shows on prices.
- Shipping: Zones, shipping methods, and classes for bulky items are all set up here.
- Payments: Turn gateways on or off and choose the order shoppers see them in at checkout.
- Accounts & Privacy: Decide whether people can check out as guests and how long you keep their data.
- Emails: Every order and account email lives here, from the wording to the sender name.
- Integration: WooCommerce connects its visitor geolocation service here, which helps work out location-based tax and shipping.
- Site visibility: One switch moves the store between Coming soon and Live.
- Advanced: You’ll assign your cart, checkout, and account pages here, and find webhooks plus the keys for the WooCommerce REST API, which lets your store connect with an ERP or a mobile app.
System Status Reports
When a store breaks, the fix usually starts with one plain-looking report. It lives at WooCommerce > Status and lists your software versions, every active plugin, and any template files that have gone stale. Support teams will ask for it anyway, and Get System Report copies the whole thing.

With the back end sorted, it’s time to work on how the store looks.
How to Customize Your WooCommerce Shop Page and Store Design?
The last part of this WooCommerce tutorial is about design. Classic and block themes use different editors, and that decides what you can change. For a layout built around your brand, web design services go further than any theme panel.
Picking a WooCommerce-Compatible Theme
Your theme sets the basic look of the shop, product, and checkout pages. A few popular ones:
- Astra, a lightweight theme
- SeedProd, a drag-and-drop theme builder
- Neve, a mobile-first theme
- OceanWP, a free all-purpose theme
Try any new theme on a WordPress staging site first, since a theme change can shuffle your product pages before you notice.
Customizer Options on Classic Themes
On a classic theme, the quick wins are all in one place. A holiday shipping banner, a different default sort order, tighter image cropping, fewer checkout fields. You’ll find every one of them under Appearance > Customize > WooCommerce. It won’t move the layout around, though. The next options handle that.
Relevant Read: https://wpwebinfotech.com/blog/best-woocommerce-themes/
Site Editor Templates on Block Themes
Block themes confuse plenty of first-time store owners, and it’s mostly down to one template. Your Shop page doesn’t really control itself. It runs on a template called Product Catalog, under Appearance > Editor > Templates > WooCommerce, and that template overrides whatever you change on the page. If your edits seem to vanish, that’s why.
Shortcodes for Product Grids
Shortcodes feel old-school, but they still earn their keep on classic themes. Paste [products limit=”12″ columns=”4″] into a page, and you get 12 products in a four-column grid. Change it to [products category=”hoodies”], and the page shows only hoodies. We use them constantly for seasonal sale pages.
Designing the Shop With a Page Builder
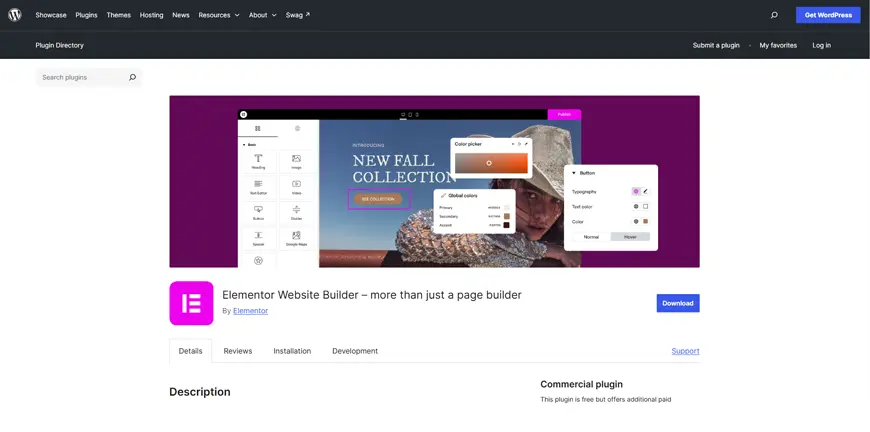
If the rest of your site is built with the Elementor website builder, its Pro version can design the shop too. In Templates > Theme Builder, create a Product Archive template and set it to display on the Shop page.
Plugins and Extensions
Every plugin loads more code, and we’ve watched stores with forty plugins crawl next to ones running ten. Still, if WooCommerce can’t do something out of the box, someone has probably built a plugin for it, Social Auto Poster being one. Add what you need, skip the rest, and use these tips to speed up a WooCommerce store if yours is already slowing down.
Relevant read: 30 Must-have WooCommerce Plugins for Your Store
Custom Code With Hooks and Child Themes
When no setting does the job, developers use hooks, which are spots in WooCommerce’s code where custom functions can run, or they copy template files into a WordPress child theme and edit them there. Never edit the plugin files directly, because the next update wipes out your changes.
For features that no plugin offers, a WooCommerce plugin development company can build a custom extension.
Once the design is done, there’s one last round of checks before launch.
Get Your WooCommerce Store Ready for Launch
Your customers shouldn’t be the ones to discover a broken checkout. Run these checks first, or hand them to QA testing services for large catalogs:
• Place a test order with each payment method in sandbox mode.
• Make sure order emails reach both you and the customer.
• Complete one order, then refund it.
• Check tax and shipping on a few real US addresses.
• Switch Site visibility to Live.
That wraps up this WooCommerce tutorial. How well your store holds up as orders grow depends on your hosting and on regular website maintenance services.
If you’d rather hand off the build or a migration, you can hire WooCommerce experts who showcase their expertise with these settings in everyday work.
FAQs on WooCommerce Stores
Is WooCommerce free?
Yes, WooCommerce itself is a free, open-source plugin. However, you may need to pay for web hosting, a domain name, premium themes and plugins, and payment processing fees.
Can I use WooCommerce without coding knowledge?
Yes, the setup wizard and plugins allow non-developers to run a store. However, advanced or custom features may require basic HTML/CSS, PHP, or hiring a developer.
Can I sell digital products with WooCommerce?
Absolutely. WooCommerce supports digital downloads, subscriptions, memberships, and even booking services with the right extensions.
Is WooCommerce SEO-friendly?
Yes, WooCommerce works well with SEO plugins like Yoast SEO or Rank Math, helping your products rank better in search engines.
Is WooCommerce secure?
WooCommerce follows WordPress security standards. For added safety, keep WordPress, WooCommerce, and your plugins updated, and use SSL, strong passwords, and a security plugin like Wordfence.
Table of Contents